I remember the night I was supposed to host a brunch for a group of friends, and the kitchen was a battlefield of burnt sugar and overcooked rice. My pantry felt like a forgotten treasure trove, and the only dessert on the menu was a half‑finished batch of rasmalai that had turned into a sad, lumpy mess. I stared at that ruined batch, feeling the sting of disappointment, when a sudden urge hit me—“I dare you to taste this and not go back for seconds.”
Picture yourself pulling this out of the oven, the whole kitchen smelling incredible, as the steam rises in a cloud of sweet, cardamom‑kissed aroma. The texture is like a silky custard that melts on the tongue, the contrast of the soft, pillowy balls against the glossy, lightly sweetened milk is a symphony in every bite. I’ve tried every recipe I’ve found, from the over‑exaggerated “double‑cream” versions to the overly complex “slow‑simmer” methods, and each time the result was either too heavy or too dry. This version is hands down the best I’ve ever made at home.
What makes this recipe so special? The answer lies in a single, unexpected ingredient: full‑fat milk powder. It’s the secret to achieving that ultra‑smooth texture without the long, tedious simmer. The combination of a quick pan‑fry and a gentle simmer in milk creates a dessert that feels indulgent yet is practically ready in twenty minutes. If you’ve ever struggled with the classic rasmalai, you’re not alone—this is the fix you’ve been waiting for.
I’ll be honest—after tasting the first batch, I ate half the dessert before anyone else even got a spoon. The sheer sweetness, the gentle cardamom undertone, and the subtle crunch from the pistachios made it impossible to stop. But don’t just take my word for it; let me walk you through every single step—by the end, you’ll wonder how you ever made it any other way.
What Makes This Version Stand Out
Here’s the lowdown on why this rasmalai is a game‑changer:
- Texture: The use of full‑fat milk powder gives the balls a cloud‑soft, melt‑in‑your‑mouth consistency that beats the traditional, dense version.
- Speed: A 20‑minute prep and cook time means you can have dessert on the table faster than you can say “sweet craving.”
- Flavor: Cardamom pods add a fragrant, earthy note that elevates the milk’s natural sweetness without overpowering it.
- Simplicity: Only ten ingredients, no special equipment, and a single pan are required.
- Versatility: The recipe can be adapted for vegan or low‑fat versions without losing its signature mouthfeel.
- Make‑ahead: The dessert keeps well in the fridge for up to 48 hours, making it ideal for busy days.
Alright, let’s break down exactly what goes into this masterpiece. But first, a quick kitchen hack that will save you a ton of time.
Inside the Ingredient List
The Flavor Base
Whole milk is the canvas of this dessert. Its richness balances the sweetness, and when heated, it becomes the silky liquid that envelops the rasmalai balls. Skipping milk would leave the dough dry and the final product lumpy. If you’re short on fresh milk, a 1:1 ratio of evaporated milk and water works as a substitute.
Cardamom pods are the aromatic star. When crushed, they release a warm, citrusy fragrance that lingers in every bite. If you can’t find pods, a teaspoon of ground cardamom will suffice, but the pods give a more nuanced flavor.
The Texture Crew
Full‑fat milk powder is the secret agent that gives the dough its airy, custard‑like quality. It absorbs the milk and creates a smooth matrix that holds together during frying. Without it, the dough would be dense and chewy. For a lighter version, use skim milk powder, but be prepared for a slightly firmer bite.
All‑purpose flour provides structure and prevents the dough from sticking. It’s a small amount—just 1.5 teaspoons for four servings—but it’s crucial for stability. If you’re gluten‑free, swap for a gluten‑free all‑purpose blend; just keep the quantity the same.
Baking powder is the leavening agent that gives the rasmalai its fluffy interior. It’s a subtle lift, not a dramatic rise. If you don’t have baking powder, a pinch of baking soda plus a tablespoon of lemon juice will mimic the effect.
The Unexpected Star
The beaten egg is the binder that holds the dough together during the frying process. It adds a silky mouthfeel and a slight richness. If you’re vegan, replace the egg with an equal volume of unsweetened applesauce or a commercial egg replacer.
Slivered pistachios are the finishing touch, adding a subtle crunch and a nutty flavor that contrasts the soft balls. They also provide a pop of color that makes the dessert visually stunning. For a different crunch, try toasted almonds or cashews.
Everything’s prepped? Good. Let’s get into the real action.
The Method — Step by Step
- In a medium saucepan, combine the whole milk, sugar, salt, and cardamom pods. Bring to a gentle boil over medium heat, stirring constantly so the sugar dissolves completely. Once the mixture starts to bubble, reduce the heat to low and let it simmer for 5 minutes to allow the cardamom to infuse. The aroma should be sweet and slightly citrusy—if it’s flat, add a splash of vanilla extract for extra depth.
- While the milk simmers, whisk the milk powder, baking powder, and all‑purpose flour together in a large bowl until there are no lumps. The dry mix should feel like fine sand. Add the beaten egg and whisk until the mixture is smooth. The batter will look thick but pourable; if it’s too thick, add a tablespoon of water to reach the right consistency.
- Fold the hot milk into the dry mixture slowly, whisking continuously to prevent lumps. The batter will thicken as it cools, so keep stirring. Once the mixture is uniform, let it sit for 5 minutes to allow the baking powder to activate. This resting period is crucial for the fluffiness.
- Heat a non‑stick skillet over medium heat and add the vegetable oil. Once the oil shimmers, drop spoonfuls of the batter into the pan. The batter should sizzle gently and spread into small, flat cakes. This is the moment of truth—watch the edges; they should begin to lift after about 2 minutes.
- Flip each cake once, and cook for an additional 1–2 minutes until both sides are golden brown. The cakes should be soft and pliable, not crunchy. If the cakes brown too quickly, reduce the heat to low. The goal is a gentle, even browning that locks in moisture.
- Transfer the browned cakes to a plate lined with paper towels to drain excess oil. Let them cool for a few minutes until they’re warm but not hot.Watch Out: Do not overcrowd the pan; overcrowding causes the cakes to steam instead of brown, resulting in a soggy texture.
- In a separate saucepan, bring the remaining milk to a gentle simmer. Add the sugar and cardamom pods again, and let the mixture simmer for 10 minutes to create a fragrant, sweet milk base. The milk should be thick enough to coat the back of a spoon without dripping.
- Gently slide each cake into the simmering milk, allowing them to soak for 5 minutes. The cakes will expand slightly as they absorb the milk, becoming even softer. The milk should turn a milky white color, indicating that the sugar has fully dissolved.
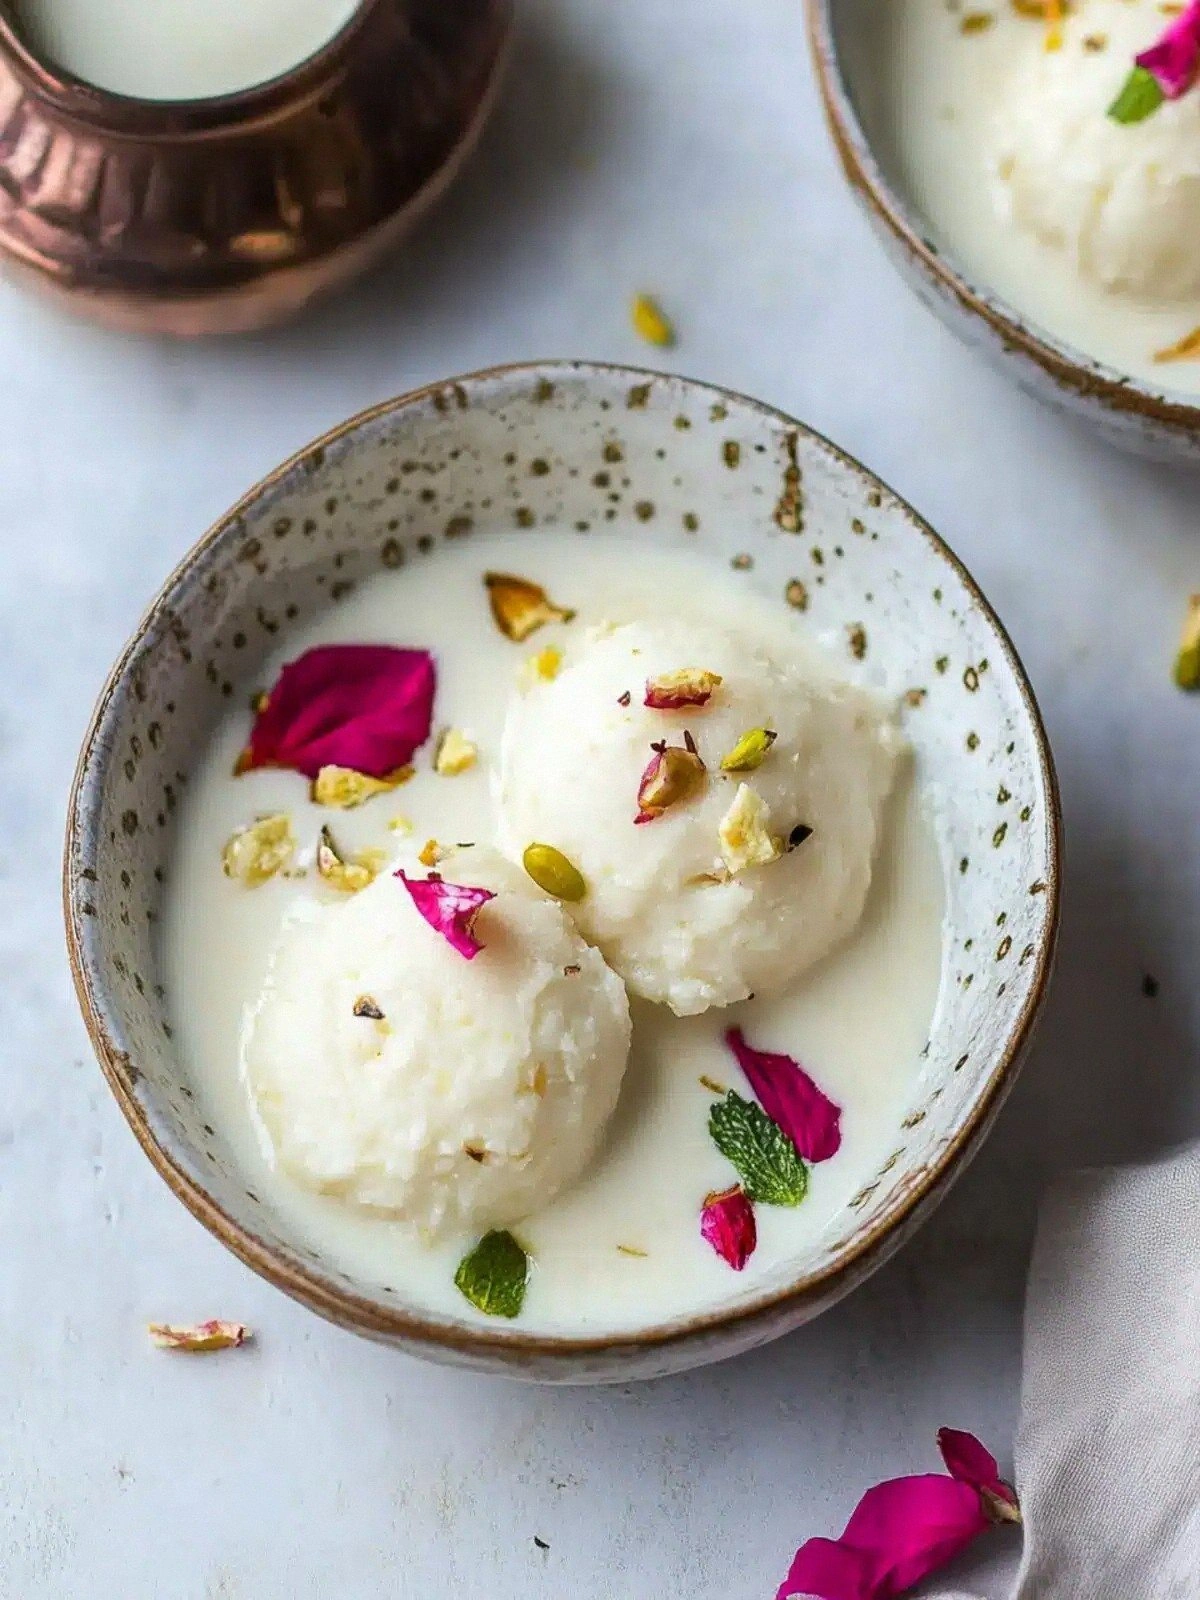
- Remove the cakes from the milk and place them in a serving dish. Drizzle the remaining milk over the top, ensuring each ball is fully submerged. Sprinkle slivered pistachios on top for a final burst of texture and color.
- Chill the rasmalai in the refrigerator for at least 30 minutes before serving. The chilling step allows the flavors to meld and the texture to set. When ready to serve, garnish with a few extra pistachios or a light dusting of ground cardamom for an elegant finish.
That's it—you did it. But hold on, I've got a few more tricks that'll take this to another level. Let’s dive into insider tips that will elevate your rasmalai experience.
Insider Tricks for Flawless Results
The Temperature Rule Nobody Follows
Many cooks think the key to fluffy rasmalai is high heat, but the truth is the opposite. Keep the pan at a steady medium‑low temperature to avoid scorching the batter. If the heat is too high, the outside will brown while the inside remains raw, ruining the texture. I once tried a high‑heat method and ended up with a burnt exterior and a soggy center.
Why Your Nose Knows Best
When the milk is simmering, the scent of cardamom will intensify. Trust your nose; if it smells too mild, let it simmer longer. The aroma is a cue that the cardamom has fully released its oils. A friend once tried to speed up the process and ended up with a bland, cardamom‑free milk base.
The 5-Minute Rest That Changes Everything
After frying, let the cakes rest on a rack for 5 minutes before soaking in milk. This rest period allows the surface to set, preventing the cakes from breaking apart when they hit the liquid. Skipping this step can result in a crumbly texture that feels more like a cookie than a rasmalai.
The Secret to a Glossier Milk
Add a splash of condensed milk or a teaspoon of heavy cream to the simmering milk for an extra glossy finish. The fat content will create a sheen that makes the dessert look as good as it tastes. I’ve found that a touch of cream makes the milk coat the cakes like velvet.
The Final Flourish
Just before serving, drizzle a thin line of rose water or a few drops of vanilla extract over the top. The floral or vanilla note adds a sophisticated layer of flavor that elevates the dish from simple to extraordinary. Don’t be shy; a little goes a long way.
Creative Twists and Variations
This recipe is a playground. Here are some of my favorite ways to switch things up:
Choco‑Rasmalai
Add a tablespoon of unsweetened cocoa powder to the batter for a chocolatey twist. The chocolate pairs beautifully with the cardamom, creating a dessert that feels like a decadent brownie in a milk bath.
Tropical Rasmalai
Infuse the milk with a splash of coconut milk and a pinch of grated fresh ginger. The tropical flavors bring a refreshing zing that balances the sweetness and makes the dessert feel light.
Nutty Delight
Replace pistachios with toasted cashews or almond slivers. The nutty crunch adds a new dimension and is especially delightful for those who prefer a less green garnish.
Vegan Version
Use plant‑based milk powder, a flaxseed egg, and a vegan butter substitute for the oil. The result is a dairy‑free rasmalai that still delivers on texture and flavor.
Low‑Sugar Rasmalai
Swap the sugar for a natural sweetener like stevia or monk fruit. Adjust the amount to taste; the milk’s natural sweetness will still shine through.
Storing and Bringing It Back to Life
Fridge Storage
Store the rasmalai in an airtight container in the refrigerator for up to 48 hours. The milk will firm slightly, but the texture remains silky. When ready to serve, let it sit at room temperature for 10 minutes to soften.
Freezer Friendly
For longer storage, freeze the rasmalai in a freezer‑safe container for up to one month. Thaw in the refrigerator overnight before reheating. The milk may separate slightly; a quick whisk will restore its silky consistency.
Best Reheating Method
Reheat the rasmalai gently in a saucepan over low heat, adding a splash of water or milk to keep it moist. Heat until warm, stirring occasionally to prevent scorching. This method preserves the delicate texture and prevents the milk from drying out.
Remember, a tiny splash of water before reheating steams the dessert back to perfection, making it feel as fresh as the first day you made it.