Picture this: a Saturday night, the kitchen lights dimmed, and the only thing you can hear is the sizzling of bacon in a hot pan. I was halfway through a bland takeout dinner when a stray maple syrup bottle fell to the floor, splattering across the counter. The sticky mess sparked an idea—what if I could turn that accidental drizzle into a sweet, savory masterpiece? I grabbed a handful of King’s Hawaiian rolls, a few strips of chicken, and a block of Gouda, and the kitchen transformed into my personal flavor laboratory.
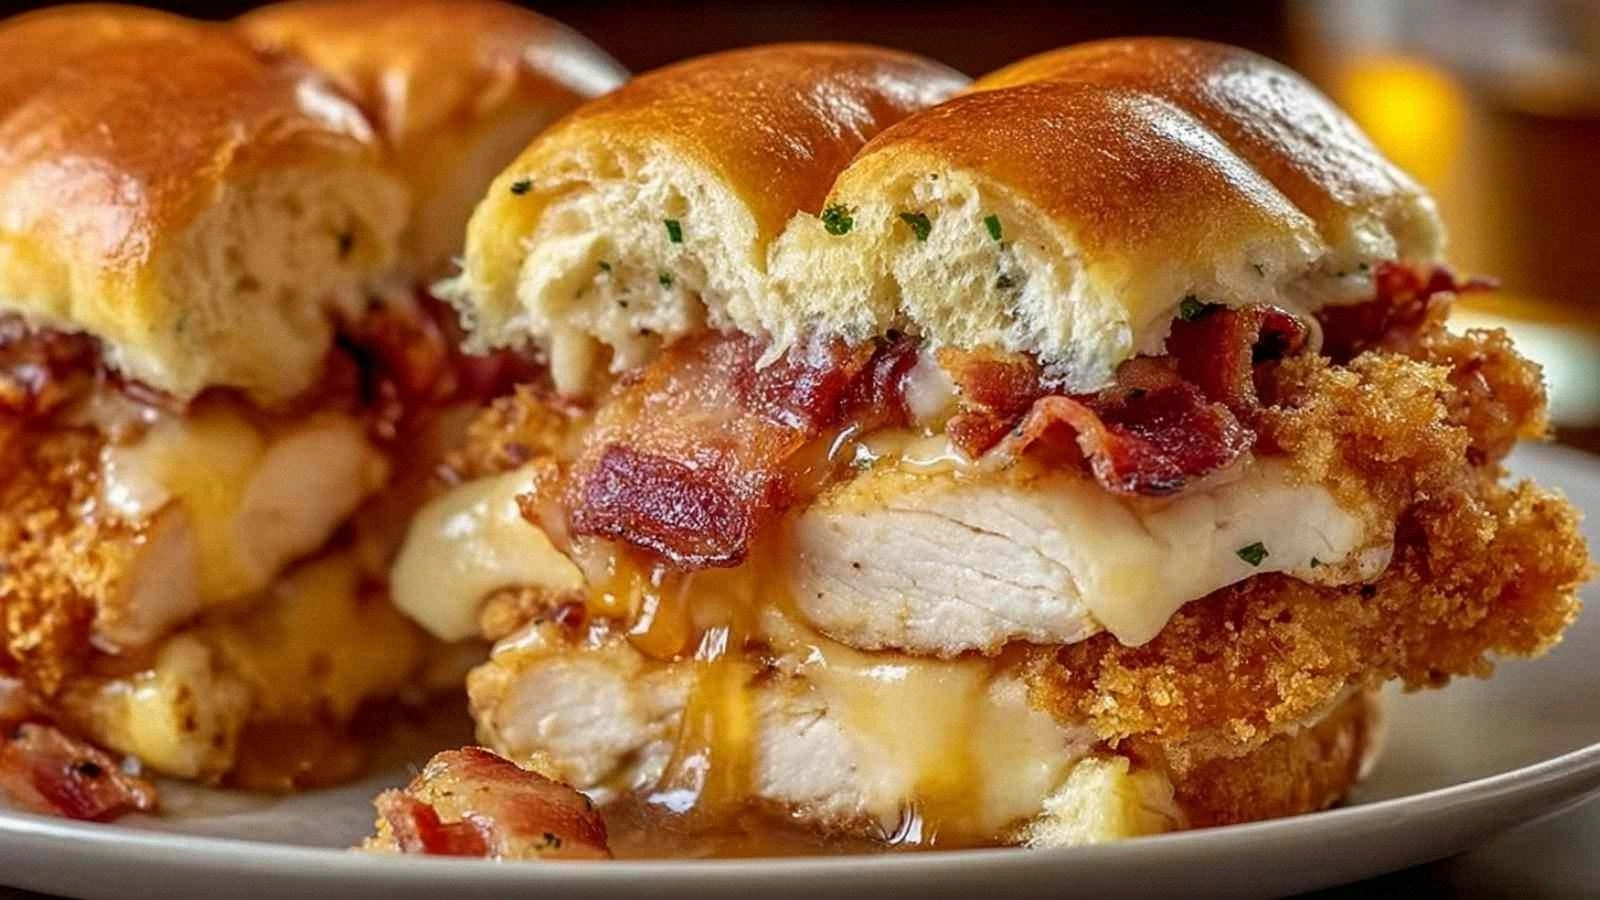
The first bite was an explosion of textures: the soft, slightly sweet roll, the crisp bacon edges that crackled like thin ice, and the molten cheese that oozed like a velvety river. The maple butter, warmed just enough to coat the chicken without burning, added a caramelized sweetness that danced on the palate. It was the kind of moment where you pause, inhale deeply, and realize you’re experiencing a culinary revelation. I dared myself to taste this and not go back for seconds—though, truthfully, I ate half the batch before anyone else got a chance.
What made this version stand out wasn’t just the ingredients; it was the way each element interacted. The rolls were toasted to a golden crisp, giving a satisfying crunch that held the fillings together. The chicken was seasoned with a subtle spice blend that balanced the maple's sweetness, while the Gouda added a creamy richness that cut through the saltiness of bacon. The maple butter, divided into two portions—one for coating the chicken, one for glazing the top—created layers of flavor that were both bold and harmonious.
Most recipes get this completely wrong by using plain butter or skipping the maple glaze altogether, resulting in a flat, bland slider. Here, the maple butter’s silky texture coats the chicken like velvet, and the glaze caramelizes just enough to form a glossy, caramelized crust. The result? A bite that’s both indulgent and balanced, with each component enhancing the others. Picture yourself pulling these sliders out of the oven, the whole kitchen smelling incredible, and the first bite delivering a sweet‑savory symphony that makes you wonder how you ever made it any other way.
What Makes This Version Stand Out
- Flavor Fusion: The maple butter introduces a sweet depth that contrasts beautifully with the savory bacon and chicken, turning a simple slider into a gourmet experience.
- Texture Contrast: The rolls’ airy interior meets the crispy bacon edges and gooey Gouda, creating a mouthfeel that keeps every bite exciting.
- Ease of Prep: All components are pre‑cooked or ready to assemble, so you can have a showstopper ready in under 30 minutes.
- Make‑Ahead Friendly: Assemble the sliders, refrigerate, and pop them in the oven just before serving—ideal for parties or busy weeknights.
- Crowd Appeal: Even the pickiest eaters will be drawn in by the sweet glaze and melt-in-your-mouth cheese.
- Ingredient Quality: Using King’s Hawaiian rolls gives a subtle sweetness that elevates the entire dish, while fresh Gouda offers a richer melt than processed cheddar.
- Visual Impact: The glossy maple glaze makes the sliders look irresistible, turning a simple snack into a centerpiece.
- Scalable: The recipe scales beautifully—just multiply the ingredients by the number of servings, and you’ll never run out of sliders.
Inside the Ingredient List
The Flavor Base
King’s Hawaiian rolls are the sweet heart of the slider. Their slightly caramelized exterior pairs perfectly with the maple butter, creating a subtle sweetness that isn’t overpowering. If you skip the rolls, the sliders lose that essential lift; the bread becomes a flat, unremarkable base. For a different twist, try brioche or pretzel rolls to add a richer doughy texture.
The Texture Crew
Crispy bacon provides a satisfying crunch that breaks each bite with a savory snap. The chicken breast strips, when cooked to a perfect medium, offer a juicy interior that contrasts with the bacon’s crispness. If you’re short on bacon, smoked turkey or pancetta can substitute, but the flavor profile will shift slightly toward a more savory note.
The Unexpected Star
Maple butter, a luxurious blend of pure maple syrup and clarified butter, is the secret weapon. It coats the chicken with a silky glaze that caramelizes in the oven, creating a glossy sheen. Without it, the sliders would lack that silky, sweet finish that elevates the dish. A quick homemade version mixes equal parts maple syrup and butter, then reduces until thick.
The Final Flourish
Gouda cheese, with its buttery richness and mild sharpness, melts into a gooey center that ties the flavors together. The cheese’s smooth melt ensures every bite is creamy, while its slight nuttiness balances the maple’s sweetness. If Gouda isn’t available, try Gruyère or a blend of cheddar and mozzarella for a different melt.
Everything’s prepped? Good. Let’s get into the real action and start building the sliders that will have everyone begging for the recipe.
The Method — Step by Step
- Prep the Rolls: Slice each King’s Hawaiian roll in half horizontally. Brush the cut sides lightly with melted maple butter, then toast them on a preheated skillet over medium heat until golden brown. The rolls should smell toasty and have a slight caramelized crust. This step locks in moisture and adds a sweet, buttery layer that complements the filling.
- Warm the Chicken: In a small saucepan, melt 1 tablespoon of maple butter over low heat. Add the cooked chicken strips and stir until each piece is coated and heated through. The chicken should be fragrant, with a subtle maple glaze that coats each strip like a fine, sweet sauce.
- Cook the Bacon: In a separate pan, crisp the bacon until it reaches your desired level of crunch. Once done, drain on paper towels and let it cool slightly before slicing into smaller pieces that fit the slider size. The bacon’s crisp edges should crackle when pressed.
- Layer the Fillings: On the bottom half of each toasted roll, spread a thin layer of the remaining maple butter. Place 2–3 chicken strips on top, then scatter 1–2 slices of Gouda cheese. Add a handful of bacon pieces, and finish with a drizzle of maple butter. The cheese should begin to melt slightly from the heat of the chicken.
- Top It Off: Cover each slider with the top half of the roll, pressing gently to seal the edges. The sandwich should look like a mini, golden, glazed burger. The maple glaze should form a glossy sheen over the top.
- Bake to Perfection: Preheat your oven to 375°F (190°C). Place the sliders on a parchment-lined baking sheet and bake for 8–10 minutes, or until the cheese has melted and the edges of the rolls are crisp. The aroma will fill the kitchen, creating an irresistible scent that signals the sliders are ready.
- Rest and Serve: Remove from the oven and let the sliders rest for 2 minutes. This brief rest allows the cheese to set slightly, preventing a gooey mess when you bite. Serve immediately with a side of tangy pickles or a light green salad.
- Optional Finish: For an extra caramelized top, brush a thin layer of maple butter over the finished sliders and pop them back in the oven for 1–2 minutes. Watch the glaze bubble and set into a shiny crust that will make each bite even more indulgent.
That’s it— you did it. But hold on, I’ve got a few more tricks that will take this to another level and make every bite a showstopper.
Insider Tricks for Flawless Results
The Temperature Rule Nobody Follows
Many people bake sliders at a high temperature, hoping for a quick crisp. However, a moderate 375°F (190°C) allows the cheese to melt evenly without burning the maple glaze. I’ve baked at 350°F once, and the result was a slightly soggy interior that didn’t caramelize properly. Keep the heat steady, and you’ll achieve that perfect glossy finish.
Why Your Nose Knows Best
Trust the scent of the maple butter melting. When it starts to bubble and emit a sweet, buttery aroma, that’s the cue to move to the next step. A quick nose check can save you from overcooking or undercooking the sliders, ensuring each bite is flavorful and not dry.
The 5-Minute Rest That Changes Everything
After baking, let the sliders rest for exactly five minutes. This short pause allows the cheese to set just enough to stay in place when you bite, while the maple glaze thickens into a luscious glaze. Skipping the rest often results in a cheese spill that can ruin the presentation.
Keep the Bacon Crispy
If you’re using pre‑cooked bacon, reheat it in a microwave for a few seconds or in a skillet just enough to crisp it up again. A crisp bacon layer adds a delightful crunch that contrasts with the soft roll and gooey cheese. A soggy bacon bite can make the slider feel heavy and less enjoyable.
Make-Ahead Magic
Assemble the sliders and refrigerate them, covered, for up to 24 hours. When you’re ready to serve, pop them in the oven for 10 minutes. The flavors will meld even more, creating a depth that’s hard to achieve fresh. This trick is perfect for hosting a dinner party with minimal last‑minute prep.
Creative Twists and Variations
This recipe is a playground. Here are some of my favorite ways to switch things up:
Spicy Maple Kick
Add a dash of cayenne pepper to the maple butter, or drizzle a small amount of sriracha over the chicken before baking. The heat balances the sweetness and adds an exciting contrast that adults will love.
Mediterranean Flair
Swap Gouda for feta and sprinkle chopped kalamata olives on top of the chicken. The briny feta pairs beautifully with the maple glaze, creating a Mediterranean‑inspired slider that’s both fresh and indulgent.
Veggie‑Friendly Version
Replace the chicken with grilled portobello mushroom caps. Their meaty texture and earthy flavor complement the maple butter, making a vegetarian slider that still feels decadent.
Cheese Lover’s Dream
Layer multiple cheese types—Gouda, smoked cheddar, and a hint of blue cheese—between the chicken and bacon. The melting cheeses create a gooey, flavorful explosion that will have your guests reaching for more.
Sweet & Savory Breakfast Slider
Swap the chicken for a fried egg and sprinkle a pinch of sea salt on top. The yolk’s richness pairs with the maple glaze for a breakfast‑style slider that’s perfect for brunch.
Gluten‑Free Twist
Use gluten‑free King’s Hawaiian rolls or a gluten‑free bun brand. The flavor remains the same, ensuring that those with dietary restrictions can still indulge in the sweet‑savory experience.
Storing and Bringing It Back to Life
Fridge Storage
Store assembled sliders in an airtight container in the refrigerator for up to 2 days. Keep the top halves separate to prevent the rolls from becoming soggy. When ready to serve, reheat in a preheated oven at 350°F for 5–7 minutes.
Freezer Friendly
Wrap each slider tightly in foil and place them in a freezer bag. They can be frozen for up to 2 weeks. Thaw overnight in the refrigerator, then bake at 375°F for 10 minutes to restore crispness.
Best Reheating Method
To preserve the buttery glaze and melt the cheese, reheat the sliders in a 350°F oven for 5–7 minutes. Adding a tiny splash of water to the baking sheet creates steam that keeps the rolls moist and prevents them from drying out.