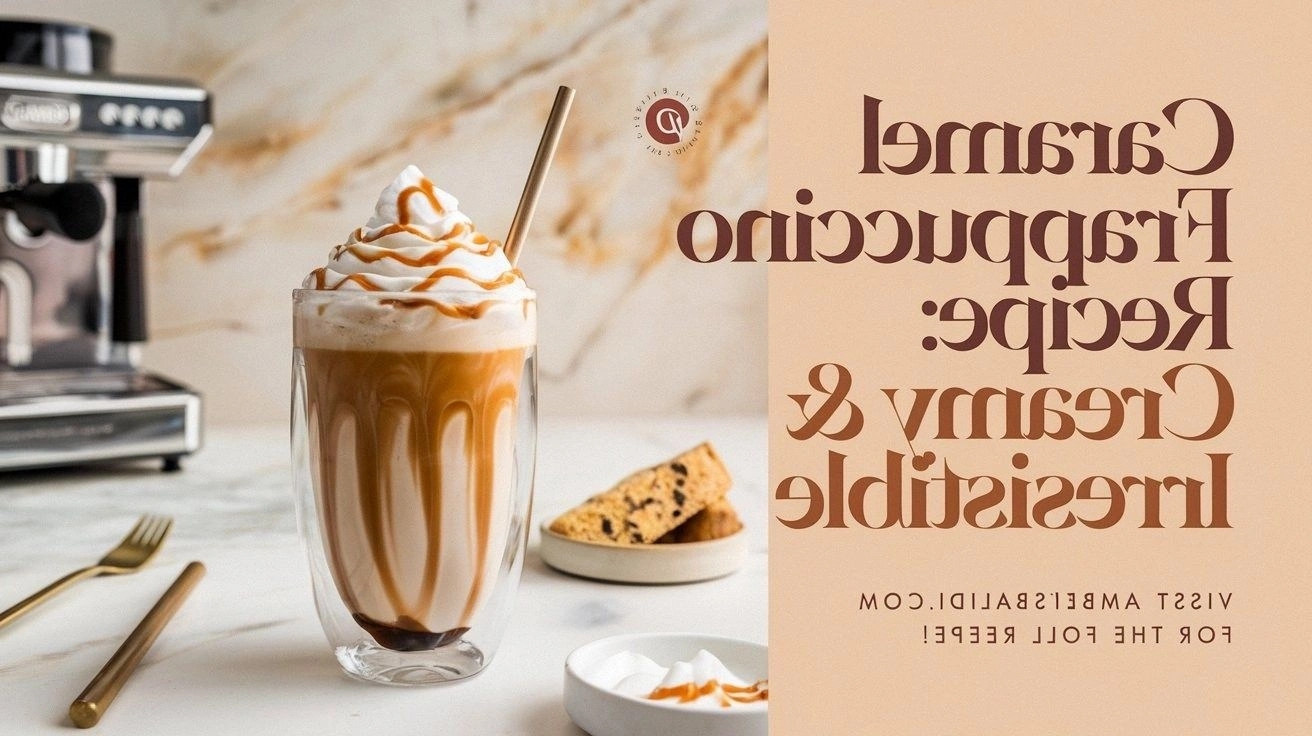
Picture this: the kitchen is a battlefield, flour flying like confetti, and you’re standing in the middle of a chocolate catastrophe. The box of store‑bought chocolate cake that should have been a simple treat turns into a sticky, ruined mess because you forgot to chill the batter. That moment of panic is the spark that pushed me to reinvent the classic Black Forest trifle, turning a disaster into a dazzling dessert that feels like a holiday miracle. I’m not just sharing a recipe; I’m offering a redemption story that will make your taste buds sing. By the end of this post, you’ll wonder how you ever survived without this version.
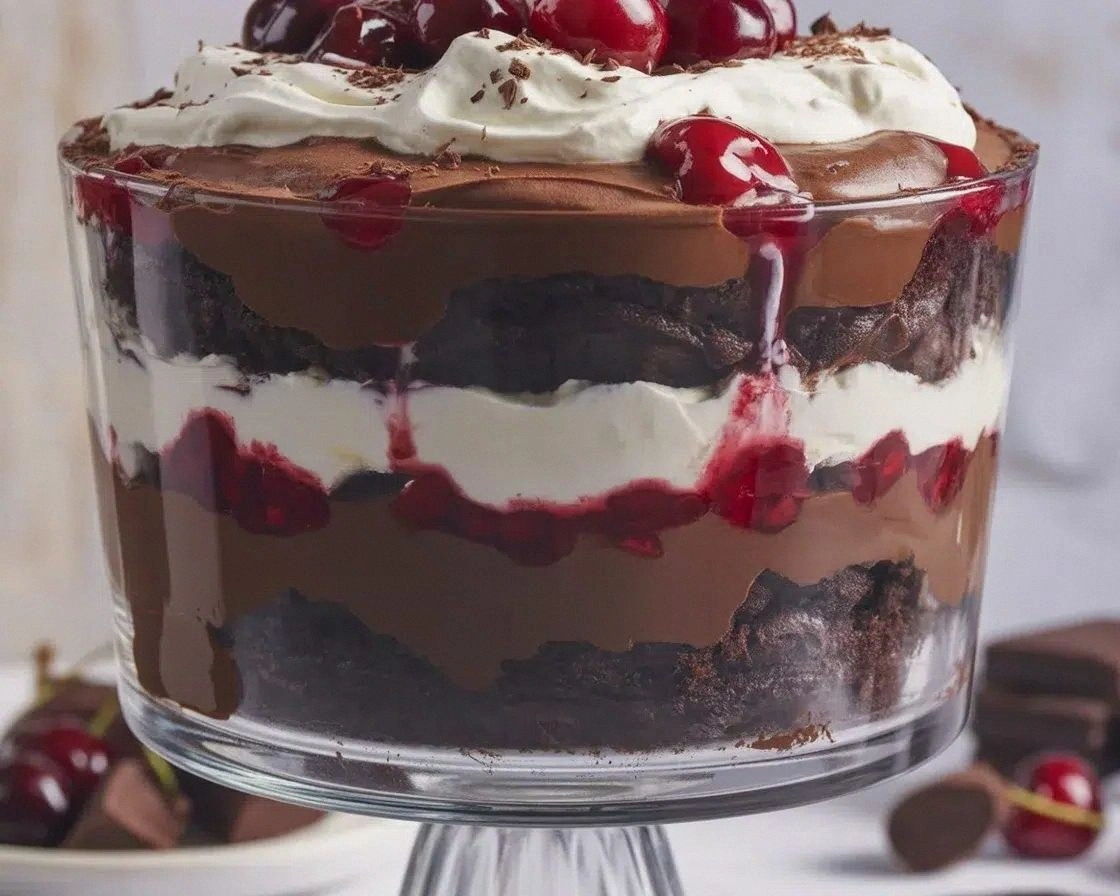
Let me paint the scene for you: the air smells of rich cocoa and ripe cherries, the sound of a whisk beating like a drum, and the sight of silky whipped cream cascading into a glass. The texture is a harmonious dance between the crumbly cake layers, the glossy cherry filling, and the delicate chocolate shavings that crackle when you bite. The first bite melts on your tongue, releasing a burst of tartness that balances the sweetness, while the kirsch adds a subtle, almost smoky finish. Every spoonful feels like a secret winter party, and the anticipation of the next layer keeps you hooked. If you’ve ever struggled with a trifle that fell flat, this is the fix you’ve been waiting for.
What makes this trifle unforgettable? First, the cake is pre‑cut into cubes that soak up the cherry filling without becoming soggy, a trick that most recipes overlook. Second, the whipped cream is infused with kirsch, giving it a depth that feels like a fine dessert wine. Third, the dark chocolate shavings add a textural contrast that snaps like a delicate candy. Fourth, the cherries are toasted lightly to release their juice, creating a glossy glaze that coats the layers. Fifth, the assembly is done in a clear glass bowl, so the colors dance like a festive waterfall. Finally, the trifle is chill‑ready in under 30 minutes, making it perfect for last‑minute holiday gatherings.
Now, here’s the twist you didn’t see coming: the cherry filling is not just poured in; it’s gently heated with a splash of kirsch to create a glossy, caramelized glaze that coats the cake cubes. That subtle caramelization gives the trifle a luxurious mouthfeel that feels like a decadent chocolate mousse. I dare you to taste this and not go back for seconds. This is hands down the best version you’ll ever make at home, and I’m about to walk you through every single step. By the time you finish reading, you’ll be ready to create a trifle that’s the talk of the table.
Before we dive in, let’s break down exactly what goes into this masterpiece: you’ll need a store‑bought chocolate cake, a can of cherry pie filling, heavy whipping cream, kirsch, dark chocolate shavings, and fresh cherries. The cake provides the chewy, chocolatey backbone; the cherry filling offers sweet‑tart contrast; the whipped cream delivers airy texture; the kirsch infuses a subtle depth; the chocolate shavings add crunch; and the cherries give a burst of freshness. Each component is essential, but the magic happens when they’re layered just right. I’ll also share a few kitchen hacks to save time and avoid common pitfalls. Let’s get started!
What Makes This Version Stand Out
- Texture: The cake cubes are lightly toasted, preventing them from becoming mushy when they soak in the cherry glaze.
- Flavor: Kirsch is blended into the whipped cream, creating a subtle, aromatic finish that pairs beautifully with the cherries.
- Visual Appeal: The layers are arranged in a clear glass bowl, showcasing the vibrant red of the cherries against the dark chocolate.
- Ease: No baking required; the trifle comes together in under 30 minutes, making it ideal for last‑minute holiday dessert.
- Versatility: You can swap the cherry filling for raspberry or blueberry, and the kirsch for a splash of liqueur or vanilla extract.
- Make‑Ahead Friendly: The trifle can be assembled and refrigerated for up to 48 hours, allowing you to focus on other holiday tasks.
- Kid‑Friendly: The chocolate and cherry flavors are a guaranteed hit with children and adults alike.
- Presentation: A sprinkle of dark chocolate shavings on top adds a sophisticated finish that feels like a gourmet dessert.
Alright, let’s break down exactly what goes into this masterpiece…
Inside the Ingredient List
The Flavor Base
The chocolate cake is the backbone of this trifle. It offers a rich, velvety base that absorbs the cherry glaze without losing its structure. If you skip the cake, you lose the classic Black Forest texture and depth. A homemade cake would work too, but the store‑bought version saves time and guarantees consistency.
The cherry pie filling brings tartness and sweetness in perfect harmony. It’s the liquid component that coats the cake cubes, creating a glossy, caramelized glaze when heated with kirsch. Skipping this would leave the trifle bland; the cherries alone can’t provide enough moisture. For a lighter option, use fresh cherries and a splash of lemon juice instead.
The Texture Crew
Heavy whipping cream is whipped to soft peaks and then folded with kirsch. This mixture gives the trifle a light, airy feel that balances the dense cake. If you’re lactose intolerant, replace it with coconut cream for a dairy‑free version. The cream’s fat content also helps carry the kirsch flavor throughout.
Kirsch is a clear cherry brandy that adds depth and a subtle fruitiness. It’s essential for that authentic Black Forest aroma. If you don’t have kirsch, a splash of cherry liqueur or even a bit of vanilla extract will work, though the flavor profile will shift slightly.
The Unexpected Star
Dark chocolate shavings provide a crunchy, bittersweet contrast to the sweet cherries. They’re sprinkled on top and occasionally tucked between layers for a textural pop. If you can’t find shavings, finely grated dark chocolate or chocolate curls will do the trick.
Fresh cherries add a burst of juicy sweetness and a pop of color. They’re toasted lightly to release their juice, creating a glossy glaze that coats the cake cubes. If fresh cherries are out of season, frozen cherries can be used; just thaw them before use.
The Final Flourish
Optional garnishes like fresh mint leaves or a dusting of powdered sugar can elevate the presentation. They also add a subtle herbal or sweet note that complements the chocolate and cherries. If you prefer a more dramatic look, drizzle a thin line of chocolate ganache around the rim of the glass bowl.
Choosing the right cake is key; look for a cake with a high cocoa content and a slight moisture level. A cake that’s too dry will absorb the cherry glaze too quickly, while a cake that’s too moist will become soggy. Store‑bought cakes from a reputable brand usually hit the sweet spot, but if you’re adventurous, you can bake a chocolate cake from scratch and let it cool completely before slicing.
Everything’s prepped? Good. Let’s get into the real action…
The Method — Step by Step
- Step 1: Prepare the Cake – Slice the chocolate cake into 1-inch cubes using a serrated knife. Arrange the cubes on a parchment‑lined tray and let them rest for 10 minutes so they firm up slightly. This prevents the cubes from dissolving when you add the cherry glaze. The cubes should look like little chocolate bricks, ready to soak.
- Step 2: Warm the Cherry Filling – Pour the cherry pie filling into a small saucepan and heat over medium heat. Add a splash of kirsch and stir until the mixture is glossy and slightly thickened. The heat caramelizes the sugars, turning the filling into a luscious glaze. Keep an eye on it; once it starts to bubble, reduce the heat.
- Step 3: Coat the Cake – Toss the cake cubes gently in the warm cherry glaze, ensuring each cube is evenly coated. Let the cubes sit for 5 minutes so they absorb the glaze but don’t become mushy. If you’re short on time, a quick stir and a minute of rest will do. This step is where the magic begins.
- Step 4: Whip the Cream – In a mixing bowl, whip the heavy cream to soft peaks. Fold in 2 tablespoons of kirsch, mixing until the flavor is evenly distributed. The whipped cream should be light and airy, providing a creamy contrast to the dense cake cubes. Taste it; it should have a subtle cherry aroma.
- Step 5: Layer the Trifle – Begin by spooning a thin layer of whipped cream into the bottom of the glass bowl. Add a layer of glazed cake cubes, then a drizzle of cherry glaze. Repeat these layers until the bowl is nearly full, finishing with a layer of whipped cream. The final layer should be smooth and glossy.
- Step 6: Add Fresh Cherries – Toast the fresh cherries lightly in a dry skillet over medium heat for 2 minutes, turning them until they release a bit of juice. Sprinkle them over the top layer of whipped cream. The toasted cherries add a burst of flavor and a subtle caramelized note.
- Step 7: Finish with Chocolate Shavings – Sprinkle a generous amount of dark chocolate shavings over the top layer of whipped cream. The shavings should be scattered like confetti, adding both color and texture. Let the trifle sit for 10 minutes to allow the chocolate to soften slightly.
- Step 8: Chill and Serve – Cover the bowl with plastic wrap and refrigerate for at least 30 minutes before serving. The chilling step allows the flavors to meld and the layers to set. When you’re ready to serve, give it a quick stir to redistribute any settled glaze. Enjoy the glossy, chocolate‑cherry symphony.
That's it — you did it. But hold on, I've got a few more tricks that'll take this to another level…
Insider Tricks for Flawless Results
The Temperature Rule Nobody Follows
Keep the whipped cream cold until the last moment; a warm bowl will cause it to deflate. If you’re in a warm kitchen, chill the mixing bowl in the fridge for 10 minutes before whipping. This trick keeps the peaks firm and gives the trifle a light, airy texture that’s essential for a professional finish. I’ve seen people skip this step and end up with a flat, lifeless dessert.
Why Your Nose Knows Best
Smell the cherry glaze as it heats; it should develop a sweet, caramelized aroma. If it still smells raw, give it a few more minutes. The scent is the best indicator of proper caramelization. A properly heated glaze will cling to the cake cubes and coat them beautifully.
The 5-Minute Rest That Changes Everything
After adding the whipped cream layers, let the trifle rest for 5 minutes before adding the cherries. This brief pause allows the whipped cream to settle and absorb the cherry juices, creating a harmonious flavor profile. Skipping this rest can result in uneven distribution of the glaze.
Avoiding the Soggy Cake Dilemma
Use a gentle coat of glaze rather than soaking the cake cubes. The glaze should be thin enough to coat the surface but not so thick that the cubes become waterlogged. If you’ve ever tried a trifle with soggy cake, you know how disappointing it can be. This simple adjustment guarantees a firm, satisfying bite.
The Secret of a Glazed Finish
Finish the top with a thin glaze by brushing a small amount of cherry glaze over the whipped cream. This creates a glossy, eye‑catching finish that enhances the presentation. It also adds a subtle sweetness that ties all the layers together. A quick glaze is all it takes to elevate the trifle from good to unforgettable.
The Final Flourish
Use a microplane to grate dark chocolate just before serving. The fresh chocolate shavings have a more vibrant flavor and a better texture than pre‑shaved chocolate. This step adds a touch of sophistication that will impress your guests. Trust me, the difference is noticeable.
Creative Twists and Variations
Raspberry Rhapsody
Swap the cherry filling for raspberry pie filling to create a tangy, berry‑rich version. Use fresh raspberries for a burst of color and flavor. The raspberry’s natural tartness complements the chocolate base, while the kirsch adds a subtle depth. This variation is perfect for spring or summer celebrations.
Nutty Nirvana
Add chopped walnuts or pecans between layers for a crunchy, nutty twist. The nuts provide a satisfying bite and pair wonderfully with the chocolate and cherries. Toast the nuts lightly before adding to enhance their flavor. This version is a hit at holiday parties where you want a little extra texture.
Almond Bliss
Replace the heavy cream with almond milk whipped with a touch of vanilla for a dairy‑free, nutty flavor profile. The almond milk will give the trifle a subtle nutty undertone that complements the cherries. Use a non‑fat almond milk for a lighter texture. This variation is ideal for guests with dairy sensitivities.
Minty Marvel
Introduce fresh mint leaves into the whipped cream for a refreshing contrast. The mint’s cooling effect balances the richness of the chocolate. Sprinkle a few mint leaves on top as a garnish for an elegant look. This version is especially refreshing during warm weather.
Chocolate Ganache Glaze
Drizzle a thin layer of chocolate ganache around the rim of the glass bowl for a luxurious finish. The ganache adds a silky, chocolatey richness that coats the edges of the trifle. Use dark chocolate for a slightly bitter note or milk chocolate for a sweeter touch. This twist elevates the trifle’s visual appeal.
Citrus Zest
Add a splash of orange or lemon zest to the cherry glaze for a bright, citrusy lift. The zest’s bright aroma cuts through the richness of the chocolate, creating a balanced flavor. Sprinkle a pinch over the top before serving for a subtle garnish. This variation adds a refreshing twist that’s perfect for brunch.
Storing and Bringing It Back to Life
Fridge Storage
Store the trifle in an airtight container in the refrigerator for up to 48 hours. The layers will stay intact, and the flavors will continue to meld. When you’re ready to serve, give it a quick stir to redistribute any settled glaze. Keep the container chilled until the last minute to preserve the whipped cream’s freshness.
Freezer Friendly
For longer storage, freeze the trifle in a freezer‑safe container for up to 2 weeks. Thaw in the refrigerator overnight before serving. The texture may be slightly softer, but the flavor remains intact. This option is ideal for prepping ahead of a busy holiday season.
Best Reheating Method
To revive a frozen trifle, gently warm it in the refrigerator for a few hours rather than microwaving. If you need a quick fix, place the bowl in a warm water bath for 10 minutes. Add a splash of water before reheating to create steam, which will restore the whipped cream’s airy texture. Avoid overheating, or the chocolate shavings may melt.