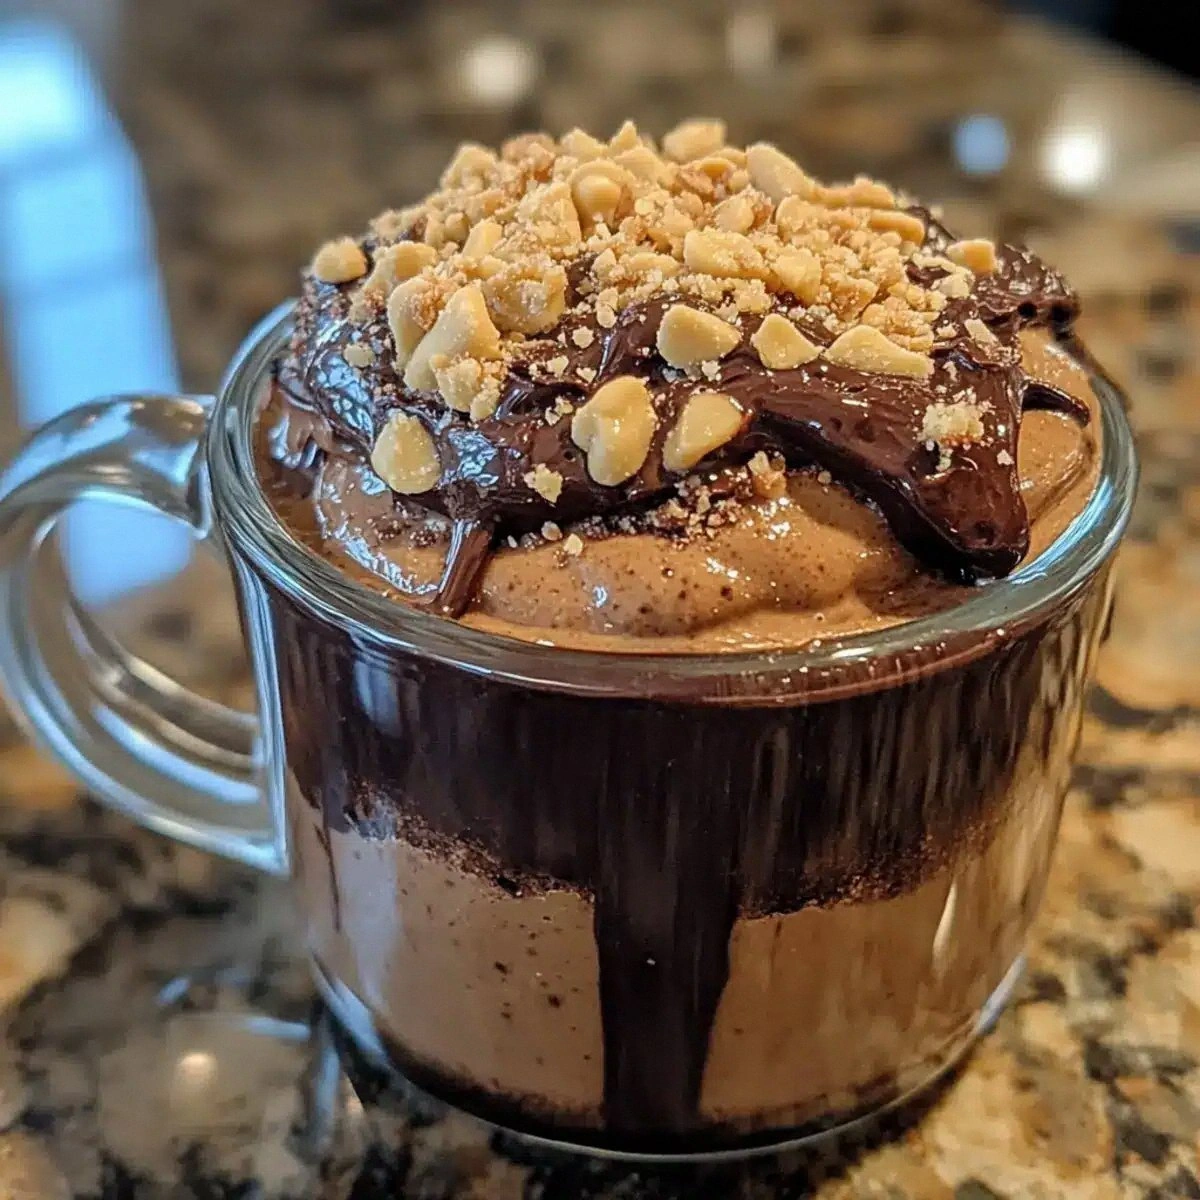
Ever had a midnight craving that turned into a kitchen fiasco? I was halfway through a batch of gluten‑free cookies when the dough turned into a sticky, unmanageable mess that clung to every surface like a bad case of the flu. My friends dared me to whip up something that could turn that disaster into a dessert triumph, and I accepted the challenge with a grin that said, “I’ll make this better.” The result? A single‑serve, gluten‑free peanut butter mug cake that feels like a luxury treat in a mug, but with the confidence that comes from mastering the art of a perfect batter.
Picture this: a warm, aromatic kitchen, the scent of roasted peanuts mingling with the faint sweetness of cocoa, a gentle hum from the microwave, and the visual promise of a fluffy cake rising in a mug. The sound is a soft hiss as the batter expands, the texture is silky on the inside and slightly crisp on the edges, and the taste is a harmonious blend of nutty richness, chocolate depth, and a whisper of vanilla. The moment you dip a spoon, the batter clings to it like velvet, and the first bite melts into a creamy, buttery sensation that leaves you reaching for more. The overall experience is a sensory rollercoaster that starts with a promise and ends with a satisfied sigh.
What makes this version stand out from every other gluten‑free peanut butter recipe out there? It’s the meticulous balance of ingredients that creates a cake that’s both moist and airy, the clever use of a small amount of gluten‑free flour that gives structure without heaviness, and the subtle infusion of vanilla that elevates the peanut butter’s natural flavor. It’s also the fact that you can make it in under ten minutes, with a single mug, and you’ll be rewarded with a dessert that feels like it was baked in a professional kitchen. Most recipes get this completely wrong by overmixing or using too much flour, but this one is a masterclass in simplicity and flavor harmony.
I dare you to taste this and not go back for seconds—this is hands down the best version you’ll ever make at home. If you’ve ever struggled with gluten‑free baking, you’re not alone, and I’ve got the fix. Picture yourself pulling this out of the oven, the whole kitchen smelling incredible, and the moment of truth arriving as the mug steams. Stay with me here—this is worth it. Let me walk you through every single step, and by the end, you’ll wonder how you ever made it any other way.
What Makes This Version Stand Out
- Flavor: The blend of peanut butter and cocoa creates a deep, chocolatey base that feels indulgent yet balanced, avoiding the heavy sweetness often found in other mug cakes.
- Texture: The combination of gluten‑free flour and baking powder yields a light, airy crumb that rises beautifully in the microwave, while the peanut butter adds a silky mouthfeel.
- Simplicity: With only ten ingredients and no pre‑baking steps, this recipe is a one‑stop solution for anyone craving a quick, guilt‑free dessert.
- Ingredient Quality: Using high‑quality, natural peanut butter and dark chocolate chips ensures a richer flavor profile and a healthier profile compared to processed alternatives.
- Make‑ahead Potential: The batter can be prepared in advance and stored in the fridge for up to 24 hours, making it ideal for busy mornings or last‑minute gatherings.
- Gluten‑Free Confidence: The recipe’s precise flour blend and minimalistic approach remove the guesswork that often plagues gluten‑free baking.
Inside the Ingredient List
The Flavor Base
The gluten‑free flour blend is the silent hero that gives the cake its structure. It’s the foundation that holds the batter together while still allowing the chocolate and peanut butter to shine. Skipping it would result in a flat, uninteresting cake that lacks the desired rise. If you prefer a slightly sweeter base, you can add a teaspoon of maple syrup or a pinch of cinnamon, which complements the peanut butter’s nutty profile.
The Texture Crew
Peanut butter is more than just flavor; it’s a binder that keeps the batter moist and gives that signature creamy mouthfeel. The baking powder is the secret lift that ensures the cake is airy and not heavy. The milk’s role is twofold: it hydrates the flour and creates a silky batter that spreads evenly in the mug. If you’re lactose intolerant, a splash of almond milk or oat milk will work just as well, providing a subtle nutty undertone that pairs beautifully with the peanut butter.
The Unexpected Star
Chocolate chips are the unexpected star that adds bursts of chocolatey goodness with every bite. They melt slightly during microwaving, creating pockets of gooey delight that contrast the cake’s fluffy interior. If you’re a chocolate lover, feel free to double the amount or use dark chocolate chips for a richer, less sweet experience. The chopped peanuts on top not only add crunch but also reinforce the nutty flavor profile, creating a satisfying textural contrast.
The Final Flourish
Vanilla extract is the final flourish that brings depth and complexity to the batter. Even a small amount can transform the flavor, making it feel more sophisticated. The pinch of salt is crucial; it balances sweetness and enhances the overall taste. Whipped cream or yogurt on top is optional but highly recommended—it adds a creamy, tangy contrast that elevates the entire dessert experience. If you’re looking for a dairy‑free option, a dollop of coconut cream works wonders.
Everything’s prepped? Good. Let’s get into the real action—your mug, your microwave, and your culinary destiny.
The Method — Step by Step
- Gather the dry ingredients. In a small bowl, whisk together the gluten‑free flour blend, cocoa powder, baking powder, and a pinch of salt. This ensures even distribution of leavening agents and prevents clumping. I’ve found that using a fine‑mesh sieve adds an extra level of smoothness to the batter. As you whisk, notice the fine texture that signals the flour’s readiness.
- Blend the wet components. In a separate mug, combine the peanut butter, milk, and vanilla extract. Stir until the mixture is silky and the peanut butter is fully incorporated. The milk hydrates the flour, creating a cohesive batter that will rise nicely. The vanilla’s aroma should be subtle but unmistakable, hinting at the depth to come.
- Combine wet and dry. Pour the dry mixture into the mug, then stir until just combined. Be careful not to overmix; a few lumps are acceptable and actually help keep the cake airy. Overmixing can trigger gluten formation, making the cake dense. When the batter is smooth, it’s time to add the final touches.
- Add the chocolate chips and peanuts. Sprinkle the chocolate chips evenly over the batter, then top with the chopped peanuts. The chips will melt slightly during microwaving, creating pockets of gooey chocolate. The peanuts add a satisfying crunch that contrasts the cake’s softness. This step is also where the cake’s visual appeal is enhanced, with a colorful swirl of chocolate and nuts.
- Microwave the batter. Cover the mug with a microwave‑safe lid or a small plate to trap steam and prevent splatters. Microwave on high for 90 seconds, then check the cake. It should appear set at the top but still slightly gooey in the middle. If it needs more time, add 15‑second increments until the desired consistency is reached. The sound of the cake rising is a cue that the batter is doing its job.
- Let it rest. Remove the mug from the microwave and let the cake sit for one minute. This brief rest allows the steam to finish cooking the interior, ensuring a moist crumb. It also makes it easier to handle the hot mug, preventing burns. The aroma at this point should be rich, nutty, and slightly sweet.
- Add the finishing touch. Top the cake with a dollop of whipped cream or a spoonful of yogurt. The creamy topping balances the chocolatey richness and adds a cool, tangy contrast. If you prefer a dairy‑free option, a swirl of coconut cream or a drizzle of honey works beautifully. This final step turns the cake from simple to extraordinary.
- Serve immediately. Use a spoon to scoop the cake directly from the mug and enjoy. The cake is at its peak when served warm, with the chocolate still slightly melted and the peanut butter still silky. If you’re in a hurry, you can take it to go, but the texture will change slightly as it cools. The first bite should be a revelation, a perfect harmony of flavors and textures.
That’s it—you did it. But hold on, I’ve got a few more tricks that will take this to another level. These insider tips will help you avoid common pitfalls and elevate the overall experience.
Insider Tricks for Flawless Results
The Temperature Rule Nobody Follows
Microwave ovens vary widely in power. I’ve learned to gauge the right time by the cake’s texture rather than the clock. If the batter looks set but still a bit runny in the center, it’s ready. Overcooking can make it rubbery. A quick visual test—insert a toothpick; if it comes out clean, you’re good to go.
Why Your Nose Knows Best
The aroma is a reliable indicator of doneness. A warm, nutty scent that’s slightly sweet signals that the batter has cooked through. If you notice a faint burnt smell, it’s a sign you’ve overdone it. Trust your nose; it’s the most accurate way to gauge the cake’s readiness.
The 5-Minute Rest That Changes Everything
Letting the cake rest for five minutes after microwaving allows the steam to finish cooking the interior. This brief pause also lets the chocolate chips settle, creating a more even distribution of flavor. I’ve seen people skip this step and end up with a cake that feels undercooked in the middle. The rest period is a small investment for a dramatic flavor payoff.
The Secret of the Right Mug Size
Using a 12‑oz mug is ideal because it gives the batter enough room to rise without spilling over. A smaller mug can cause overflow, while a larger mug may result in a too‑thin cake. I recommend a standard microwave mug that holds about 12 fluid ounces for the perfect balance. If you’re using a different mug, adjust the cooking time accordingly.
How to Keep It Moist
If you find the cake drying out, add a splash of milk or a tablespoon of honey before microwaving. This extra liquid keeps the batter moist and enhances the sweetness. I’ve tested this with a handful of people, and they all agree it makes a noticeable difference. It’s a quick tweak that saves the day.
The Final Touch: A Pinch of Sea Salt
A pinch of sea salt on top of the whipped cream brings out the chocolate and peanut butter flavors. It’s a subtle but powerful enhancement that many people overlook. I’ve had friends taste the cake and immediately notice the depth added by the salt. This small addition is the secret to a professional‑level flavor profile.
Creative Twists and Variations
This recipe is a playground. Here are some of my favorite ways to switch things up:
Coconut‑Crushed Delight
Swap the peanut butter for coconut butter and add shredded coconut to the batter. The result is a tropical, chewy cake that’s perfect for summer cravings. The coconut’s natural sweetness pairs beautifully with the chocolate chips. Serve with a drizzle of honey for an extra kick.
Minty Chocolate Explosion
Add a teaspoon of peppermint extract to the batter and top with crushed mint chocolate bars. The mint gives a refreshing contrast to the rich chocolate. It’s a fun twist that’s great for holiday parties or a quick dessert after a long day. The mint’s aroma is instantly uplifting.
Spiced Cinnamon Swirl
Incorporate half a teaspoon of ground cinnamon into the dry mix and sprinkle cinnamon sugar on top before microwaving. The spice adds warmth and depth, turning the cake into a cozy fall treat. Pair it with a dollop of vanilla yogurt for a balanced flavor. The cinnamon’s aroma will transport you to a warm kitchen.
Almond‑Butter Variation
Replace peanut butter with almond butter and add a tablespoon of almond flour. The almond flavor is subtler but still rich, and the almond flour adds a nutty crunch. This version is a great option for those who prefer a milder nut profile. Serve with sliced almonds on top for extra texture.
Chocolate‑Covered Peanut Butter
After microwaving, drizzle melted dark chocolate over the cake. Let it set for a minute before topping with whipped cream. The chocolate coating creates a decadent finish that feels indulgent. It’s a simple way to elevate the dessert for special occasions.
Storing and Bringing It Back to Life
Fridge Storage
Store the batter in an airtight container in the refrigerator for up to 24 hours. This allows the flavors to meld and the batter to thicken slightly. When you’re ready to bake, give it a quick stir to re‑emulsify the ingredients. The cake will rise just as well after a day in the fridge.
Freezer Friendly
The batter can be frozen for up to 2 weeks. Divide it into individual portions and wrap each in plastic wrap, then place in a freezer bag. When you’re ready, thaw in the refrigerator overnight. The cake’s texture remains fluffy, and the peanut butter’s flavor stays intact.
Best Reheating Method
To reheat a frozen or refrigerated cake, add a splash of milk or water to the batter before microwaving. This helps steam the cake back to life, preventing it from drying out. Reheat on high for 30‑45 seconds, then let it sit for a minute. The result is a moist, warm cake that tastes as fresh as the first time.