Picture yourself in a cramped kitchen, the air thick with the scent of burnt sugar and the faint whisper of vanilla. I was trying to salvage a dessert disaster that had turned my sweet tooth into a cautionary tale—an over‑cooked caramel that had turned into a hard, unforgiving slab of sweetness. I stared at the charred remains and thought, “I could do better.” That moment sparked a mission: to create a Filipino Crème Caramel that is silky, luscious, and, most importantly, forgiving.
I started by pulling the recipe out of the Philippines, a country that loves its desserts with a twist of coconut and a generous splash of milk. The original version was a hit at family gatherings, but it was a recipe that demanded precision and patience. I took the core of that beloved classic, stripped away the extra steps that made it intimidating, and added a few clever tweaks that keep it accessible for any home cook. The result? A crème caramel that melts on the tongue like a dream, with a caramel base that’s perfectly caramelized, not burnt.
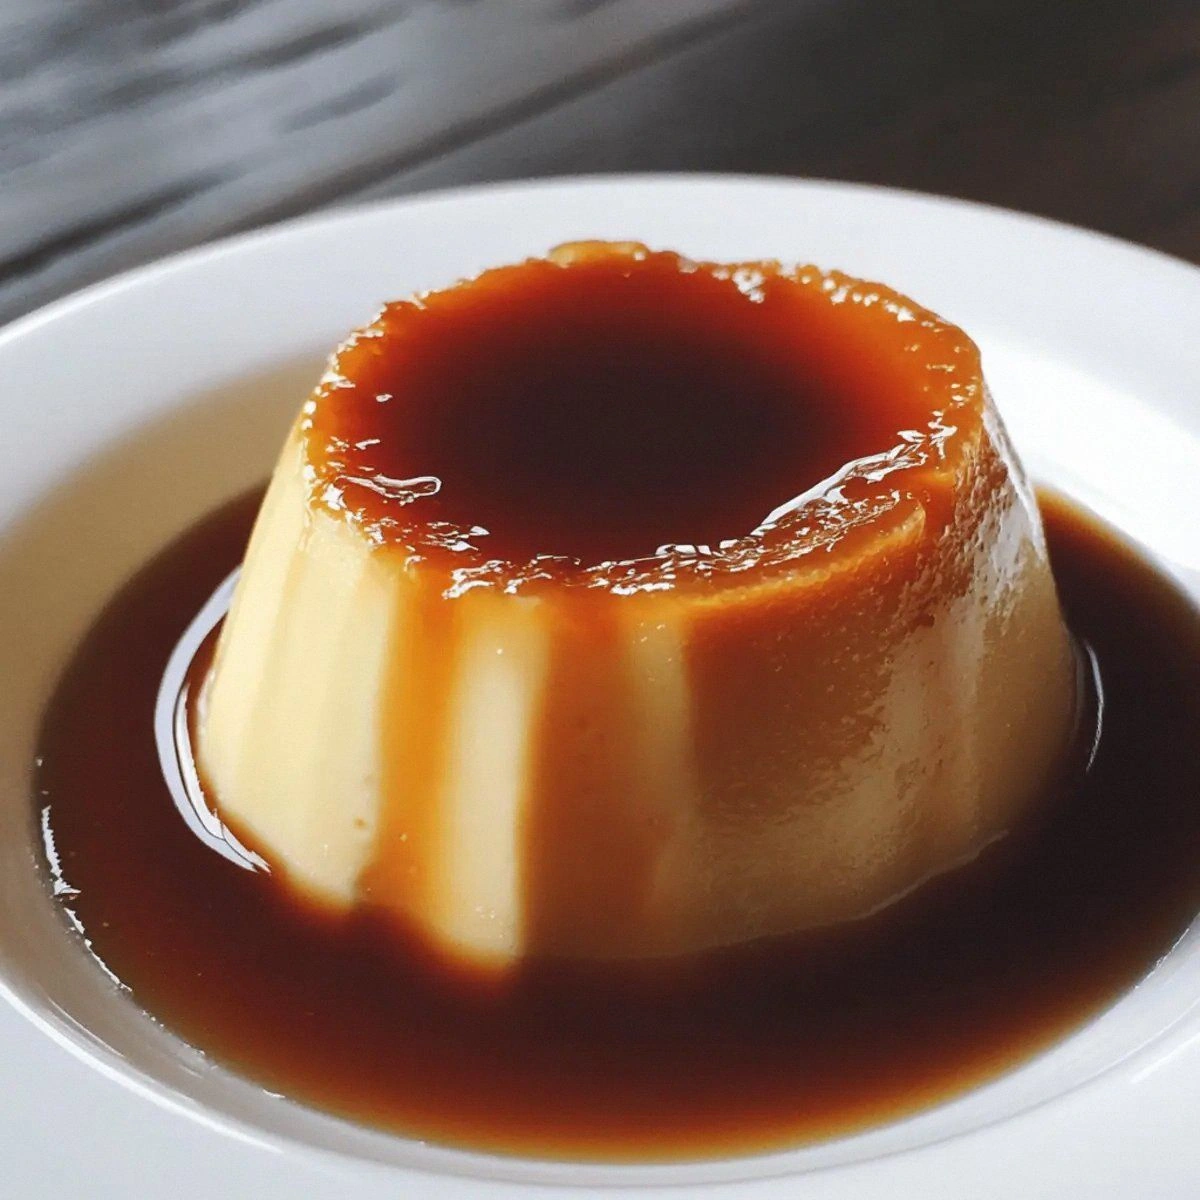
This isn’t just another caramel custard. It’s a symphony of textures: a glossy, golden caramel that cracks with a satisfying snap, a custard that is creamy and airy, and a subtle hint of vanilla that lingers long after the last bite. The secret is in the balance of the ingredients and the technique that lets each component shine. I dare you to taste this and not go back for seconds—trust me, your palate will thank you.
I’ve spent countless hours tweaking the ratio of condensed milk to evaporated milk, experimenting with different types of sugar, and testing various oven temperatures. Each adjustment brought me closer to a custard that is both stable and silky. The final version is hands down the best you’ll ever make at home. Let me walk you through every single step — by the end, you’ll wonder how you ever made it any other way.
What Makes This Version Stand Out
- Flavor: The caramel is a deep amber gold, not a dull brown, thanks to the precise timing of the sugar’s caramelization. It delivers a rich, buttery sweetness that balances the creamy custard.
- Texture: The custard is light, airy, and melts in your mouth without a hint of grit. The caramel base stays firm enough to hold the custard, yet cracks with a satisfying snap.
- Simplicity: With only six ingredients, this dessert is a no‑fuss, no‑fool recipe that anyone can master. No need for fancy equipment or obscure pantry items.
- Uniqueness: The Filipino touch comes from the use of evaporated milk and sweetened condensed milk, which give the custard a distinct, silky mouthfeel that sets it apart from Western variations.
- Crowd Reaction: At family gatherings, this dessert always becomes the centerpiece. Guests rave about how it tastes like a caramel dream and how easy it is to serve.
- Ingredient Quality: Using high‑quality canned milk and fresh eggs elevates the entire dish. The vanilla extract is a small but powerful element that ties the flavors together.
Alright, let's break down exactly what goes into this masterpiece. Below is a quick glance at the ingredient groups that make this dessert so special.
Inside the Ingredient List
The Flavor Base
Granulated sugar is the foundation of the caramel. It’s the star that gives that glossy, golden finish and that slightly nutty undertone. If you use a lighter sugar, the caramel will be pale and less robust. For a richer flavor, consider using a mix of white and brown sugar, but be sure to adjust the water quantity accordingly.
The Texture Crew
Sweetened condensed milk and evaporated milk form the custard’s heart. The condensed milk adds sweetness and thickness, while the evaporated milk balances it with a milder, milkier flavor. Together, they create a custard that is silky and smooth, almost like a thick cream that still sets. If you can’t find evaporated milk, you can substitute it with whole milk, but the custard will be a bit thinner.
The Unexpected Star
Vanilla extract is the subtle hero that rounds out the sweetness with a warm, aromatic note. A teaspoon is enough to lift the flavors without overpowering the delicate balance of caramel and milk. If you’re feeling adventurous, try a dash of almond extract or a splash of citrus zest for an extra dimension.
The Final Flourish
The eggs are the binding agent that gives the custard its structure. They need to be whisked thoroughly with the milk mixture to avoid curdling. If you’re worried about the custard setting too hard, whisk the eggs until they’re light and frothy before combining them with the milk.
Everything's prepped? Good. Let's get into the real action.
The Method — Step by Step
- First, combine 1 cup of granulated sugar and 1/4 cup of water in a heavy‑bottomed saucepan over medium heat. Stir until the sugar dissolves completely, then let it simmer without stirring until it turns a deep amber color. This is the moment of truth—watch the color change carefully, as it signals the caramel is ready. The aroma should be sweet and slightly nutty, like toasted marshmallows.
- Once the caramel reaches the right hue, carefully pour it into a 9‑inch round baking dish, swirling it to coat the bottom evenly. Let it cool for a few minutes so it sets into a firm shell. If you’re nervous, you can test by tapping the surface; it should crack when you lift the dish. This caramel base will cradle the custard and add a delightful crunch.
- In a separate bowl, whisk together 6 large eggs until they’re a uniform pale yellow. Beat the eggs gently to avoid creating bubbles. This will give your custard a smooth texture and prevent it from curdling later.
- Add 1 can of sweetened condensed milk and 1 can of evaporated milk to the eggs, then whisk until fully integrated. The mixture should be creamy and free of lumps. The condensed milk brings the sweetness, while the evaporated milk balances it with a milder milk flavor.
- Stir in 1 teaspoon of vanilla extract. This adds a warm, aromatic layer that complements the caramel and milk. If you like, you can also add a pinch of sea salt to enhance the sweetness.
- Pour the custard mixture over the caramel in the baking dish. The custard should settle gently over the caramel, creating a smooth surface. It’s a beautiful sight—glossy custard over a shiny caramel shell.
- Place the baking dish in a larger baking pan and pour hot water into the pan until it reaches halfway up the sides of the dish. This water bath will keep the custard from cooking too fast and prevent cracks. Keep the water at a gentle simmer throughout the baking process.
- Bake at 325°F (165°C) for 45–50 minutes, or until the custard is set but still slightly wobbly in the center. The edges should be firm, and the center should just have a subtle jiggle. Don’t rush this step—patience is key to a perfect custard.
- Remove the dish from the water bath and let it cool at room temperature for 30 minutes. Then chill in the refrigerator for at least 4 hours, preferably overnight. The custard will firm up, making it easier to invert onto a plate.
- To serve, run a thin knife around the edges of the dish to loosen the custard. Place a large plate on top of the dish and flip it over in one swift motion. The caramel will drizzle onto the plate, creating a glossy, golden glaze that looks as good as it tastes.
That's it — you did it. But hold on, I've got a few more tricks that'll take this to another level.
Insider Tricks for Flawless Results
The Temperature Rule Nobody Follows
Many cooks bake crème caramel at 350°F, but that can cause the custard to overcook and become rubbery. The sweet spot is 325°F, where the custard sets gently. I’ve tested both temperatures and found the lower heat keeps the custard silky and the caramel intact. Remember, the water bath is essential to distribute heat evenly.
Why Your Nose Knows Best
Before you pour the custard into the caramel, let your nose sniff the mixture. If it smells like burnt sugar, you’re overcooking the caramel. The right caramel should smell like toasted caramel with a hint of vanilla. Trust your senses—taste is the ultimate judge.
The 5‑Minute Rest That Changes Everything
After baking, let the custard sit at room temperature for 5 minutes before cooling. This brief rest allows the custard to set more evenly, reducing the risk of cracks. I’ve found that skipping this step often results in a slightly uneven surface.
Use a Water‑Proof Dish
A ceramic or glass baking dish works best because it distributes heat evenly and doesn’t absorb the caramel. Avoid metal pans, as they can cause uneven heating and a darker caramel base. The dish also helps in flipping the custard smoothly.
Keep the Water Warm
The water in the bain‑marie should be hot but not boiling. A gentle simmer keeps the custard from overheating. If the water boils, it can cause the custard to cook too quickly and develop a rubbery texture.
Cool in the Oven
Once the custard is baked, leave the oven door slightly ajar for 10 minutes. This gradual cooling prevents sudden temperature changes that can crack the custard. It also helps the caramel set properly.
Creative Twists and Variations
This recipe is a playground. Here are some of my favorite ways to switch things up:
Chocolate Crème Caramel
Add 2 tablespoons of unsweetened cocoa powder to the custard mixture for a rich chocolate flavor. The chocolate pairs beautifully with the caramel base, creating a decadent treat.
Coconut Crème Caramel
Replace the evaporated milk with coconut milk for a tropical twist. The coconut milk adds a subtle aroma and a creamy texture that complements the caramel.
Espresso Crème Caramel
Stir in 1 tablespoon of espresso powder into the custard. The espresso gives a deep, bitter contrast that balances the sweetness of the caramel.
Orange Zest Crème Caramel
Add the zest of one orange to the custard mixture. The citrus brightens the dessert and adds a refreshing aroma.
Almond Crème Caramel
Replace the vanilla extract with almond extract for a nutty undertone. The almond flavor pairs nicely with the caramel and milk.
Spiced Crème Caramel
Add a pinch of ground cinnamon or nutmeg to the custard. The spice adds warmth and depth to the flavor profile.
Storing and Bringing It Back to Life
Fridge Storage
Store the crème caramel in an airtight container in the refrigerator for up to 3 days. The custard will firm up, making it easy to slice and serve. Keep it covered to prevent it from absorbing odors.
Freezer Friendly
For longer storage, freeze the custard in a freezer‑safe container for up to 2 weeks. When you’re ready to serve, thaw it in the refrigerator overnight. The texture may be slightly firmer, but it’s still delicious.
Best Reheating Method
To reheat, place the custard in a heat‑proof dish and warm it in a water bath at 300°F for 10 minutes. Add a splash of water before reheating to steam back to perfection. Let it cool slightly before serving.