I swear I was standing in my kitchen, half‑asleep, when my roommate dared me to bake something that would make her forget about the chocolate chip cookies she’d been obsessing over all week. I laughed, grabbed a handful of dates from the pantry, and thought, “What if I turn these sweet, sticky gems into a cake that doesn’t just taste good, but actually feels like a hug from a grandma who knows all the right secrets?” The moment the aroma of caramelized dates hit the air, I knew I was onto something. That first whiff was like a warm blanket on a chilly morning—sweet, nutty, and impossibly comforting.
I spent the next hour juggling bowls, measuring cups, and a relentless stream of “what if” questions. Most date cakes I’d tried before ended up dense, gummy, or just plain bland. I was determined to crack the code, to create a cake that was moist without being soggy, sweet without being cloying, and crunchy without turning into a nut‑filled brick. The breakthrough came when I realized that the secret isn’t just in the dates themselves, but in how you balance them with the right amount of butter, a splash of milk, and a pinch of baking soda that lifts the whole thing into airy perfection.
Now, I’m about to hand you the exact formula that turned my kitchen mishap into a show‑stopping dessert. This version stands out because it uses a simple technique—toast the nuts and dates just enough to coax out their natural oils, then fold them into a batter that’s light enough to rise like a sunrise. The result is a cake that’s caramel‑rich, nut‑crunchy, and so tender that a single bite will have you shouting, “I dare you to taste this and not go back for seconds!” And yes, I’ll be honest — I ate half the batch before anyone else got a chance.
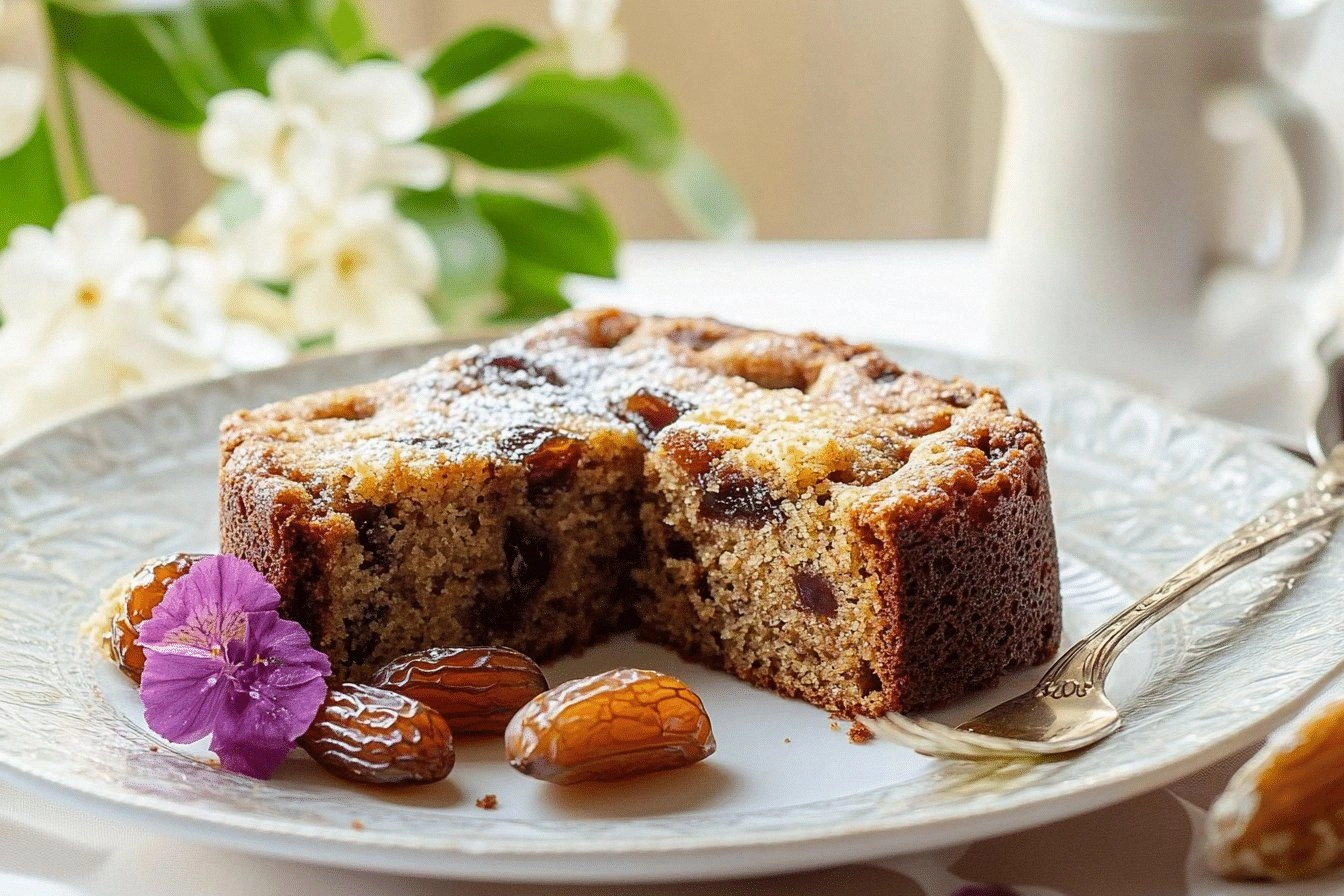
Picture yourself pulling this out of the oven, the whole kitchen smelling like a cozy café on a rainy day, the crust golden, the interior speckled with glistening dates and toasted nuts. The moment you cut into it, steam rises, and the crumb is soft enough to melt in your mouth while the edges have that perfect, slightly crisp edge that shatters like thin ice. Okay, ready for the game‑changer? Let me walk you through every single step — by the end, you’ll wonder how you ever made it any other way.
What Makes This Version Stand Out
- Flavor Harmony: The natural caramel of dates pairs with the buttery richness of nuts, creating a balanced sweetness that never feels one‑dimensional.
- Texture Contrast: Soft, moist crumb meets crunchy nut pieces, delivering a bite‑experience that’s both tender and satisfyingly crisp.
- Simplicity: Only nine core ingredients, all pantry staples, and a handful of minutes of prep time—no fancy equipment required.
- Unique Twist: Toasting the dates and nuts first unlocks deeper, toasted flavors that most recipes skip entirely.
- Crowd‑Pleaser: Even the most skeptical sweet‑tooth can’t resist the aroma that fills the house while it bakes.
- Ingredient Quality: Using high‑quality, pitted dates and fresh, unsalted nuts makes a measurable difference in taste and texture.
- Cooking Method: The gentle rise from baking soda ensures a light, airy crumb without the heaviness of traditional date breads.
- Make‑Ahead Potential: This cake stores beautifully, meaning you can bake it ahead of a gathering and simply reheat for that fresh‑out‑of‑the‑oven feel.
Inside the Ingredient List
The Flavor Base
Chopped dates are the heart of this cake. Their natural sugars caramelize during baking, giving you that deep, honey‑like sweetness without any added refined sugar. If you skip them, you’ll lose both the moisture and the signature flavor that makes this cake sing. A good tip: choose Medjool dates for their plump, buttery texture, and pit them yourself for the freshest taste.
The Texture Crew
Mixed nuts—whether you pick walnuts, almonds, or pecans—add that essential crunch. They also contribute healthy fats that keep the crumb tender. If you’re allergic or simply don’t have nuts on hand, try toasted sunflower seeds or pumpkin seeds; the crunch factor stays, though the flavor profile shifts a bit toward earthier tones.
The Structural Pillars
All‑purpose flour provides the framework that holds everything together. Baking soda is the quiet hero that creates lift; without it, the cake would be dense and heavy. Butter or oil adds richness, while brown sugar or honey deepens the caramel notes. Eggs bind everything, and vanilla extract adds a warm aromatic backdrop that ties the whole thing together.
The Final Flourish
Milk or buttermilk keeps the batter smooth and moist. The slight acidity of buttermilk reacts with the baking soda, giving an extra boost of fluffiness. If you’re out of buttermilk, a splash of lemon juice in regular milk works just as well. Remember, the liquid should be at room temperature to avoid shocking the batter and causing uneven rise.
Everything's prepped? Good. Let’s get into the real action—mixing, folding, and baking our way to a masterpiece that will have your friends begging for the recipe.
The Method — Step by Step
-
Preheat your oven to 350°F (175°C) and grease a 9‑inch round cake pan with a thin layer of butter or oil. While the oven warms, line the bottom with parchment paper—this ensures the cake releases cleanly and looks picture‑perfect. I always tap the pan gently on the counter to level the butter, creating an even surface for the batter to rise evenly.
Kitchen Hack: Place the pan in the oven for just 2 minutes while it preheats; the warm surface helps the batter set faster, giving a higher rise. -
In a dry skillet over medium heat, toss the chopped dates and mixed nuts. Stir constantly for 2‑3 minutes until you hear a faint sizzle and the nuts turn a shade deeper, releasing their oils. This step is pure magic; the toasting amplifies the natural sweetness and adds a subtle smokiness that you’ll taste in every bite.
Once toasted, transfer the mixture to a bowl and let it cool slightly. If you’re impatient, you can spread them on a parchment sheet to speed up cooling, but don’t let them get cold—warm ingredients incorporate more smoothly into the batter.
-
In a large mixing bowl, whisk together the flour, baking soda, and a pinch of salt. This dry blend ensures the leavening agent is evenly distributed, preventing any pockets of soda that could create bitter spots. I like to sift the flour once; it aerates the mixture, giving the final crumb a feather‑light texture.
-
In a separate bowl, cream the butter (or oil) with brown sugar (or honey) until the mixture is pale and fluffy—about 3‑4 minutes with an electric mixer on medium speed. The creaming process traps air, which later expands in the oven, contributing to a tender crumb. If you’re using honey, add it a bit later to avoid over‑aerating the mixture.
-
Add the eggs one at a time, beating well after each addition, then stir in the vanilla extract. The eggs act as a binder and add richness; beating them properly prevents a grainy texture. When the mixture looks glossy and slightly thickened, you know you’ve reached the perfect emulsion.
Kitchen Hack: Warm the eggs slightly (about 30 seconds in the microwave) before adding; they incorporate more smoothly and reduce the risk of curdling. -
Gradually add the dry flour mixture to the wet ingredients, alternating with the milk (or buttermilk). Start and end with the flour, mixing just until combined—over‑mixing will develop gluten and make the cake tough. At this stage, the batter should be thick but pourable, with a glossy sheen.
Watch Out: If you see lumps of flour, stop mixing immediately and use a rubber spatula to fold them in gently; over‑mixing after this point can cause a dense cake. -
Fold the toasted dates and nuts into the batter with a gentle hand, ensuring they’re evenly distributed without crushing them. The goal is to keep the nuts whole for that satisfying crunch. The batter should now have specks of gold and ruby, looking like a treasure trove of flavor.
-
Pour the batter into the prepared pan, smoothing the top with a spatula. Give the pan a quick tap on the counter to release any large air bubbles; you’ll hear a soft thud that tells you the batter is settled.
Slide the pan into the oven and bake for 30‑35 minutes, or until a toothpick inserted into the center comes out clean with just a few moist crumbs. Around the 20‑minute mark, rotate the pan 180° to ensure even browning. The edges should start pulling away from the sides, and the top will be a deep golden‑brown, smelling like a caramel‑nut dream.
-
Allow the cake to cool in the pan for 10 minutes, then turn it out onto a wire rack to finish cooling. This short rest lets the steam escape, preventing a soggy bottom. Once fully cooled, dust lightly with powdered sugar or drizzle a simple glaze if you crave extra sweetness.
That’s it — you did it. But hold on, I’ve got a few more tricks that’ll take this to another level, from glaze ideas to serving suggestions that will make your guests think you hired a professional pastry chef.
Insider Tricks for Flawless Results
The Temperature Rule Nobody Follows
Never bake a cake straight from the fridge. Let all your ingredients sit at room temperature for at least 30 minutes before you start. This simple step ensures the butter emulsifies properly with the sugar, and the eggs blend smoothly, giving you a uniform batter that rises evenly. I once tried a cold batter and ended up with a cake that rose in the middle but stayed flat on the edges—total disappointment.
Why Your Nose Knows Best
The moment the cake starts to smell like toasted caramel is your cue to start checking for doneness. Trust the scent more than the timer; ovens can vary by up to 25 °F. When the fragrance hits that sweet‑nutty peak, pop the door open, and do the toothpick test. If the toothpick comes out with a few moist crumbs, you’ve nailed the perfect texture.
The 5‑Minute Rest That Changes Everything
After removing the cake from the oven, let it rest in the pan for exactly five minutes before turning it out. This short pause lets the steam redistribute, preventing a gummy bottom while keeping the crumb moist. A friend once skipped this step, and the cake fell apart when sliced—lesson learned.
Glaze It Right
If you love a glossy finish, whisk together powdered sugar, a splash of milk, and a dash of vanilla until you reach a drizzling consistency. Drizzle over the cooled cake in a slow, circular motion for a professional look. The glaze sets in about ten minutes, creating a sweet crust that cracks delicately when you cut into it.
Serve With Style
A dollop of lightly sweetened Greek yogurt or a scoop of vanilla ice cream adds a creamy contrast to the dense, nutty cake. Sprinkle a few extra toasted nuts on top for texture, and you’ve turned a simple slice into a plated dessert worthy of a dinner party. Trust me, the compliments will keep coming.
Creative Twists and Variations
This recipe is a playground. Here are some of my favorite ways to switch things up:
Chocolate‑Swirl Date Cake
Add ¼ cup cocoa powder to the dry ingredients and swirl in a melted dark chocolate mixture before baking. The result is a marbled masterpiece that satisfies both chocolate lovers and date enthusiasts.
Spiced Autumn Version
Incorporate a teaspoon of cinnamon, a pinch of nutmeg, and a dash of ground cloves. The warm spices echo the comfort of a crisp fall day, making this cake perfect for Thanksgiving leftovers.
Citrus‑Infused Delight
Add the zest of one orange and a tablespoon of freshly squeezed orange juice to the wet mixture. The citrus brightens the deep caramel notes, giving the cake a fresh, lively finish.
Vegan Friendly
Swap butter for coconut oil, use maple syrup instead of honey, and replace eggs with a “flax egg” (1 tbsp ground flaxseed mixed with 3 tbsp water). The texture remains moist, and the flavor stays true to the original.
Gluten‑Free Adaptation
Replace all‑purpose flour with a 1:1 gluten‑free flour blend, and add a tablespoon of xanthan gum to mimic the elasticity of gluten. The cake rises just as beautifully, and the crumb stays tender.
Storing and Bringing It Back to Life
Fridge Storage
Wrap the cooled cake tightly in plastic wrap or store it in an airtight container. It will stay fresh for up to five days, and the flavors actually deepen as the dates continue to hydrate the crumb.
Freezer Friendly
Slice the cake, place each piece on a parchment sheet, freeze until solid, then transfer to a zip‑top freezer bag. Properly stored, it lasts for three months. When you’re ready to enjoy, let it thaw at room temperature for 30 minutes.
Best Reheating Method
Preheat your oven to 300°F (150°C), place a slice on a baking sheet, and add a tiny splash of water (about a teaspoon) before covering loosely with foil. Heat for 8‑10 minutes; the steam revives the moisture, and the crust regains its gentle crispness.