Picture this: a rainy Sunday afternoon, a kitchen humming with the sound of a blender, and a sudden craving for something sweet, comforting, and oddly savory. I was staring at a bag of glutinous rice flour that had been sitting in the pantry for months, wondering what to do with it. My friend dared me to make a dessert that would make the whole house smell like a bakery, and I was like, “Why not? Let’s turn that humble flour into a masterpiece.” I grabbed the ingredients, set the timer, and the kitchen turned into a stage where a simple rice cake would steal the show.
The first thing I noticed was the texture—glutinous rice flour is silky, almost like a fine sand that clings to your hands. When you mix it with the brown sugar and water, the batter takes on a translucent sheen, like liquid glass. The aroma that starts to rise when you whisk the egg is sweet, slightly caramelized, and it instantly makes your mouth water. The heat from the pan is like a gentle hug, coaxing the batter to puff up, and the sound of the first sizzle is the soundtrack to a culinary triumph. It’s a moment that feels like a secret handshake between you and the kitchen.
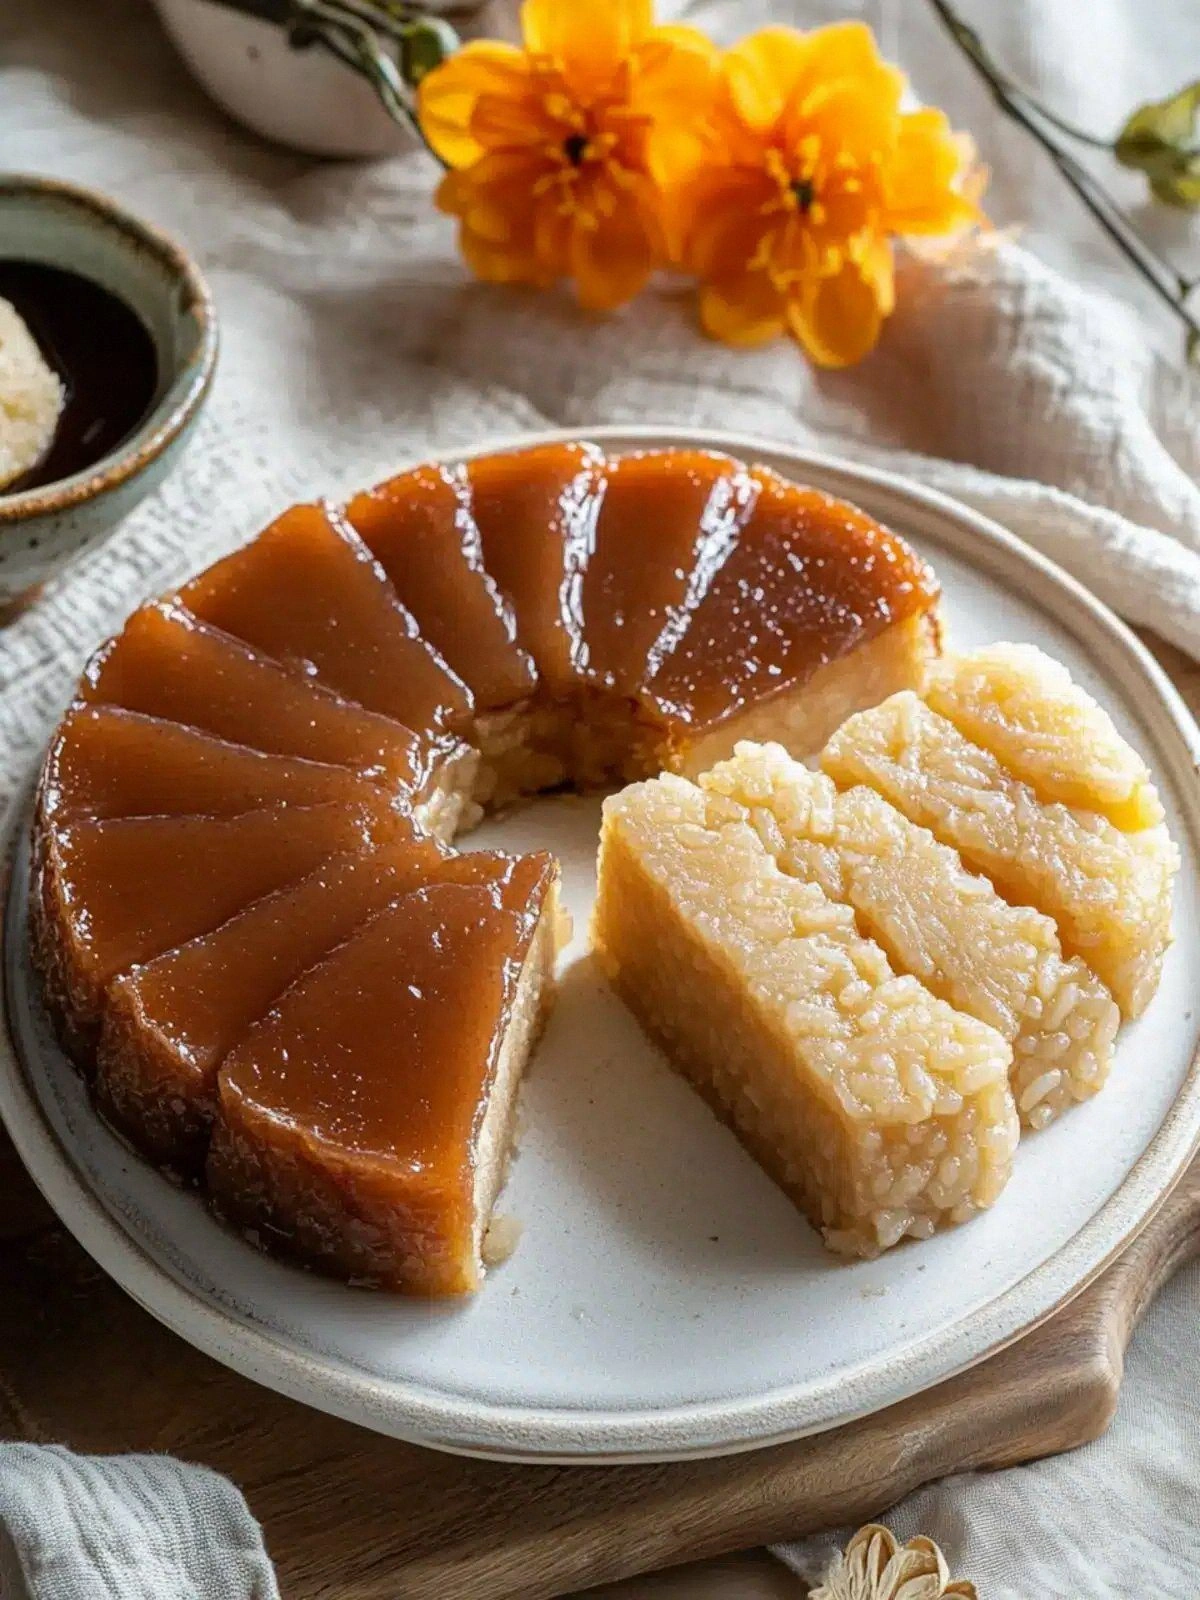
But this isn’t just another sweet rice cake recipe. This version is the kind of dish that makes you question why you ever settled for mediocre desserts. The secret? A blend of glutinous and regular rice flours that gives it that chewy center with a tender crust, a generous splash of brown sugar for depth, and a surprisingly subtle oil infusion that keeps it from drying out. The result is a cake that melts in your mouth like a warm hug and leaves a lingering sweetness that lingers on the tongue. If you’ve ever tried a standard nian gao and found it too dry or too sweet, this will flip your expectations on their head.
And here’s a teaser that will have you reaching for the recipe card right away: I used a double‑step oil technique that gives the cake a glossy finish and a slightly crisp edge, something you won’t find in the average recipe. The first tablespoon of oil coats the batter, while the second tablespoon is used to lightly grease the pan, creating that perfect contrast between a chewy interior and a subtly caramelized exterior. Trust me, you’ll want to keep this trick in your culinary arsenal forever.
What Makes This Version Stand Out
- Flavor: The combination of glutinous and regular rice flours creates a harmonious balance between chewiness and tenderness, while the brown sugar adds a caramel depth that elevates the dish beyond plain sweetness.
- Texture: The double‑oil technique gives the cake a glossy sheen and a slightly crisp edge that contrasts beautifully with the soft, pillowy center.
- Simplicity: With only seven core ingredients, this recipe is approachable for beginners and a quick win for busy weeknights.
- Uniqueness: The use of both glutinous and regular rice flours is a game‑changer that many other recipes overlook, resulting in a cake that feels both traditional and innovative.
- Crowd Reaction: Friends who’ve tasted this version often say, “I dare you to taste this and not go back for seconds,” and they rarely get it right the first time.
- Ingredient Quality: Using high‑quality brown sugar and fresh eggs ensures a richer flavor profile and a smoother texture.
- Cooking Method: The two‑step oil process and precise heat control prevent sticking and create a caramelized crust without burning.
- Make‑Ahead Potential: This cake holds up well for up to 48 hours in the fridge and can be reheated to regain its original moistness.
Alright, let's break down exactly what goes into this masterpiece…
Inside the Ingredient List
The Flavor Base
The cornerstone of this cake is the combination of glutinous rice flour and rice flour. The glutinous variety brings that signature chew, while the regular flour provides structure and a subtle graininess that keeps the cake from feeling too dense. Together, they create a balanced mouthfeel that is both comforting and sophisticated. If you skip one of these flours, the cake will either become too mushy or too rigid, and you’ll lose the delicate interplay that defines the texture.
Next is brown sugar, which does more than sweeten; it introduces molasses undertones that add depth and complexity. Brown sugar also contributes moisture, helping the batter stay tender during cooking. Replacing it with white sugar will produce a flatter flavor profile and a drier crumb. For a healthier twist, you can try a small portion of honey, but be prepared for a slightly different caramelization.
The Texture Crew
Water is the unsung hero that dissolves the sugar, activates the flours, and creates a batter that flows smoothly. The ratio of water to flour is critical; too much water will make the cake runny, while too little will lead to a dry, crumbly result. Aim for a batter that is thick enough to coat the back of a spoon but still pourable.
The egg brings structure and richness, acting as a binder that holds the cake together while adding a subtle protein boost. It also contributes to the cake’s golden color and helps achieve that glossy finish. If you’re vegan, you can replace the egg with a flaxseed mixture or a commercial egg replacer, but expect a slightly altered texture.
The Unexpected Star
Oil is the secret weapon that elevates the cake’s mouthfeel and appearance. The first tablespoon of oil is mixed into the batter, ensuring that the cake stays moist and doesn’t dry out during cooking. The second tablespoon is used to lightly grease the pan, creating a thin barrier that prevents sticking and promotes even browning. Skipping either oil step will result in a less desirable texture and a less appealing finish.
The Final Flourish
The final flourish comes in the form of a light dusting of powdered sugar after baking, which adds a delicate sweetness and an elegant finish. This step is optional but recommended if you want the cake to feel like a refined dessert rather than a simple snack. If you’re watching calories, you can skip the dusting or use a sugar substitute that melts at room temperature.
Everything's prepped? Good. Let's get into the real action…
The Method — Step by Step
- In a large mixing bowl, combine the glutinous rice flour and rice flour. Whisk them together until they’re perfectly blended, ensuring there are no lumps. This dry mix forms the foundation of the cake’s structure.
- Add the brown sugar to the flour mixture and stir until the sugar is evenly distributed. The sugar’s granules should be fully incorporated, which helps prevent clumps when you add the wet ingredients.
- In a separate bowl, whisk the egg with the water until the mixture is smooth and slightly frothy. This aeration introduces tiny air pockets that will lift the cake as it bakes.
- Pour the wet mixture into the dry ingredients and stir with a wooden spoon until a thick batter forms. The batter should have a consistency similar to thick pancake batter; it should coat the back of a spoon but still be pourable.
- Stir in the first tablespoon of oil, ensuring it’s fully incorporated. This oil will keep the cake moist and give it a subtle sheen during cooking.
- Heat a non‑stick skillet over medium heat and add the second tablespoon of oil. Swirl the pan to coat the surface evenly, creating a barrier that prevents sticking.
- Pour the batter into the skillet, using a spatula to spread it into an even layer about 1‑2 inches thick. The edges should just start to lift slightly from the pan after a minute; this is the moment of truth.
- Reduce the heat to low and cover the skillet with a lid. Let the cake steam for about 15 minutes, or until the top looks set and the bottom has a golden‑brown crust. The steam keeps the cake tender and prevents it from drying out.
- After 15 minutes, remove the lid and increase the heat to medium. Allow the cake to brown for an additional 5 minutes, watching carefully for the edges to develop a slightly crisp texture.
- Once the cake is cooked, slide it onto a cutting board and let it rest for 5 minutes. This rest period lets the steam redistribute and the cake firm up, making it easier to slice.
- Cut the cake into squares or rectangles, dust each piece with powdered sugar, and serve warm. The warm, gooey interior will contrast with the crisp edges, creating a delightful sensory experience.
That's it — you did it. But hold on, I've got a few more tricks that'll take this to another level…
Insider Tricks for Flawless Results
The Temperature Rule Nobody Follows
Many bakers assume that high heat is always better, but for this cake, low and steady wins the race. Cooking the cake on a low flame ensures the interior cooks evenly without burning the exterior. I’ve found that a temperature of 300°F (150°C) is ideal for the steaming phase; this keeps the moisture locked in and prevents the batter from drying out.
Why Your Nose Knows Best
Trust your nose during the steaming phase. When the cake is ready, a subtle caramel aroma should fill the kitchen. If you don’t smell that hint of sugar caramelizing, give it a few more minutes. Over‑cooking will turn the cake into a dry, rubbery slab.
The 5‑Minute Rest That Changes Everything
After removing the cake from the skillet, let it rest for exactly five minutes before slicing. This short pause allows the steam to redistribute, giving the cake a more cohesive structure. Cutting it too soon can cause the edges to crumble, ruining that perfect chew.
The Double‑Oil Technique
The first tablespoon of oil is mixed into the batter, while the second tablespoon is used to lightly grease the pan. This dual application keeps the cake moist and prevents sticking. Skipping either oil step will result in a cake that is either too dry or too sticky.
The Powdered Sugar Finish
Dusting the cake with powdered sugar after baking adds a delicate sweetness and an elegant finish. It also helps to balance the caramelized edges with a light, airy sweetness that lingers on the palate.
Creative Twists and Variations
This recipe is a playground. Here are some of my favorite ways to switch things up:
Citrus Burst
Add a tablespoon of finely grated orange zest to the batter for a bright, refreshing twist. The citrus oils lift the sweetness, making the cake feel lighter. Pair it with a drizzle of honey for an extra layer of flavor.
Spiced Delight
Stir in half a teaspoon of ground cinnamon and a pinch of nutmeg before cooking. The warm spices create a comforting, autumnal vibe that pairs beautifully with the caramel notes from the brown sugar.
Nutty Crunch
Fold in a handful of chopped toasted almonds or walnuts into the batter after it has been mixed. The nuts add a delightful crunch and a nutty aroma that complements the chewy interior.
Chocolate Swirl
Swirl in a few spoonfuls of melted dark chocolate into the batter before cooking. The chocolate creates pockets of rich flavor that contrast with the subtle sweetness of the cake.
Savory Twist
Replace half of the brown sugar with a tablespoon of soy sauce and add a dash of sesame oil. The result is a savory, umami‑rich cake that works well as an accompaniment to spicy dishes.
Storing and Bringing It Back to Life
Fridge Storage
Store the cake in an airtight container at room temperature for up to 48 hours. The airtight seal prevents moisture loss, keeping the cake tender and flavorful. If you plan to keep it longer, refrigerate it in a zip‑lock bag to maintain freshness.
Freezer Friendly
Wrap each slice individually in plastic wrap, then place them in a freezer bag. Freeze for up to three months. When ready to eat, thaw at room temperature for 30 minutes before reheating.
Best Reheating Method
To restore the cake’s original moisture, heat it in a steamer or a microwave set to 30% power for 30–45 seconds, then finish in a preheated oven at 300°F (150°C) for 5 minutes. A tiny splash of water before reheating helps the cake steam back to perfection, giving it that melt‑in‑your‑mouth texture.