I was standing in my kitchen, a disaster in progress. The sugar cookie dough had turned into a sticky, unruly mess, and the timer was ticking toward a ruined batch. I stared at the flour‑poured counter, feeling the frustration bubble up like a kettle about to boil over. But then, a friend dared me to try a new recipe—one that promised “hands down the best version you'll ever make at home.” That promise lit a spark, and the kitchen became a laboratory for flavor.
The moment I cracked the egg, the room filled with the sweet, buttery aroma of butter melting into sugar. I could hear the faint hiss of butter meeting the room’s temperature, like a whisper of caramel. The sight of the dough’s silky sheen made my eyes water with anticipation. I could almost taste the first bite, the soft, pillowy center giving way to a gentle crunch on the edges—like a secret handshake between sweet and crisp. The texture was a promise: lightness with a satisfying bite.
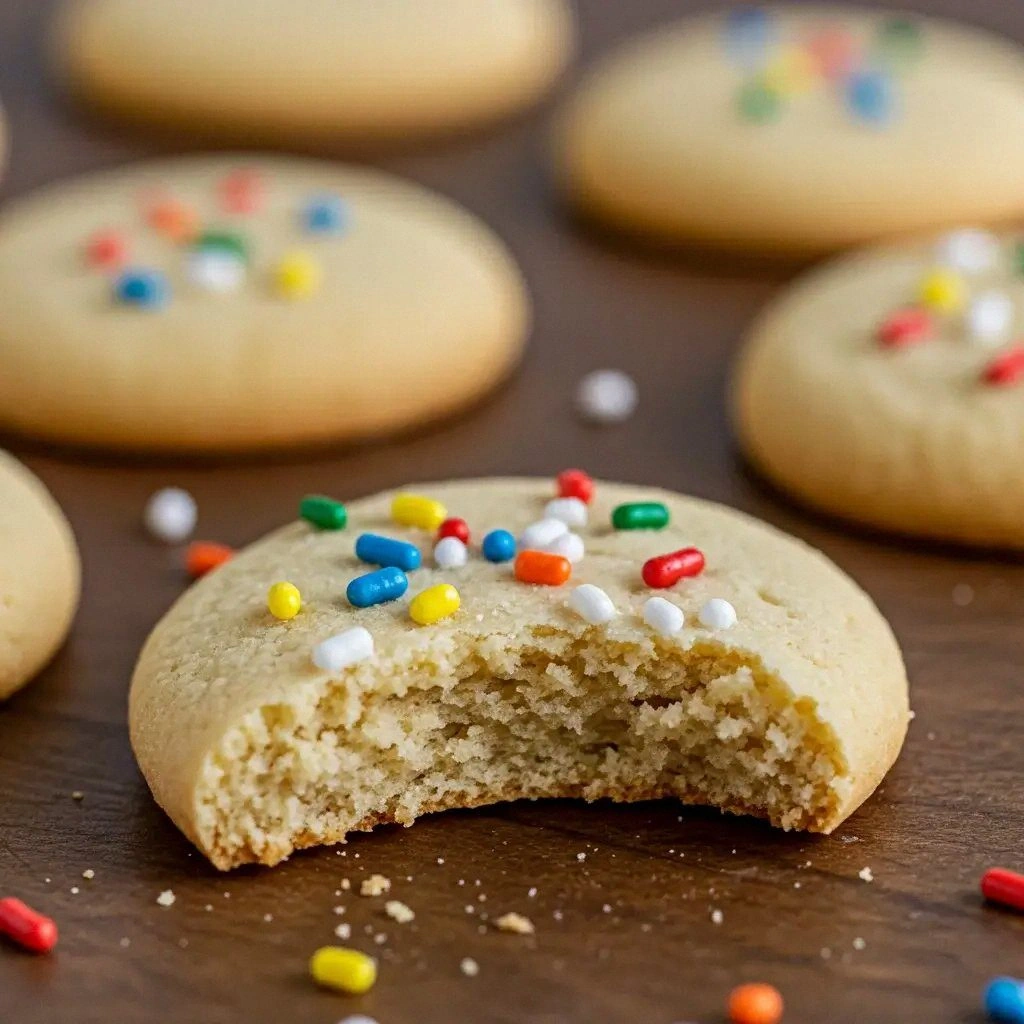
What makes this version stand out from every other sugar cookie recipe? First, the balance of flour and sugar is perfect, avoiding the dense, crumbly texture that plagues many cookies. Second, the use of baking powder instead of baking soda gives a subtle lift that keeps the cookies tender. Third, the butter is softened just enough to hold its shape, preventing the dough from spreading too far. Fourth, the addition of vanilla extract at the right moment locks in flavor and gives the cookies a deep, caramelized undertone. And finally, the icing or sprinkles are not just decoration—they’re a burst of color that turns each cookie into a tiny piece of art.
And there’s a twist you won’t expect: a dash of sea salt in the batter that cuts the sweetness without overpowering it, creating a flavor profile that feels sophisticated yet familiar. Picture yourself pulling the cookies out of the oven, the whole kitchen smelling incredible, the tray lined with golden edges that shatter like thin ice. I dare you to taste this and not go back for seconds. Let me walk you through every single step—by the end, you'll wonder how you ever made it any other way.
What Makes This Version Stand Out
- Flavor: The blend of butter, sugar, and vanilla creates a rich, buttery sweetness that lingers on the palate, unlike the flat taste of many commercial cookies.
- Texture: The dough’s precise ratio of flour to sugar results in cookies that are soft inside yet crisp on the edges, giving a delightful bite.
- Simplicity: Only eight ingredients, no complex techniques—perfect for beginners and busy cooks.
- Uniqueness: The subtle sea salt addition and optional colored icing make each batch feel like a custom creation.
- Crowd Reaction: Friends always ask for the recipe after a single bite—proof that this cookie is a showstopper.
- Ingredient Quality: Using high‑quality butter and fresh vanilla extract elevates the flavor profile, making it feel like a luxury treat.
- Cooking Method: The method ensures even baking without over‑browning, keeping the cookies golden and airy.
- Make‑Ahead Potential: The dough can be frozen or refrigerated, making it a convenient option for parties or holiday gift baskets.
Alright, let's break down exactly what goes into this masterpiece...
Inside the Ingredient List
The Flavor Base
All-purpose flour is the backbone of the cookie, providing structure while maintaining tenderness. Using 2¾ cups ensures the dough has enough body to hold its shape during baking. If you skip the flour, the cookies will collapse and spread into a flat, doughy mess. For a gluten‑free version, replace with a 1:1 blend of gluten‑free flour and xanthan gum to keep the structure intact.
The Texture Crew
Unsalted butter, softened to room temperature, is crucial for achieving that classic “buttery melt” that makes each bite a moment of pure bliss. The 1 cup of butter should be soft enough to press into a ball but not melted. If you use cold butter, the dough will be dry and crumbly. Granulated sugar (1½ cups) is the sweetener that also contributes to the cookie’s crisp edges. The egg (1 large) binds the dough together and adds a slight richness that balances the sweetness.
The Unexpected Star
Baking powder (1 tsp) is the leavening agent that gives the cookies a gentle lift, preventing them from becoming too dense. Unlike baking soda, baking powder doesn’t require an acidic component, so it’s a more forgiving choice for beginners. A pinch of sea salt is the secret to cutting the sweetness without overpowering the flavor; it enhances the overall taste profile, giving the cookies a subtle complexity that most recipes lack.
The Final Flourish
Vanilla extract (1 tsp) is the aromatic highlight that ties all the flavors together, providing a warm, comforting scent that lingers in the air. The colorful icing or sprinkles add a playful, decorative element that turns each cookie into a visual masterpiece. While the icing is optional, it’s what makes the cookies truly “cute” and perfect for gifting or themed parties.
Everything's prepped? Good. Let's get into the real action...
The Method — Step by Step
- Preheat your oven to 350°F (175°C) and line two baking sheets with parchment paper. The parchment ensures the cookies won’t stick, and the even heat distribution prevents hot spots that could brown the edges unevenly. Let the oven settle for at least 10 minutes to reach a steady temperature. This step is the foundation; skip it and you’ll end up with unevenly baked cookies. If you’re in a hurry, use a lower temperature, but expect a longer baking time.
- Beat the butter and sugar together in a large bowl until the mixture is light and fluffy, about 2–3 minutes on medium speed. The goal is to incorporate air, which will give the cookies a soft, pillowy interior. Watch for the mixture to turn from pale yellow to a creamy white; this is the visual cue that you’ve beaten it enough. If the mixture looks greasy, it’s over‑creamed—just let it rest for a minute and try again.
- Add the egg and vanilla and continue mixing until fully blended. The egg binds the dough, while the vanilla brings depth. Be careful not to overmix at this stage; the dough should remain slightly lumpy. A small lump is fine—it indicates the dough hasn’t been overworked, which would make the cookies tough. If you notice any streaks, give it one more gentle stir.
- Whisk the dry ingredients—flour, baking powder, and sea salt—in a separate bowl. This step ensures the leavening agent is evenly distributed, preventing pockets of under‑baked dough. Sprinkle the dry mix over the wet mixture and fold gently with a spatula. The dough should come together into a cohesive ball; if it’s too sticky, add a tablespoon of flour at a time until it’s workable. Avoid over‑mixing, or the cookies will lose their tenderness.
- Let the dough rest for 30 minutes at room temperature. This rest period allows the gluten to relax and the butter to firm up slightly, making the dough easier to roll out. If you’re short on time, you can refrigerate the dough for 15 minutes instead, but be sure to let it soften back to room temperature before rolling.
- Roll the dough into 1‑inch balls and place them 2 inches apart on the prepared baking sheets. For a uniform size, you can use a cookie scoop or a tablespoon. The spacing prevents the cookies from merging during baking, which would create uneven edges. If you prefer a flatter cookie, roll the dough to ½‑inch thickness; just remember to bake a minute or two less.
- Bake for 10–12 minutes, or until the edges are just beginning to turn golden. The center should still look slightly pale, which is the hallmark of a perfectly baked sugar cookie. If you leave them too long, they’ll become hard and crumbly. Keep an eye on the first batch to fine‑tune the timing for your oven.
- Cool on a wire rack for 5 minutes before transferring the cookies to the rack to cool completely. This short rest allows the cookies to firm up slightly, making them easier to handle. Once cooled, you can decorate with icing or sprinkles. If you want a glossy finish, brush the tops with a thin glaze of milk and sugar; it gives the cookies a subtle sheen that’s impossible to resist.
That’s it—you did it. But hold on, I've got a few more tricks that'll take this to another level...
Insider Tricks for Flawless Results
The Temperature Rule Nobody Follows
Many bakers bake at 375°F, but this cookie thrives at 350°F. The lower temperature ensures the cookies bake evenly and retain their softness. If your oven runs hot, reduce the temperature by 25°F and add an extra minute of bake time. Always preheat for at least 10 minutes to lock in the correct heat.
Why Your Nose Knows Best
The aroma of butter caramelizing in the oven is a reliable indicator that the cookies are ready. When the scent reaches a sweet, nutty fragrance, it’s time to pull them out. Trust your nose; it’s the most accurate timer for baked goods.
The 5‑Minute Rest That Changes Everything
Letting the cookies rest on the pan for 5 minutes after baking allows the edges to set and the center to firm up. This brief pause prevents the cookies from breaking apart when you transfer them to a wire rack. Skipping this step can result in fragile cookies that crumble under your fingers.
The Secret of Even Spacing
Use a cookie scoop to ensure uniform size. Consistent cookie size means even baking time, which translates to a uniform texture across the batch. If you’re rolling the dough, mark the dough with a small dot on the top to keep the thickness consistent.
The Quick Chill Trick
If you’re baking a large batch, chill the dough for 15 minutes after the initial rest period. This step reduces spreading and yields a crispier edge. Chill the dough again if you’re preparing it a day in advance.
Creative Twists and Variations
This recipe is a playground. Here are some of my favorite ways to switch things up:
Chocolate‑Infused Delight
Add 1 cup of melted dark chocolate to the dough for a rich, chocolatey twist. Replace ¼ cup of flour with the melted chocolate, and let the dough chill for 20 minutes to set the chocolate before baking. The result is a cookie that feels like a chocolate‑butter hybrid.
Citrus Burst
Zest one orange or lemon and fold it into the dough. The citrus zest adds a bright, fresh flavor that cuts through the sweetness. Pair it with a drizzle of lemon glaze for a zesty finish.
Nutty Crunch
Stir in ½ cup of chopped toasted almonds or pecans for a satisfying crunch. The nuts add texture and a nutty aroma that complements the buttery base. Toast the nuts in a dry skillet for 3 minutes before mixing.
Spiced Holiday Edition
Add ½ teaspoon of ground cinnamon and a pinch of ground nutmeg to the dry mix. The spices bring warmth and depth, perfect for holiday gatherings. Finish with a dusting of powdered sugar for a festive touch.
Minty Freshness
Replace the vanilla extract with 1 teaspoon of mint extract. The mint gives a cool, refreshing note that pairs well with chocolate chips or a drizzle of white chocolate. The color contrast also makes the cookies visually stunning.
Vegan Version
Swap the butter for an equal amount of vegan butter and use a flax egg (1 tablespoon ground flaxseed mixed with 3 tablespoons water). The vegan version retains the same texture and flavor profile while being plant‑based. This is perfect for those who love the taste but want to keep it cruelty‑free.
Storing and Bringing It Back to Life
Fridge Storage
Store cooled cookies in an airtight container at room temperature for up to 5 days. The airtight seal prevents the cookies from drying out, preserving their soft interior. For a longer shelf life, keep them in the fridge; they’ll stay fresh for up to 2 weeks.
Freezer Friendly
Place the cooled cookies on a parchment‑lined tray and freeze for up to 3 months. Once frozen, transfer the cookies to a freezer‑safe zippered bag to prevent freezer burn. When ready to enjoy, let them thaw at room temperature for 20 minutes.
Best Reheating Method
To revive frozen cookies, preheat the oven to 350°F (175°C) and bake for 5 minutes. Add a tiny splash of water to the baking sheet before placing the cookies; the steam will keep them moist. For a quick snack, microwave a single cookie on high for 10–12 seconds, but be careful not to overheat.