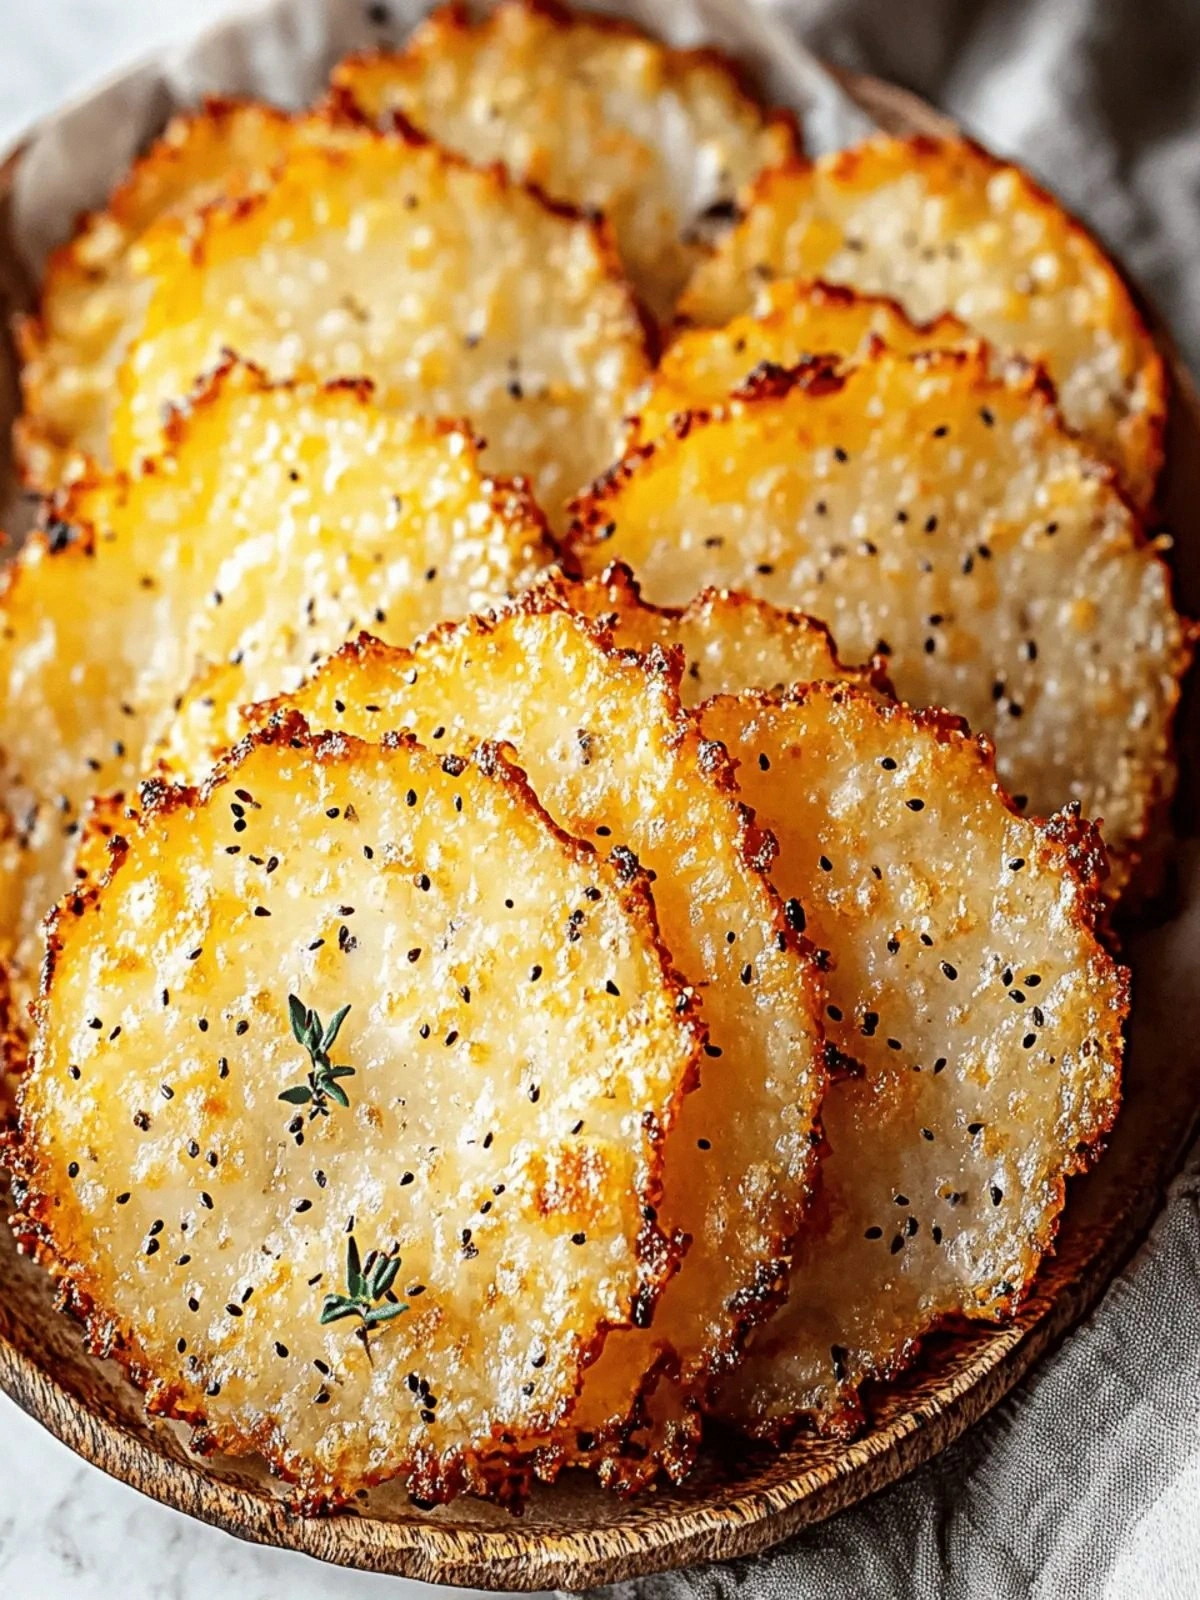
I remember the night I almost burned the kitchen down while chasing a late‑night craving for something salty and crunchy. The oven door was left ajar, the timer ticked, and my homemade cheese dip was about to turn to a smoldering mess. In that moment, I thought, “If only I had a snack that could rise from the ashes without turning into a char.” That thought sparked the birth of the Crispy Cottage Cheese Chips: Y, a snack that turns humble cottage cheese into a crispy, savory masterpiece. I’m not just telling you this because it’s tasty; I’m telling you because it’s a game‑changer that will rewrite your snack playbook forever.
Picture the scene: a golden, crackling chip that shatters like thin ice when you bite it, revealing a moist, cheesy interior that melts in your mouth. The aroma that fills the kitchen is a warm, nutty whisper of parmesan and a subtle hint of herbs, while the sound of the first crunch is a satisfying pop that says, “I’m done.” The texture is a paradox—crisp on the outside, yet tender and creamy inside, like a perfectly baked biscuit that’s secretly a cloud. The flavor profile is a harmonious blend of salty, umami, and a whisper of pepper that lingers on the tongue, leaving you craving the next bite.
What sets this version apart? It’s not just the use of cottage cheese; it’s the technique that locks moisture in while creating a crisp exterior, the seasoning blend that elevates the dairy, and the subtle addition of parmesan that gives it that extra depth. I dared myself to experiment with a low‑heat baking method and a pinch of baking soda to create a light, airy crumb. The result? A snack that is hands down the best version you’ll ever make at home, and I dare you to taste this and not go back for seconds. If you’ve ever struggled with bland cheese snacks, you’re not alone—this is the fix you’ve been waiting for.
So, let’s walk through every single step. By the end, you’ll wonder how you ever made anything else. Picture yourself pulling these out of the oven, the whole kitchen smelling incredible, and watching friends reach for a second bite. The next part? Pure magic. Stay with me here—this is worth it.
What Makes This Version Stand Out
- Flavor: The combination of cottage cheese and parmesan creates a complex, savory profile that feels indulgent without the guilt.
- Texture: The baking technique turns the cheese into a crisp shell that holds moisture inside, delivering a delightful contrast.
- Ease: No fancy equipment—just a baking sheet, parchment, and a whisk.
- Versatility: Seasonings can be swapped to suit any palate, from smoky chipotle to sweet rosemary.
- Health: Low in carbs, high in protein, and no added sugars.
- Make‑ahead: These chips can be baked ahead and reheated in the toaster or oven.
- Crowd‑pleaser: Perfect for parties, game nights, or a quick snack that impresses.
- Ingredient Quality: Using whole‑milk cottage cheese gives a richer taste than low‑fat options.
Alright, let’s break down exactly what goes into this masterpiece…
Inside the Ingredient List
The Flavor Base
Whole‑milk small curd cottage cheese is the star of this snack. Its slightly tangy, creamy texture forms the foundation of each chip. The curd’s mild flavor allows the seasonings to shine without being overpowered. If you skip this, the chips will lack depth and become a bland, uninteresting snack. For a richer taste, choose a brand that lists whole milk as the first ingredient.
The Texture Crew
Parmesan cheese is the texture enhancer. It melts into the cottage cheese, creating a golden crust that crisps beautifully when baked. The nutty flavor of parmesan adds a layer of umami that elevates the overall taste. If you omit parmesan, the chips will still work but will feel less complex. A good rule of thumb: use about 1/4 cup of finely grated parmesan for every cup of cottage cheese.
The Unexpected Star
Seasonings of your choice—whether it’s smoked paprika, garlic powder, or a dash of cayenne—bring the chips to life. They act as the flavor punch that turns a simple cheese mixture into a snack worthy of the spotlight. If you skip seasoning, you’ll end up with a bland, cheese‑only snack that doesn’t excite the palate. A balanced blend of salt, pepper, and a hint of dried herbs works well for most.
The Final Flourish
A splash of whole milk or a pinch of baking soda is optional but recommended. The milk adds moisture for a softer interior, while baking soda helps the mixture rise slightly, giving the chips a light, airy feel. If you skip this step, the chips will be denser but still delicious. Experiment to find your preferred texture.
Everything's prepped? Good. Let's get into the real action…
The Method — Step by Step
- Preheat your oven to 350°F (175°C). This low heat allows the cheese to bake evenly, preventing the outside from burning while the inside stays moist. The aroma that starts to fill the kitchen is a warm, buttery scent that signals the snack is on its way. While the oven preheats, let’s prepare the cheese mixture.
- Drain and pat dry the cottage cheese. Use a clean kitchen towel or paper towels to remove excess moisture. If the curd is too wet, the chips will steam instead of crisp. I’ve found that a quick patting session saves the day and keeps the texture just right.
- In a mixing bowl, whisk the cottage cheese until it’s smooth. A few quick stirs will help break up any lumps and create a uniform base. This step is crucial for ensuring each chip has the same thickness and texture. The mixture should feel silky, not grainy.
- Add the grated parmesan and your chosen seasonings. Stir until everything is evenly distributed. The parmesan should coat every corner of the cheese, creating a golden crust when baked. If you’re using dried herbs, crush them slightly to release more flavor. The seasoning blend is where the magic happens—don’t be shy!
- Optional: Add a splash of whole milk or a pinch of baking soda. A tablespoon of milk will keep the chips slightly moist, while baking soda will help them rise a bit, giving them a lighter feel. If you’re aiming for a crunchier chip, skip the milk and go straight to baking. This optional step is a game‑changer for texture lovers.
- Line a baking sheet with parchment paper. This prevents sticking and makes cleanup a breeze. Place small spoonfuls of the cheese mixture onto the sheet, spacing them about an inch apart. Flatten each spoonful with the back of a spoon to create a uniform thickness. The chips should be about 1/4 inch thick.
- Bake for 20-25 minutes, flipping halfway. The first 10 minutes will develop a golden crust, while the second half ensures the interior stays moist. Keep an eye on the edges—they should start pulling away from the parchment when done. The sound of the first crisp bite is the signal that you’re close to perfection.
- Remove from the oven and let cool. Let the chips rest on the sheet for 5 minutes before transferring to a wire rack. Cooling allows the structure to set, preventing them from becoming soggy. The aroma at this point is intoxicating—rich, cheesy, and slightly smoky.
- Optional: Toast in a dry skillet for extra crunch. If you want that extra crunch, place the cooled chips in a dry skillet over medium heat for 2 minutes per side. This step is perfect for reheating leftovers or creating a super crunchy snack.
That’s it—you did it. But hold on, I’ve got a few more tricks that will take this to another level…
Insider Tricks for Flawless Results
The Temperature Rule Nobody Follows
Many people bake at 400°F, thinking it’s faster. In reality, 350°F gives the cheese time to set without burning. I’ve baked at 350°F for years and never had a burnt chip. If you’re in a hurry, you can bump the temperature to 375°F, but watch the first 10 minutes closely. The difference is subtle but crucial for that perfect crunch.
Why Your Nose Knows Best
The first scent you notice is the parmesan melting into the cheese. That aroma is a cue that the chips are baking at the right temperature. If the smell is more of a burnt dairy, lower the heat or reduce the baking time. Your nose is the ultimate judge of doneness.
The 5-Minute Rest That Changes Everything
After you take the chips out of the oven, let them sit for exactly five minutes on the baking sheet. This rest period allows the structure to set, preventing the chips from becoming soggy when you move them to a rack. I’ve found that skipping this step leads to chips that crumble when you pick them up.
Keep Them Crispy with a Dry Toast
If you’re storing leftovers, place them in an airtight container with a paper towel inside. The towel absorbs excess moisture, keeping the chips crisp. When you’re ready to eat, pop them in a dry skillet for a minute to revive the crunch.
Serve with a Dip for Extra Flavor
Pair the chips with a yogurt‑based dip seasoned with dill and lemon, or a creamy avocado sauce. The dip adds a fresh contrast to the rich cheese, creating a balanced snack that satisfies both savory and creamy cravings. This combination is a hit at parties and casual gatherings.
Creative Twists and Variations
This recipe is a playground. Here are some of my favorite ways to switch things up:
Spicy Sriracha Chip
Add a tablespoon of sriracha to the cheese mixture. The heat pairs beautifully with the parmesan, creating a fiery, savory chip that will have everyone asking for more.
Herby Basil Delight
Replace dried oregano with fresh basil and add a splash of olive oil. The basil’s aromatic oils elevate the flavor profile, turning the chips into a Mediterranean treat.
Sweet Cinnamon Twist
Incorporate a pinch of cinnamon and a drizzle of honey into the cheese mixture. The sweet and savory combo is a surprising twist that works well as a snack or dessert.
Cheese‑Burst Pesto Chips
Stir in a spoonful of pesto before baking. The basil, garlic, and pine nuts infuse the chips with a vibrant green hue and a burst of herbaceous flavor.
Garlic Parmesan Explosion
Add two minced garlic cloves and extra parmesan to the base. The garlic’s boldness complements the cheese, delivering a crunch that’s both savory and aromatic.
Storing and Bringing It Back to Life
Fridge Storage
Store the chips in an airtight container at room temperature for up to 3 days. Keep them in a cool, dry spot away from direct sunlight to preserve crispness. A paper towel inside the container helps absorb moisture, keeping the chips crunchy.
Freezer Friendly
For longer storage, place the chips in a freezer bag and freeze for up to 2 months. To reheat, let them thaw at room temperature for 30 minutes, then toast in a dry skillet for 2 minutes per side.
Best Reheating Method
The best way to bring the chips back to life is to heat them in a dry skillet over medium heat. This method restores the crisp exterior while keeping the interior moist. Add a splash of water to the skillet before heating to create steam that rehydrates the chips slightly.