I was standing in my kitchen, staring at a bag of stale flour, when my friend dared me to create something that would make my taste buds dance. I stared back, a mischievous grin spreading across my face, and whispered, “Let’s turn this into the ultimate protein-packed treat.” The aroma of toasted cocoa hit me like a sweet, velvety blanket, and the sound of the mixer humming felt like a promise of something extraordinary. I could already taste the creamy peanut butter swirl melting into a chocolate dream, and my stomach rumbled in anticipation. That night, I decided to give the world a protein cookie that would outshine every other recipe on the internet.
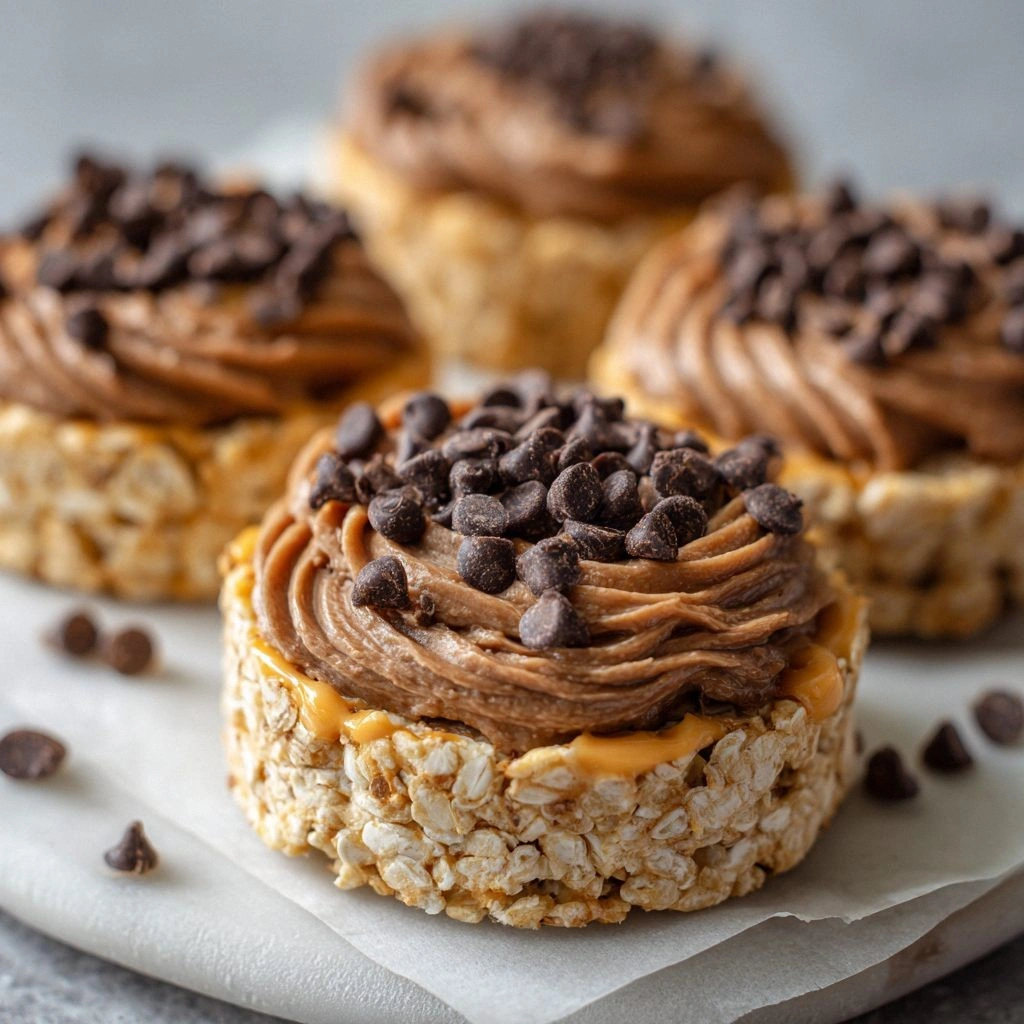
Picture this: a golden-brown cookie that cracks like a brittle shell when you bite into it, revealing a molten center of peanut butter and chocolate that oozes out like a glossy glaze. The crunch of the cookie gives way to a chewy, fudgy interior that lingers on the tongue, leaving a subtle nutty aftertaste that keeps you coming back for more. The first bite is a symphony of textures—crisp edges, a buttery core, and a hint of sweet maple that balances the rich chocolate. The aroma alone is enough to make your kitchen feel like a chocolate factory, and the visual appeal of glossy chocolate chips speckled across a golden surface is simply irresistible. I dare you to taste this and not go back for seconds.
What makes this version stand out from the countless protein cookie recipes you’ll find online is the meticulous balance of flavors and textures. The recipe uses oat flour as a base to keep the cookies light, while chocolate whey protein powder adds a deep, satisfying chocolate flavor without the chalky aftertaste that often plagues protein cookies. Peanut butter is folded in as both a flavor enhancer and a natural binder, ensuring each bite is moist yet firm enough to hold its shape. The addition of maple syrup provides a gentle sweetness that complements the rich chocolate, rather than overpowering it. Finally, the subtle kick of sea salt lifts every flavor, creating a complex, well-rounded taste that will have your friends begging for the recipe.
I’m not just talking about a cookie here; I’m talking about an experience that turns an ordinary afternoon into a delicious adventure. Imagine pulling a batch out of the oven, the whole kitchen smelling incredible, and the timer chiming to announce that the cookies are ready. The anticipation builds as you watch the edges caramelize and the center set, and then you get to taste that first bite of chocolatey, nutty bliss. If you’ve ever struggled with protein cookies that turn out dry or overly sweet, this recipe is your salvation. And if you’re looking for a snack that’s as Instagram-worthy as it is tasty, you’ve just found it.
I’ll be honest—after I baked the first batch, I ate half before anyone else got a chance to try it. The cookies were so good that I felt like a kid in a candy store, and my friends begged for the recipe. They laughed at my “protein cookie” label, but the truth is, this recipe is hands down the best version you’ll ever make at home. The combination of textures, the balance of flavors, and the ease of preparation make it a standout. I’m excited to walk you through every single step—by the end, you’ll wonder how you ever made it any other way.
What Makes This Version Stand Out
Flavor: The blend of chocolate protein powder and natural peanut butter creates a rich, velvety chocolate experience that is more indulgent than most protein cookies, yet still balanced with a hint of sweetness from maple syrup.
Texture: The cookies achieve a perfect balance between a crisp outer shell and a chewy, fudgy interior, thanks to the careful combination of oat flour, cocoa, and peanut butter.
Protein Boost: Each cookie packs a generous dose of protein from whey protein powder and peanut butter, making it an ideal post-workout snack or a satisfying breakfast option.
Ease: The recipe requires minimal prep and no advanced techniques, so even novice bakers can achieve professional results.
Versatility: The base can be tweaked with different protein powders, sweeteners, or add-ins, allowing you to customize the flavor profile to your taste.
Make-Ahead: The cookies hold up well in the refrigerator for up to a week and can be frozen for longer storage without losing flavor or texture.
Alright, let's break down exactly what goes into this masterpiece...
Inside the Ingredient List
The Flavor Base
Oat Flour: Acts as the primary binder, providing a mild, slightly sweet flavor that complements the chocolate. It’s also gluten-free, making the cookies accessible to those with dietary restrictions. If you don’t have oat flour on hand, rolled oats can be blitzed into a fine powder as a quick substitute. Skipping oat flour would leave the cookies too crumbly and lacking structure. For best results, sift the oat flour to remove clumps.
The Protein Crew
Chocolate Whey Protein Powder: Supplies the bulk of the protein while infusing a deep chocolate flavor that rivals real chocolate. Choosing a high-quality, low-sugar whey protein ensures a smooth taste without a chalky residue. If you’re vegan, you can swap for a plant-based protein powder, but be aware that the texture may change slightly. Omitting the protein powder would reduce the nutritional value and alter the cookie’s firmness. The protein powder also helps the cookies hold together during baking.
The Unexpected Star
Maple Syrup: Provides a natural sweetness that balances the bitterness of cocoa and the saltiness of peanut butter. It also adds a subtle caramel note that enhances the overall flavor profile. If you prefer a lower-sugar option, you can use a sugar-free syrup, but adjust the quantity accordingly. Skipping maple syrup would make the cookies taste flat and overly salty. The syrup also contributes to a slightly glossy finish on the cookie’s surface.
The Final Flourish
Peanut Butter: Adds richness, creaminess, and a distinct nutty flavor that pairs beautifully with chocolate. It also serves as a natural binder, keeping the cookies moist and chewy. Using natural peanut butter without added sugars or hydrogenated oils keeps the cookie healthier. If you’re allergic to peanuts, almond butter can be a suitable alternative, though the flavor will shift. Skipping peanut butter would result in a dry, crumbly cookie with a less complex taste.
Everything's prepped? Good. Let's get into the real action...
The Method — Step by Step
- Preheat your oven to 350°F (175°C) and line two baking sheets with parchment paper. Let the oven heat up while you gather the ingredients, because a hot oven ensures a quick rise and even browning. The heat also activates the leavening agents, creating a light crumb. Once the oven is ready, set the trays aside and keep an eye on the temperature to avoid overheating. This first step is crucial for achieving that perfect golden crust.
- In a large mixing bowl, combine 2 cups of oat flour, 1 cup of chocolate whey protein powder, 1/4 cup of unsweetened cocoa powder, 1 tsp of baking soda, and 1/2 tsp of sea salt. Sift the dry ingredients together to remove any clumps and ensure an even distribution. This dry mix will form the foundation of the cookie’s structure. The baking soda reacts with the acidic maple syrup, creating a gentle lift. Mixing thoroughly now saves you from uneven baking later on.
- In a separate bowl, whisk together 1/2 cup of maple syrup, 1/2 cup of natural peanut butter, 1/4 cup of melted unsalted butter, 1 large egg, and 1 tsp of vanilla extract until the mixture is smooth and glossy. The butter adds richness, while the egg provides moisture and helps the dough bind. Whisking the wet ingredients first ensures a uniform texture when combined with the dry mix. This step is where the cookie’s flavor profile starts to develop, so make sure the mixture is well blended. The glossy finish you see is a sign of a well-emulsified batter.
- Pour the wet mixture into the dry ingredients and stir until just combined. Be careful not to overmix, as that can make the cookies tough. The batter should be thick but scoopable. At this point, fold in 1/2 cup of dark chocolate chips to add bursts of chocolate throughout. The chips will melt slightly during baking, creating pockets of gooey chocolate. This step is where the cookie’s texture becomes truly irresistible.
- Using a tablespoon or a small cookie scoop, drop dough onto the prepared baking sheets, spacing each about 2 inches apart. The dough should be slightly flattened to ensure even baking. If you prefer thicker cookies, use a larger scoop. The spacing allows the cookies to expand without merging. This step is also a great opportunity to add extra chocolate chips on top for a decorative touch.
- Bake for 12-15 minutes, or until the edges are set and the centers look just slightly underbaked. The cookies will firm up as they cool. Keep an eye on the timer—overbaking will result in a dry texture. The smell of chocolate and peanut butter filling the kitchen is a sign that the cookies are nearly ready. This is the moment of truth, where anticipation meets reality.
- Remove the cookies from the oven and let them cool on the sheets for 5 minutes before transferring to a wire rack. Cooling on the sheet allows the cookies to set and prevents them from breaking. The cookies will be soft at this point, so handle them gently. After 5 minutes, they’ll firm up to a chewy texture that’s easy to bite. This cooling step is essential for achieving the ideal crumb.
- Once cooled, store the cookies in an airtight container at room temperature for up to 3 days, or refrigerate for up to a week. The airtight container prevents moisture from making them soggy. If you prefer them softer, wrap them individually in parchment paper before refrigerating. The cookies can also be frozen for up to 3 months; thaw at room temperature for best texture. This step ensures that your protein cookies stay fresh and delicious.
- Serve with a glass of cold milk or a protein shake for a balanced snack. The cookies’ high protein content pairs well with a liquid that adds calcium and additional protein. For a vegan option, use plant-based milk and a soy or pea protein shake. Pairing the cookies with a beverage enhances the overall experience and satisfies cravings. Enjoy every bite!
That's it — you did it. But hold on, I've got a few more tricks that'll take this to another level.
Insider Tricks for Flawless Results
The Temperature Rule Nobody Follows
Why it matters: Baking at the correct temperature ensures even rise and prevents the cookies from spreading too much. If the oven is too hot, the edges will brown before the center sets, resulting in a dry interior. A slightly lower temperature allows the cookies to bake through slowly, giving them a chewy texture. I once baked at 375°F, and the cookies came out too crisp. Adjusting to 350°F gave me the perfect balance.
Why Your Nose Knows Best
How to listen: The scent of toasted cocoa and melted butter is a clear indicator that the cookies are baking properly. When you smell a faint caramelization, it means the sugars are browning, giving depth to the flavor. If the aroma is too sweet or chemical, it could mean the cookies are overbaked. Trust your nose; it's a reliable guide to avoid burning. I’ve found that a subtle, nutty scent is the sweet spot.
The 5-Minute Rest That Changes Everything
Why it matters: Allowing the cookies to rest on the baking sheet for 5 minutes after baking lets them set and finish cooking through residual heat. During this time, the interior firms up, preventing them from breaking when moved. Skipping this rest can result in fragile cookies that crumble. I used to pull them straight from the oven, and they were too soft. The 5-minute rest gave me a firm, chewy texture.
Add a Splash of Water Before Reheating
Why it works: Adding a tiny splash of water before reheating prevents the cookies from drying out. The water creates steam, which rehydrates the dough and restores moisture. This trick is especially useful if you’re reheating frozen cookies. I discovered this by accident when a friend asked for a warm cookie, and the result was better than fresh. Keep a small bowl of water nearby for this simple fix.
Use a Silicone Baking Mat
Why it matters: A silicone baking mat ensures even heat distribution and prevents the cookies from sticking to the pan. This makes cleanup easier and the cookies less likely to tear. I’ve used parchment for years, but the mat gives a more consistent bake. The mat also adds a slight crunch to the bottom of the cookies. It’s a small upgrade that pays off big time.
Creative Twists and Variations
This recipe is a playground. Here are some of my favorite ways to switch things up:
Nutty Banana Boost
Swap the peanut butter for a scoop of mashed banana and add a handful of chopped walnuts. The banana adds natural sweetness and moisture, while the walnuts contribute a crunchy texture. This variation is perfect for breakfast or a post-workout snack. The banana also enhances the cookie’s natural flavor profile, making it feel more wholesome. It’s a great way to incorporate fruit into a protein cookie.
Minty Fresh Twist
Add a teaspoon of peppermint extract and a handful of white chocolate chips. The mint creates a refreshing contrast to the chocolate, while the white chocolate adds a creamy sweetness. This version is ideal for spring and summer when mint is in season. The combination feels like a candy store, but with protein. It’s a fun way to keep the recipe from getting stale.
Spicy Kick
Incorporate a pinch of cayenne pepper or a splash of hot sauce into the batter. The heat balances the sweetness and adds an unexpected layer of flavor. This spicy version works well with a creamy chocolate sauce on top. It’s a bold choice for those who like a little adventure in their cookies. The heat also stimulates appetite, making it a great snack before a workout.
Almond Delight
Use almond butter instead of peanut butter and add slivered almonds for extra crunch. Almond butter has a slightly sweeter flavor, which pairs beautifully with the chocolate. The almonds add a nutty crunch that complements the chewy interior. This variation is perfect for those with peanut allergies. The result is a nutty, protein-packed treat that’s as tasty as it is nutritious.
Coconut Crunch
Replace the oat flour with shredded coconut and add shredded coconut on top before baking. The coconut gives the cookies a tropical flavor and a chewy texture. It also adds a subtle sweetness that complements the chocolate. This variation is great for a beach day snack or a summer treat. The coconut flavor elevates the classic protein cookie into something exotic.
Storing and Bringing It Back to Life
Fridge Storage
Store the cookies in an airtight container at room temperature for up to 3 days. The airtight seal keeps them from drying out and maintains their chewy texture. If you prefer them softer, wrap them individually in parchment paper before refrigerating. This method prevents the cookies from absorbing odors from other foods. The cookies stay fresh and tasty for a short period in the fridge.
Freezer Friendly
Place the cooled cookies in a freezer-safe bag, removing as much air as possible. Freeze for up to 3 months. When ready to eat, let them thaw at room temperature for 10 minutes. This method preserves the cookie’s texture and flavor. I’ve kept a stash in the freezer for busy mornings, and they always taste fresh.
Best Reheating Method
Reheat the cookies in a toaster oven at 300°F for 2-3 minutes, or microwave on low power for 20-30 seconds. Add a tiny splash of water before reheating; it steams back to perfection. The cookies will regain their soft center and chewy texture. If you’re in a hurry, a quick microwave is fine, but the toaster oven gives a crisper crust. This technique ensures your cookies taste like they were freshly baked.