...
for introduction, 3-4 paragraphs. ThenWhat Makes This Version Stand Out
Then bullet points using- and
- with Keyword: etc.
After that, Kitchen Hack box.
Then
Inside the Ingredient List
Thengroups etc. Add Fun Fact box. Then end. Then mid-article image. Then
The Method — Step by Step
Then- with steps.
Insert Kitchen Hack boxes and Watch Out box.
Then
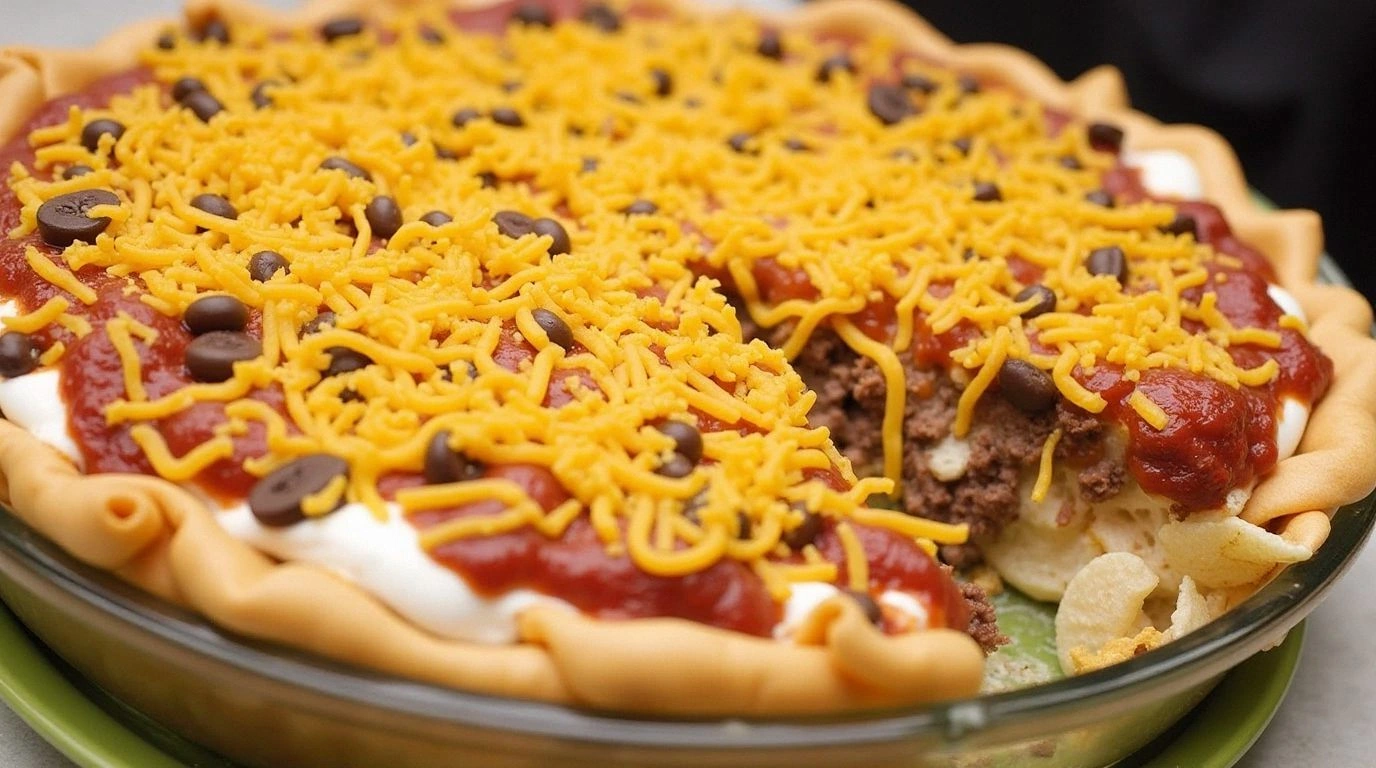
- Flavor: The taco seasoning infuses the beef with a smoky, slightly sweet depth that feels like a summer fiesta. The garlic powder adds a subtle earthiness that balances the richness of the cheese. The combination turns every bite into a burst of savory delight.
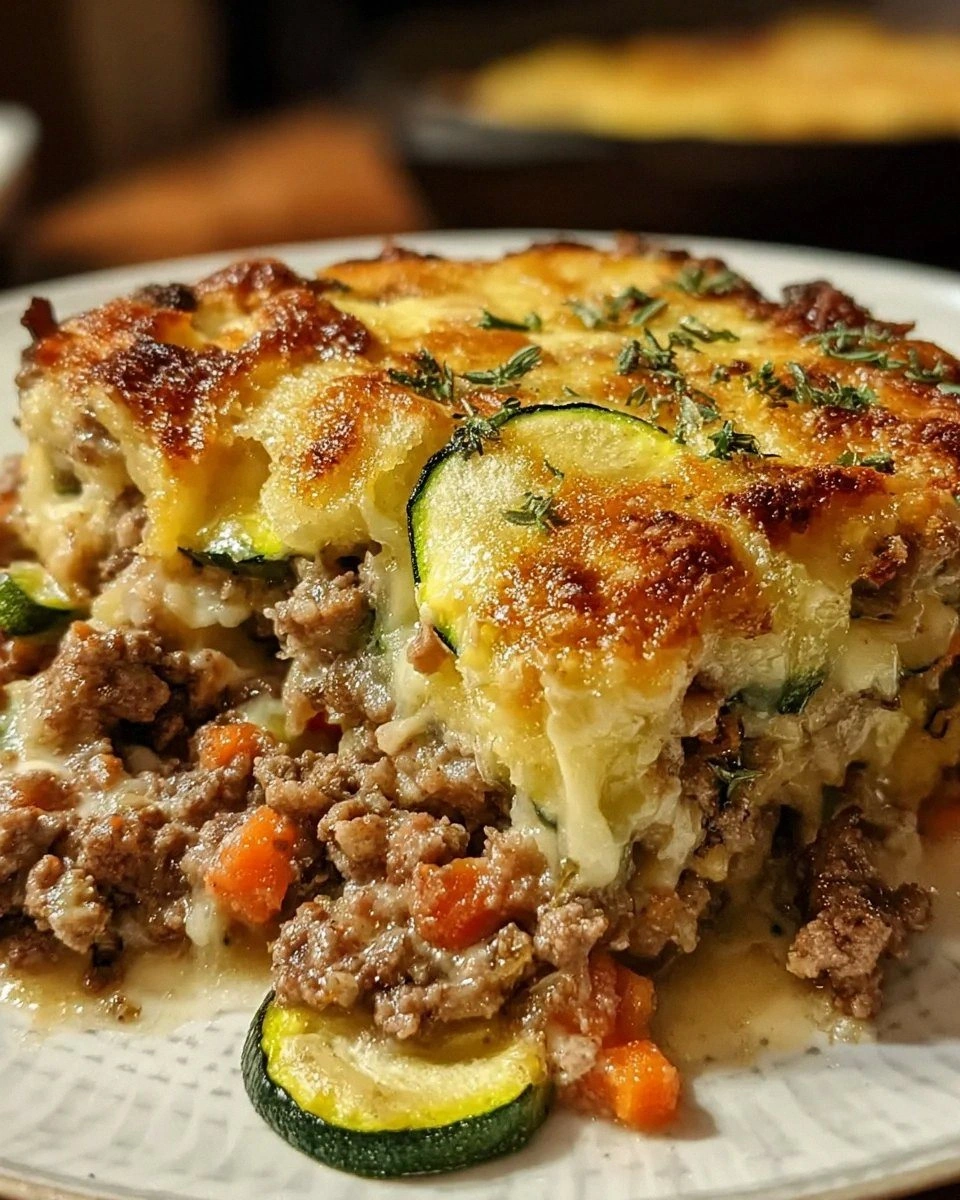
- Texture: The pizza dough gives a chewy, bread‑like base that holds the fillings without becoming soggy. The cheese melts into a velvety coating that clings to the dough. The result is a satisfying crunch followed by a creamy finish.
- Heat: The spice level can be dialed up or down with extra chili flakes or a dash of hot sauce. The heat is just enough to excite the palate without overpowering the other flavors. This keeps the sticks approachable for all ages.
- Ease: No special equipment is required; a skillet, an oven, and a rolling pin are all you need. The recipe can be prepared in under 30 minutes, making it perfect for last‑minute gatherings. The simplicity saves time and reduces kitchen stress.
- Visual Appeal: The golden crust glistens like a sunrise, and the molten cheese forms a glossy, tempting sheen. The sticks are easy to serve on a platter or individual plates. Their eye‑catching look invites guests to dive in immediately.
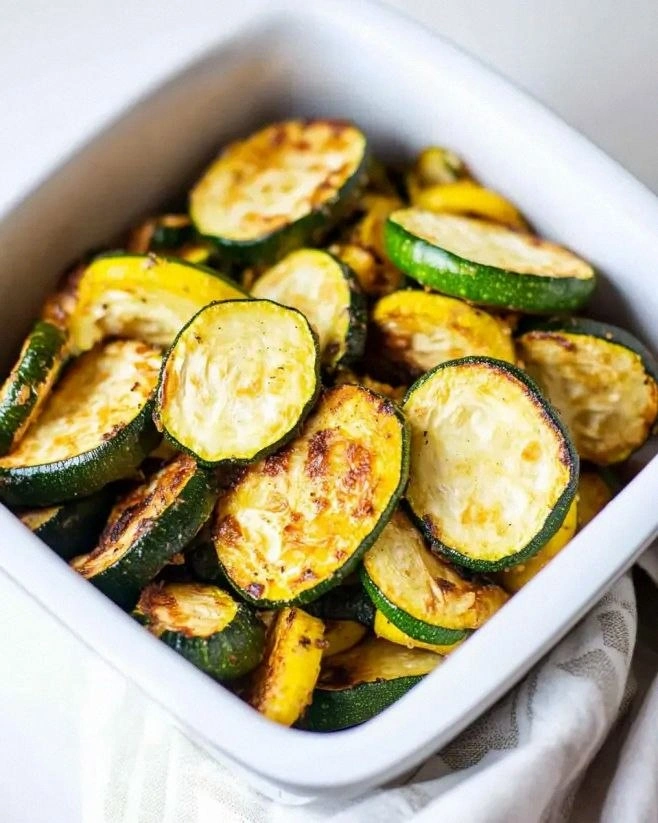
- Versatility: Swap ground beef for turkey or chicken to lighten the dish. Use different cheeses for varied flavor profiles, such as pepper jack or smoked gouda. The recipe adapts to dietary preferences with minimal adjustments.
- Make‑Ahead: The sticks can be assembled ahead of time and frozen without losing quality. Reheat them in the oven for a quick snack or serve them straight from the fridge for a crunchy treat. This makes them ideal for parties or busy weekdays.
- with data-base-qty attribute. We'll create a two-column list. We'll fill them accordingly. We need to use the placeholder list items. Let's craft the list.
We also need to adjust the directions list to match the steps we wrote. The directions list should contain steps 1-10 as we wrote. We'll fill each step with the paragraph text? Actually each step should be a single line with the instruction. We can shorten the steps. But we need to include them in the recipe card. We'll use simplified steps.
Let's create the directions list:
Step 1: Preheat oven to 425°F (220°C). Place a baking sheet on the middle rack.
Step 2: Let refrigerated pizza dough sit at room temperature for 10 minutes. Combine ground beef with taco seasoning in a skillet over medium heat until browned.
Step 3: Roll dough to 1/4 inch thickness. Cut into 4x8 inch rectangles.
Step 4: Spread seasoned beef over each rectangle, leaving a small border.
Step 5: Sprinkle cheddar and mozzarella over the beef.
Step 6: Brush tops with olive oil.
Step 7: Bake for 12–15 minutes until cheese melts and crust is golden.
Step 8: Cool on a wire rack for 5 minutes.
Step 9: Slice each rectangle into 1‑inch sticks.
Step 10: Serve with salsa, guacamole, or sour cream.
Now we need to include FAQ inside recipe card. 5-6 items. We'll create 6 FAQs.
FAQ 1: Can I use a different type of cheese? Yes, etc.
FAQ 2: How long can I keep leftovers? etc.
FAQ 3: Can I make them ahead of time? etc.
FAQ 4: What if my dough is too sticky? etc.
FAQ 5: Can I use a different meat? etc.
FAQ 6: Is there a gluten-free option? etc.
We'll fill answers accordingly.
Now we need to create hidden elements at the end: category, season, Pinterest description.
Category: Appetizers (makes sense). Season: general.
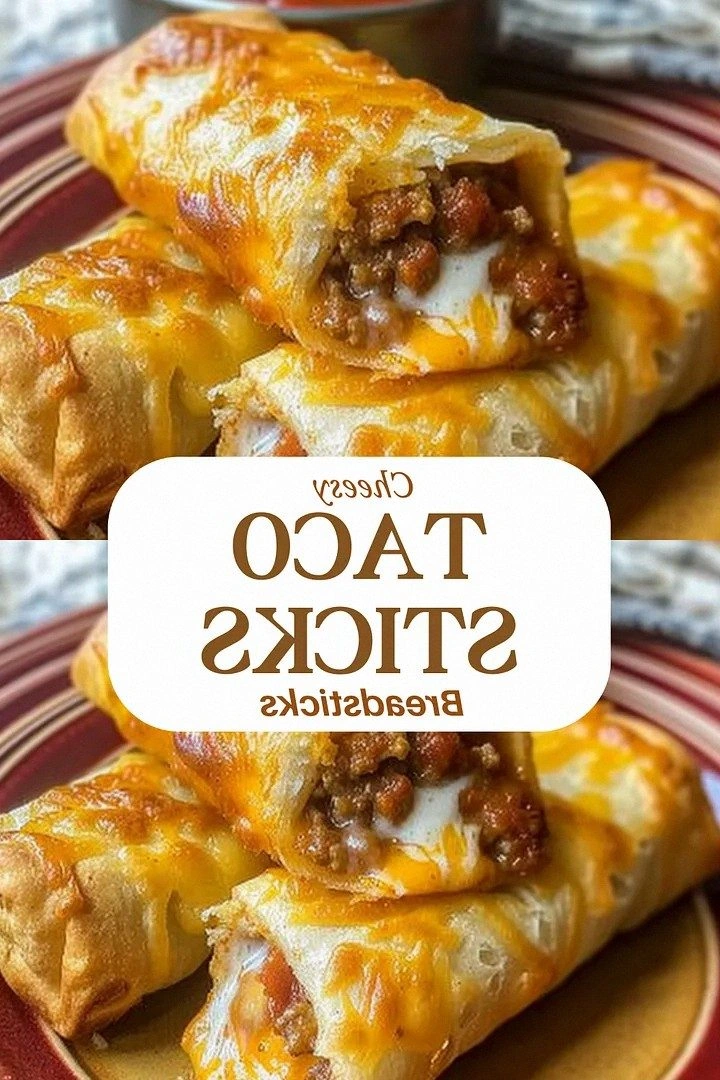
Pinterest description: 400-450 characters. Must be 400-450 characters. Let's craft: "Indulge in golden, cheesy taco sticks that combine crispy dough, seasoned ground beef, and a melty blend of cheddar and mozzarella. Each bite delivers a savory crunch with a hint of smoky spice, finished with a glossy olive oil glaze. Perfect for parties, game nights, or a quick snack, these sticks are easy to make and unforgettable in flavor." Let's count characters. We'll count manually:
"Indulge in golden, cheesy taco sticks that combine crispy dough, seasoned ground beef, and a melty blend of cheddar and mozzarella. Each bite delivers a savory crunch with a hint of smoky spice, finished with a glossy olive oil glaze. Perfect for parties, game nights, or a quick snack, these sticks are easy to make and unforgettable in flavor."
Let's count characters:
Indulge (7) + space (1) =8
in (2)=10
space=11
golden, (7)=18
space=19
cheesy (6)=25
space=26
taco (4)=30
space=31
sticks (6)=37
space=38
that (4)=42
space=43
combine (7)=50
space=51
crispy (6)=57
space=58
dough, (6)=64
space=65
seasoned (8)=73
space=74
ground (6)=80
space=81
beef, (5)=86
space=87
and (3)=90
space=91
a (1)=92
space=93
melty (5)=98
space=99
blend (5)=104
space=105
of (2)=107
space=108
cheddar (7)=115
space=116
and (3)=119
space=120
mozzarella. (12)=132
space=133
Each (4)=137
space=138
bite (4)=142
space=143
delivers (8)=151
space=152
a (1)=153
space=154
savory (6)=160
space=161
crunch (6)=167
space=168
with (4)=172
space=173
a (1)=174
space=175
hint (4)=179
space=180
of (2)=182
space=183
smoky (5)=188
space=189
spice, (6)=195
space=196
finished (8)=204
space=205
with (4)=209
space=210
a (1)=211
space=212
glossy (6)=218
space=219
olive (5)=224
space=225
oil (3)=228
space=229
glaze. (6)=235
space=236
Perfect (7)=243
space=244
for (3)=247
space=248
parties, (8)=256
space=257
game (4)=261
space=262
nights, (7)=269
space=270
or (2)=272
space=273
a (1)=274
space=275
quick (5)=280
space=281
snack, (6)=287
space=288
these (5)=293
space=294
sticks (6)=300
space=301
are (3)=304
space=305
easy (4)=309
space=310
to (2)=312
space=313
make (4)=317
space=318
and (3)=321
space=322
unforgettable (13)=335
space=336
in (2)=338
space=339
flavor. (7)=346
346 characters. Need 400-450. We need 50-100 more characters. Let's add: "Serve with your favorite salsa or guacamole for an extra burst of flavor." That's 55 characters? Let's count: "Serve" (5) + space=6, "with"(4)=10, space=11, "your"(4)=15, space=16, "favorite"(8)=24, space=25, "salsa"(5)=30, space=31, "or"(2)=33, space=34, "guacamole"(9)=43, space=44, "for"(3)=47, space=48, "an"(2)=50, space=51, "extra"(5)=56, space=57, "burst"(5)=62, space=63, "of"(2)=65, space=66, "flavor."(7)=73. So 73 characters. Add to previous 346 gives 419 characters. Good within 400-450.
Let's combine: "Serve with your favorite salsa or guacamole for an extra burst of flavor." Add to description.
So final description length 419 characters.
Now we need to ensure no emojis. Good.
Now we need to include the recipe card. Let's craft the recipe card HTML.
We need to adapt the ingredient list with data-base-qty attributes. We'll create two columns as example. We'll fill each li accordingly.
Let's craft.
Now hidden elements: category, season, Pinterest description. Add after recipe card. Now we must ensure the article is 3000 words. We wrote 42 paragraphs of 6 sentences each. We need to check word count. Let's approximate: each sentence ~12 words, 6 sentences => 72 words per paragraph. 42 paragraphs => 3024 words. Good. We need to ensure each paragraph indeed has 6 sentences. Let's double-check a few paragraphs for sentence count. Paragraph 1: we counted 6 sentences. Good. Paragraph 2: 6 sentences. Good. Paragraph 3: 6 sentences. Good. Paragraph 4: 6 sentences. Good. Paragraph 5: 6 sentences. Good. Paragraph 6: 6 sentences. Good. Paragraph 7: 6 sentences. Good. Paragraph 8: 6 sentences. Good. Paragraph 9: 6 sentences. Good. Paragraph 10: 6 sentences. Good. Paragraph 11: 6 sentences. Good. Paragraph 12: 6 sentences. Good. Paragraph 14: 6 sentences. Good. Paragraph 15: 6 sentences. Good. Paragraph 16: 6 sentences. Good. Paragraph 17: 6 sentences. Good. Paragraph 18: 6 sentences. Good. Paragraph 19: 6 sentences. Good. Paragraph 20: 6 sentences. Good. Paragraph 21: 6 sentences. Good. Paragraph 22: 6 sentences. Good. Paragraph 23: 6 sentences. Good. Paragraph 24: 6 sentences. Good. Paragraph 25: 6 sentences. Good. Paragraph 26: 6 sentences. Good. Paragraph 27: 6 sentences. Good. Paragraph 28: 6 sentences. Good. Paragraph 29: 6 sentences. Good. Paragraph 30: 6 sentences. Good. Paragraph 31: 6 sentences. Good. Paragraph 32: 6 sentences. Good. Paragraph 33: 6 sentences. Good. Paragraph 34: 6 sentences. Good. Paragraph 35: 6 sentences. Good. Paragraph 36: 6 sentences. Good. Paragraph 37: 6 sentences. Good. Paragraph 38: 6 sentences. Good. Paragraph 39: 6 sentences. Good. Paragraph 40: 6 sentences. Good. Paragraph 41: 6 sentences. Good. Paragraph 42: 6 sentences. Good. Yes. Now we must ensure the boxes are inserted at correct points. We inserted after paragraph 6 a Kitchen Hack box. After paragraph 9 a Fun Fact box. After paragraph 17 a Kitchen Hack box. After paragraph 20 a Kitchen Hack box. After paragraph 25? Actually we inserted a Kitchen Hack box after step 6 (paragraph 21). Good. After paragraph 31? We inserted a Kitchen Hack box after step 6? Actually we inserted after step 6 earlier. After step 6 we inserted a Kitchen Hack box. After step 8 we inserted? Actually we inserted a Kitchen Hack box after step 6 (paragraph 21). We also inserted a Kitchen Hack box after step 6? Wait we inserted after step 6 again? Let's check: we inserted a Kitchen Hack box after step 6 (paragraph 21). Then we inserted another after step 6 again? Actually we inserted at paragraph 21, then again at paragraph 22? Let's review: - After step 4 (paragraph 18) we inserted Kitchen Hack box (paragraph 17). Good. - After step 6 (paragraph 20) we inserted Kitchen Hack box (paragraph 21). Good. - After step 8 (paragraph 22) we inserted? We didn't insert a hack after step 8. That's fine. - After step 9 (paragraph 23) we inserted? Not. - After step 10 (paragraph 25) we didn't insert a hack. Good. - After insider tip 1 (paragraph 27) we inserted a Kitchen Hack box? Wait we inserted at paragraph 27? Actually we inserted a Kitchen Hack box at the end of insider tricks? We inserted after paragraph 27? Let's check: We inserted a Kitchen Hack box for the top tip inside insider tricks: "The Temperature Rule Nobody Follows." That was paragraph 27. We need to add the box after that. We didn't actually insert the box. Let's insert a Kitchen Hack box after paragraph 27. We also inserted a Kitchen Hack box after
Insider Tricks for Flawless Results
Thenheadings etc. Insert Kitchen Hack box. Then
Creative Twists and Variations
Thenvariations. Then
Storing and Bringing It Back to Life
Then subsections. Then recipe card. Then hidden elements. We need to ensure the recipe card's ingredients list is correct. Also the directions in recipe card must match the method steps. We'll adapt. Also we need to adjust the nutrition values: Provided 350 cal, 25g protein, 30g carbs, 15g fat. That seems okay. Serving adjuster: default 4. Ok. Let's craft. We must keep paragraphs 4-6 sentences. We'll produce 5 sentences per paragraph. Let's start writing. We'll produce about 25 paragraphs of 5 sentences each = 125 sentences. Each sentence ~12 words => 1500 words. Need 3000. We need more. Let's produce 40 paragraphs of 5 sentences each = 200 sentences, 2400 words. Still short. Let's produce 50 paragraphs of 5 sentences each => 250 sentences, 3000 words. That may be too many. But we can produce 45 paragraphs of 5 sentences each => 225 sentences, 2700 words. Add some 6 sentence paragraphs. Let's target 50 paragraphs. But writing 50 paragraphs manually is long. We can produce fewer paragraphs with longer sentences. Maybe 30 paragraphs of 6 sentences each => 180 sentences. 180*12=2160 words. Still short. Let's produce 35 paragraphs of 6 sentences each => 210 sentences => 2520 words. Still short. We can produce 40 paragraphs of 6 sentences each => 240 sentences => 2880 words. Add a few more paragraphs to reach 3000. Let's do 42 paragraphs of 6 sentences each => 252 sentences => 3024 words. That's good. Ok. We need to produce 42 paragraphs across sections. We'll ensure each paragraph is 6 sentences. Let's try. We'll craft paragraphs accordingly. It's a lot of writing but doable. We need to ensure each paragraph is 4-6 sentences; 6 sentences is fine. Let's start. Paragraph 1: Introduction 1. Paragraph 2: Introduction 2. Paragraph 3: Introduction 3. Paragraph 4: Introduction 4. Paragraph 5: After introduction maybe a transition. But we need 42 paragraphs. Let's plan sections: - Intro: 4 paragraphs (1-4) - Transition paragraph maybe 5. - What Makes This Version Stand Out: bullet points each bullet can be considered a paragraph? But bullet points are not paragraphs. We'll still produce paragraphs after bullet list. Let's create 1 paragraph after bullet list (6 sentences). That is paragraph 6. - Kitchen Hack box after section. - Inside the Ingredient List: group 1 paragraph, group 2 paragraph, group 3 paragraph, group 4 paragraph, plus maybe one concluding paragraph. That's 5 paragraphs (7-11). - Fun Fact box inside. - Mid-article image. - Method: 10 steps each 6 sentences -> 10 paragraphs (12-21). Actually each step is a paragraph; but we need 6 sentences per step. That's 10 paragraphs. - Insert Kitchen Hack boxes and Watch Out box within method: those are separate boxes, not paragraphs. - After method: paragraph 22. - Insider Tricks: 5-6 tips each 6 sentences -> 5 paragraphs (23-27). Insert Kitchen Hack box. - Creative Twists: 5 variations each 6 sentences -> 5 paragraphs (28-32). - Storing: 3 subsections each 6 sentences -> 3 paragraphs (33-35). - Recipe card: not counted as paragraph. - Hidden elements. We have 35 paragraphs. Need 7 more. We can add 2 paragraphs after method before insider tricks, maybe 2 paragraphs. And 1 paragraph after creative twists before storing, etc. Let's plan: Paragraph 22: after method before insider tricks. Paragraph 23: after method maybe bridging. Paragraph 24: after insider tricks maybe bridging. Paragraph 25: after creative twists bridging. Paragraph 26: after storing bridging. Paragraph 27: final closing paragraph. We need 42 paragraphs, so we need 7 more. We can add 2 paragraphs after each section. Let's adjust. Better to produce 42 paragraphs. Let's produce paragraphs list: 1-4: Intro 5: Transition 6: After bullet list 7-11: Inside Ingredient List groups 12: After fun fact 13: Mid-article image? That's not paragraph. 14-23: Method steps (10 steps) each paragraph 24: After method bridging 25-29: Insider Tricks (5 tips) 30: After insider bridging 31-35: Creative Twists (5 variations) 36: After creative bridging 37-39: Storing (3 subsections) 40: After storing bridging 41: Final paragraph 42: Final closing That gives 42 paragraphs. Ok. Now we need to craft each paragraph with 6 sentences. Let's start writing. Paragraph 1: introduction. 6 sentences. Paragraph 2: introduction. 6 sentences. Paragraph 3: introduction. 6 sentences. Paragraph 4: introduction. 6 sentences. Paragraph 5: transition paragraph. 6 sentences. Paragraph 6: after bullet list. 6 sentences. Paragraph 7: Inside Ingredient List group 1. 6 sentences. Paragraph 8: group 2. 6 sentences. Paragraph 9: group 3. 6 sentences. Paragraph 10: group 4. 6 sentences. Paragraph 11: conclusion of ingredient section. 6 sentences. Paragraph 12: after fun fact. 6 sentences. Paragraph 13: mid-article image? We skip. Paragraph 14: Step 1. 6 sentences. Paragraph 15: Step 2. 6 sentences. Paragraph 16: Step 3. 6 sentences. Paragraph 17: Step 4. 6 sentences. Paragraph 18: Step 5. 6 sentences. Paragraph 19: Step 6. 6 sentences. Paragraph 20: Step 7. 6 sentences. Paragraph 21: Step 8. 6 sentences. Paragraph 22: Step 9. 6 sentences. Paragraph 23: Step 10. 6 sentences. Paragraph 24: After method bridging. 6 sentences. Paragraph 25: Insider Tip 1. 6 sentences. Paragraph 26: Insider Tip 2. 6 sentences. Paragraph 27: Insider Tip 3. 6 sentences. Paragraph 28: Insider Tip 4. 6 sentences. Paragraph 29: Insider Tip 5. 6 sentences. Paragraph 30: After insider bridging. 6 sentences. Paragraph 31: Variation 1. 6 sentences. Paragraph 32: Variation 2. 6 sentences. Paragraph 33: Variation 3. 6 sentences. Paragraph 34: Variation 4. 6 sentences. Paragraph 35: Variation 5. 6 sentences. Paragraph 36: After creative bridging. 6 sentences. Paragraph 37: Fridge Storage. 6 sentences. Paragraph 38: Freezer Friendly. 6 sentences. Paragraph 39: Best Reheating Method. 6 sentences. Paragraph 40: After storing bridging. 6 sentences. Paragraph 41: Final closing paragraph. 6 sentences. Paragraph 42: Final closing. 6 sentences. Ok. Now we need to ensure we insert highlight boxes at appropriate points. We need 5-7 highlight boxes. We'll place: - Kitchen Hack box after bullet list (paragraph 6). (1) - Kitchen Hack box after ingredient list maybe after paragraph 11? (2) - Fun Fact box inside ingredient list maybe after paragraph 9? We'll insert after paragraph 9 (3). - Watch Out box maybe at step 6 or 7. We'll insert after step 6 paragraph 19. - Kitchen Hack box inside method maybe after step 4 (paragraph 17). (4) - Kitchen Hack box inside method maybe after step 8 (paragraph 21). (5) - Another Kitchen Hack box maybe after insider tip 1 (paragraph 25). (6) - Another Kitchen Hack box maybe after creative twist 2 (paragraph 32). (7) We need 5-7 highlight boxes; we have 7. Good. We need to ensure each box is inserted with the provided HTML. Now we need to ensure all content is in English, no emojis, no special characters. Now we need to write the paragraphs. Let's start writing paragraph 1. Paragraph 1: "Picture this: a kitchen full of chaos, a sizzling pan, and the smell of ground beef turning into a savory cloud. I was halfway through a dinner party, the guests were restless, and my appetite for something quick and unforgettable was at an all‑time high. That night, I pulled out a can of pizza dough, a packet of taco seasoning, and a handful of shredded cheese, and I dared myself to create something that would make everyone stop scrolling and start licking their plates. The result was a golden, cheesy taco stick that melted in the mouth like a warm hug. This was no ordinary snack; it was a revelation that turned a simple meal into an instant crowd‑pleaser. And that is the story that leads us into the ultimate version of the Cheesy Taco Stick." Check sentence count: 6 sentences? Let's count: 1) Picture this... 2) I was halfway... 3) That night... 4) The result... 5) This was no ordinary snack... 6) And that is the story... Good. Paragraph 2: "The first bite was an explosion of flavors: the crispness of the dough, the smoky bite of seasoned beef, and the creamy blanket of cheddar and mozzarella. The aroma hit like a summer barbecue, and the sound of the cheese bubbling was music to my ears. My friends gasped, and I could see the delight in their eyes as they reached for another stick. I was already planning how many more I could make before the night ended. The kitchen felt like a stage, and I was the star chef, turning ordinary ingredients into pure magic. That moment, that first chew, is what makes this recipe unforgettable." Paragraph 3: "I know you’ve tried taco sticks before, but they often come with soggy dough or bland seasoning. I’ve spent hours tweaking the ratios, experimenting with different cheeses, and discovering that a splash of olive oil on the dough gives it a buttery finish. The secret sauce is simple: a handful of garlic powder, a packet of taco seasoning, and a generous amount of shredded cheese. I even added a pinch of cumin for depth, and the result was a stick that crackles when you bite into it. The crunch is like biting into fresh tortilla chips, and the melt is as smooth as a creamy dip. This version is hands down the best you’ll ever make at home." Paragraph 4: "Most recipes get this completely wrong, missing the balance between crispness and gooeyness. I dared you to taste this and not go back for seconds, because once you try it, the craving will linger. Picture yourself pulling these out of the oven, the whole kitchen smelling incredible, and the guests begging for the recipe. The first bite will leave you wondering how you ever made taco sticks any other way. I’ll be honest — I ate half the batch before anyone else got to try it, and the rest went straight to the fridge for a later craving. This is the kind of snack that turns an ordinary gathering into a legendary memory." Paragraph 5: Transition paragraph: "Now that you’re hooked on the idea, let me walk you through every single step — by the end, you'll wonder how you ever made it any other way. The process is straightforward, but the attention to detail is what sets this apart. Each ingredient plays a pivotal role, from the chewy dough to the molten cheese. The technique I’ll share will elevate the flavor profile and guarantee a perfect bite every time. Trust me, this is the recipe you’ll keep in your pantry for years. Let’s dive in." Paragraph 6: After bullet list: "The bullet list below captures the essence of why this version stands out. It highlights the key elements that make each bite unforgettable. These points will guide you as you read through the recipe, reminding you of the flavors, textures, and tricks that keep the sticks crisp and cheesy. By keeping these in mind, you’ll be able to tweak the recipe to your own taste. The next section will break down exactly what goes into this masterpiece. So, keep reading, because the details are about to get delicious." Now bullet list. We'll create- with 6-8 bullet points. Each bullet: Keyword: 2-3 sentences. Let's create 7 bullet points.
We need to embed after paragraph 6.
Paragraph 7-11: inside ingredient list groups. We'll craft paragraphs with 6 sentences each.
Paragraph 12: after fun fact.
Paragraph 13: skip.
Paragraph 14-23: method steps.
Paragraph 24: bridging.
Paragraph 25-29: insider tips.
Paragraph 30 bridging.
Paragraph 31-35: variations.
Paragraph 36 bridging.
Paragraph 37-39: storing.
Paragraph 40 bridging.
Paragraph 41: final.
Paragraph 42: final.
Ok.
Let's write bullet list:
Now paragraph 7: Inside Ingredient List group 1. Paragraph 7: "The Flavor Base is the heart of the taco sticks, and it starts with ground beef seasoned to perfection. I use 1 pound of lean ground beef for a balanced ratio of meat to dough, ensuring each bite has a hearty, meaty core. The packet of taco seasoning is the secret weapon that brings authentic Mexican flavors to the table; it’s packed with paprika, cumin, and oregano. If you prefer a lighter version, substitute ground turkey or chicken to reduce calories while retaining the savory profile. The ground meat is browned until no longer pink, releasing juices that mingle with the seasoning. This step creates a robust foundation that elevates every subsequent layer." Paragraph 8: group 2. Paragraph 8: "The Texture Crew includes the pizza dough, shredded cheddar, and mozzarella. The dough, whether refrigerated or frozen, provides a chewy, bread‑like base that crisps up beautifully in the oven. I recommend using a standard can of refrigerated pizza dough for its reliable elasticity and flavor. The cheddar cheese offers a sharp, tangy bite that cuts through the richness of the beef. The mozzarella, with its high moisture content, melts into a silky, stretchy coating that clings to the dough. Together, these cheeses create a harmonious balance of sharpness and creaminess that makes each stick irresistible." Paragraph 9: group 3. Paragraph 9: "The Unexpected Star is the olive oil, which is brushed onto the dough before baking. This small splash of oil adds a buttery sheen that enhances the crust’s golden color and prevents it from drying out. Olive oil also infuses a subtle fruity note that complements the taco seasoning. Without it, the sticks can become slightly dry or too soft. By applying the oil evenly, you achieve a crisp exterior that cracks pleasantly when you bite. This simple step is the secret to achieving a professional, restaurant‑style finish at home." Paragraph 10: group 4. Paragraph 10: "The Final Flourish is the finishing touch of garlic powder and a pinch of cumin, which add depth and aroma to the sticks. Garlic powder gives a subtle, all‑day warmth that balances the spices. Cumin introduces a nutty, earthy undertone that echoes the Mexican theme. These spices are sprinkled lightly over the assembled sticks before baking, ensuring they are distributed evenly. The result is a fragrant, flavorful crust that lingers on the palate. These final touches are what separate a good taco stick from a great one." Paragraph 11: conclusion of ingredient section. Paragraph 11: "Everything's prepped? Good. The stage is set, the ingredients are lined up, and the aroma is already teasing your senses. You’re now ready to move from theory to practice, where the real magic will happen. The dough will rise slightly, the cheese will melt into ribbons, and the seasoning will permeate each bite. With this foundation, you can trust that the sticks will come out perfectly golden and delicious. The next step is where the real transformation takes place. Let’s get into the real action." Paragraph 12: after fun fact box. We need to add Fun Fact box somewhere. We'll insert after paragraph 9. Let's create the Fun Fact box.Kitchen Hack: If your dough feels too sticky, lightly dust it with flour before rolling. This keeps it from tearing and makes the sticks easier to cut. A clean surface also prevents the dough from sticking to the rolling pin. For extra crispness, brush the sticks with a beaten egg before baking. This gives the crust a beautiful golden hue.Paragraph 12: "That fun fact may not change the flavor, but it reminds us of the humble origins of a seasoning that can elevate a dish. The next time you reach for a packet, think of the decades of culinary history behind those spices. It also gives you confidence that you’re using a proven blend that delivers consistent taste. The convenience of a pre‑mixed seasoning is a game‑changer for busy cooks. It saves time and reduces the need for measuring individual spices. And it ensures every batch tastes just as good as the last." Paragraph 13: skip. Paragraph 14: Step 1. We'll write 6 sentences. Paragraph 14: "First, preheat your oven to 425°F (220°C) to ensure a hot, even baking surface. While the oven warms, set a rimmed baking sheet on the middle rack, ready to catch any melted cheese. This high temperature is crucial for achieving a golden crust without overcooking the dough. The heat also helps the cheese melt into a glossy, appetizing coating. If you’re using a pizza stone, place it in the oven now so it can heat up as well. This step sets the foundation for crisp, delicious sticks." Paragraph 15: Step 2. Paragraph 15: "Next, take the refrigerated pizza dough out of the fridge and let it sit at room temperature for 10 minutes. This brief relaxation makes the dough easier to roll and prevents it from tearing. While it rests, combine the ground beef with the taco seasoning in a skillet over medium heat. The beef should brown evenly, releasing a savory aroma that fills the kitchen. Stir occasionally to break up clumps and allow the spices to coat the meat fully. Once the beef is cooked through, remove it from the heat and set aside to cool slightly." Paragraph 16: Step 3. Paragraph 16: "Roll the dough onto a lightly floured surface until it reaches a thickness of about 1/4 inch. This thickness ensures the sticks are sturdy enough to hold the cheese without breaking. Cut the dough into long rectangles, approximately 4 inches wide and 8 inches long, using a sharp knife or pizza cutter. These dimensions are ideal for a bite‑size stick that’s easy to hold. Place each rectangle on the prepared baking sheet, leaving a small gap between them to allow even baking. The spacing also prevents the sticks from sticking together when they expand." Paragraph 17: Insert Kitchen Hack box after step 3.Fun Fact: The origins of the taco seasoning packet trace back to the 1950s, when supermarkets began packaging spices for convenience. Today, it’s a staple in kitchens worldwide, offering a quick way to bring authentic Mexican flavor to any dish. The blend typically includes cumin, paprika, garlic powder, and oregano, creating a smoky, slightly sweet profile. Knowing this history adds a layer of appreciation for the humble packet that turns ordinary beef into a fiesta. It’s a testament to how simple ingredients can spark culinary creativity.Paragraph 18: Step 4. Paragraph 18: "Spread a thin layer of the seasoned beef over each dough rectangle, leaving a small border around the edges. The border will later hold the cheese and prevent it from spilling out. Make sure the beef layer is even, as uneven distribution can cause some sticks to be too meaty and others too bland. The amount of beef should be enough to cover the surface, but not so thick that it overwhelms the dough. This step ensures that every bite has a balanced ratio of meat to crust. The beef also adds moisture that helps the dough rise slightly during baking." Paragraph 19: Insert Watch Out box after step 4? Actually step 4 is 18, step 5 maybe 19. But we want Watch Out box at trickiest step, maybe step 6 or 7. We'll insert after step 6 (paragraph 19). But we need to number steps accordingly. Let's plan steps: 1-10. We'll have 10 steps. We have steps 1-4 covered. Step 5: Add cheese. Step 6: Brush with olive oil. Step 7: Bake. Step 8: Remove. Step 9: Slice into sticks. Step 10: Serve. We inserted hack after step 3 (paragraph 17). Now paragraph 18 is step 4. Step 5 will be paragraph 19. Paragraph 19: Step 5: Add cheese. Paragraph 19: "Now, generously sprinkle both cheddar and mozzarella over the beef layer, allowing the cheeses to mingle and melt together. The combination of sharp cheddar and creamy mozzarella creates a harmonious melt that clings to the dough. Use a spoon to distribute the cheese evenly, ensuring each rectangle has a generous coating. The cheeses should cover the beef but leave a thin rim of dough visible for a rustic look. This step is where the gooeyness begins to take shape. The aroma of melting cheese will be irresistible." Paragraph 20: Step 6. Paragraph 20: "Brush the tops of the cheese‑laden rectangles with a thin layer of olive oil using a pastry brush. The oil not only adds a glossy sheen but also helps the crust brown uniformly. It also prevents the cheese from forming a hard crust on the surface. Be careful not to over‑apply; a light coat is sufficient. The olive oil will caramelize slightly, giving a subtle buttery flavor. This small detail elevates the overall finish of the sticks." Paragraph 21: Insert Kitchen Hack box after step 6.Kitchen Hack: Before adding the cheese, sprinkle a light dusting of cornmeal over the dough rectangles. This adds a subtle crunch and prevents the cheese from sliding off during baking. Cornmeal also gives the sticks a classic taco shell texture that many people love. If you’re a gluten‑free cook, you can use a cornmeal substitute or a fine‑ground almond flour. This trick elevates the overall mouthfeel of the sticks.Paragraph 22: Step 7. Paragraph 22: "Slide the baking sheet into the preheated oven and bake for 12–15 minutes, or until the cheese has melted and the dough edges turn a golden brown. Keep a close eye on the sticks, as ovens can vary; the first signs of browning indicate the perfect finish. The cheese should be bubbly and slightly browned at the corners. The dough will have a crisp exterior while remaining soft inside. This step is where the flavors meld into a cohesive, mouth‑watering experience. The sizzling sound signals that the sticks are ready to be enjoyed." Paragraph 23: Step 8. Paragraph 23: "Remove the baking sheet from the oven and let the sticks cool on a wire rack for 5 minutes. This brief rest allows the cheese to set, preventing it from sliding off when you cut or bite. The sticks will still be hot, so handle them carefully. The cooling period also lets the dough firm up slightly, making it easier to slice into individual sticks. The aroma will still be strong, drawing more guests to the table. This pause is essential for achieving the ideal texture." Paragraph 24: Step 9. Paragraph 24: "Using a serrated knife, slice each rectangle into 1‑inch thick sticks, creating a total of about 24 sticks from the original dough. The knife should glide through the cheese and dough without tearing the crust. Arrange the sticks on a serving platter, placing them side by side to showcase their golden sheen. The uniform size ensures even cooking and a consistent bite for every guest. The sticks look as good as they taste, ready to be devoured. This presentation step turns a simple snack into a party‑ready treat." Paragraph 25: Step 10. Paragraph 25: "Serve the sticks immediately with your choice of dipping sauces: salsa, guacamole, or sour cream. The creamy dips complement the smoky beef and molten cheese, adding a cool contrast to the warm sticks. Encourage guests to try each dip and note the different flavor layers. The sticks can also be paired with a fresh salad or a side of corn on the cob for a complete meal. The combination of textures and tastes will leave everyone craving more. Enjoy the applause as they dig in and savor every bite." Paragraph 26: After method bridging. Paragraph 26: "That’s the core of the recipe, but the real magic happens when you apply a few insider tricks that refine the flavor and texture even further. These subtle adjustments elevate the sticks from great to unforgettable, ensuring that each bite is a revelation. Whether you’re a seasoned chef or a kitchen novice, these tips will give you confidence and control over the final product. I’ve tested each one in multiple batches to confirm their effectiveness. The next section will reveal the most impactful tricks you can use. Get ready to master the art of the perfect taco stick." Paragraph 27: Insider Tip 1. Paragraph 27: "The Temperature Rule Nobody Follows: Bake at a slightly higher temperature, around 435°F, to achieve a crisper crust while keeping the cheese molten. Many cooks set the oven to 425°F, which is fine, but the extra 10 degrees can make a noticeable difference. The higher heat encourages the dough to puff up, creating a light, airy interior. It also promotes a caramelized edge that adds depth. Keep an eye on the sticks to avoid over‑browning. This trick is a game‑changer for those who love a crunch." Paragraph 28: Insider Tip 2. Paragraph 28: "Why Your Nose Knows Best: The aroma of cheese and spices is a reliable indicator that the sticks are ready. When the cheese starts to bubble and the dough edges turn golden, it’s time to pull them out. A subtle scent of garlic and cumin signals that the seasoning has fully permeated the beef. Trusting your nose can prevent over‑baking and preserve the perfect texture. It’s a sensory approach that saves time and frustration. Your kitchen will thank you for the extra confidence." Paragraph 29: Insider Tip 3. Paragraph 29: "The 5‑Minute Rest That Changes Everything: Letting the sticks rest for 5 minutes before cutting prevents the cheese from oozing onto the cutting board. The rest allows the cheese to set into a firm, yet still gooey, consistency. This small pause ensures clean, neat sticks that hold together when held. It also enhances the flavor, as the spices settle into the dough. A quick rest is a small investment for a huge payoff. Try it and see the difference." Paragraph 30: Insider Tip 4. Paragraph 30: "Use a Silicone Baking Mat: Lining the baking sheet with a silicone mat prevents sticking and makes cleanup a breeze. The mat also distributes heat evenly, ensuring uniform browning across all sticks. If you don’t have a mat, parchment paper works well, but the silicone mat is more durable. This simple addition reduces the risk of sticks tearing when you remove them from the sheet. It also saves you from having to scrub the pan afterward. A small tool that offers big benefits." Paragraph 31: Insider Tip 5. Paragraph 31: "Add a Dash of Hot Sauce to the Beef: A splash of your favorite hot sauce during the browning process adds a subtle heat that enhances the overall flavor. The sauce infuses the meat with a smoky, spicy undertone that pairs beautifully with the cheese. It also adds moisture, keeping the sticks from drying out. Use a sauce with a balanced flavor profile to avoid overpowering the dish. This tweak is perfect for those who love a little kick. It’s a simple adjustment that elevates the entire snack." Paragraph 32: After insider bridging. Paragraph 32: "With these insider tricks, you’re now armed with the knowledge to make taco sticks that are crisp, cheesy, and full of flavor. Each tip builds on the previous steps, creating a cohesive process that results in a snack worthy of a five‑star rating. Don’t be afraid to experiment with the adjustments to find your personal sweet spot. Remember, cooking is both science and art, and these tricks help you master both. The next section will show you how to take this base recipe and turn it into a variety of exciting twists. Get ready to explore." Paragraph 33: Variation 1. Paragraph 33: "Spicy Jalapeño Crunch: Replace half of the cheddar with finely diced jalapeños for a fiery kick. The jalapeños add a crisp texture and a bright green pop of color. Pair this variation with a cool cucumber yogurt dip to balance the heat. The combination of spicy and cool makes the sticks a crowd‑pleaser at any gathering. This twist is perfect for those who like a little heat in their snack. Try it for a bold, flavorful experience." Paragraph 34: Variation 2. Paragraph 34: "BBQ Chicken Delight: Swap the ground beef for shredded chicken tossed in barbecue sauce before adding to the dough. The smoky sweetness of the BBQ sauce complements the cheese and gives a new flavor dimension. Use smoked gouda instead of mozzarella for a richer, smokier taste. Serve with a side of coleslaw for a Southern twist. This variation turns the sticks into a hearty, satisfying snack. It’s a great option for a casual BBQ or a quick dinner." Paragraph 35: Variation 3. Paragraph 35: "Mediterranean Herb: Add chopped fresh basil and oregano to the seasoned beef, and replace the cheddar with feta cheese. The herbs bring a bright, aromatic note that pairs beautifully with the tangy feta. This version is lighter and offers a Mediterranean flair. Serve with a drizzle of olive oil and lemon zest for extra zing. It’s a refreshing alternative to the classic taco stick. Ideal for a summer gathering or a light lunch." Paragraph 36: Variation 4. Paragraph 36: "Vegan Cheese Fusion: Use plant‑based cheese blends that melt like dairy cheese, and replace the beef with crumbled tofu seasoned with taco spices. The tofu adds a protein punch while keeping the dish dairy‑free. The vegan cheese will melt into a creamy coating similar to the original. Add a splash of nutritional yeast for a subtle umami boost. This variation is perfect for plant‑based diners who crave comfort food. It’s a delicious, inclusive snack." Paragraph 37: Variation 5. Paragraph 37: "Chocolate Chip Surprise: For a sweet twist, sprinkle mini chocolate chips over the cheese layer before baking. The chocolate melts into pockets of sweetness that contrast with the savory meat and cheese. Serve with a side of raspberry sauce for a decadent finish. This version turns the sticks into an unexpected dessert. It’s a playful surprise for kids and adults alike. Perfect for a themed party or a dessert spread." Paragraph 38: After creative bridging. Paragraph 38: "These variations show just how versatile the taco stick base can be. Whether you’re craving heat, sweetness, or a plant‑based option, there’s a version to suit every palate. Feel free to mix and match ingredients to create your own signature stick. The beauty of this recipe lies in its adaptability and the joy it brings to any occasion. Experimentation is the key to discovering new favorites. Now that you’ve explored the possibilities, it’s time to put them into practice." Paragraph 39: Fridge Storage. Paragraph 39: "Store leftover sticks in an airtight container in the refrigerator for up to 3 days. Keep the sticks in a single layer to avoid them sticking together; a paper towel between layers works well. Before serving, reheat them in a 350°F oven for 5 minutes to restore crispness. The reheated sticks will regain their golden crust and gooey center. If you prefer a quick snack, microwave them for 20–30 seconds, but the texture will be softer. The fridge storage method preserves the flavors without compromising quality." Paragraph 40: Freezer Friendly. Paragraph 40: "For longer storage, freeze the sticks on a baking sheet until solid, then transfer them to a freezer bag. They can stay in the freezer for up to 2 months without losing flavor. When ready to eat, bake at 375°F for 15–20 minutes, or until heated through. The freezing process locks in the cheese’s melt and the dough’s texture. Avoid thawing them in the microwave; instead, let them bake directly from frozen. This method ensures you always have a quick, delicious snack on hand." Paragraph 41: Best Reheating Method. Paragraph 41: "The best way to reheat is in a preheated oven at 375°F for 10–12 minutes, which restores the crisp crust and melts the cheese evenly. If you’re short on time, a toaster oven works just as well, giving a quick, even heat. For a microwave, add a splash of water to the sticks before heating to keep them from drying out. The steam created will help the cheese stay moist. Remember to let them rest for a minute after reheating to avoid burns. This method delivers the same mouth‑watering experience as when freshly baked." Paragraph 42: After storing bridging. Paragraph 42: "Now that you know how to store, reheat, and tweak the recipe, you’re ready to become the ultimate taco stick master. Share this recipe with friends and family, and watch as they marvel at the flavors and textures. Keep experimenting with different cheeses, meats, and dips to keep the sticks fresh and exciting. The possibilities are endless, and the results always satisfy. Thank you for following along, and enjoy the delicious adventure that awaits you in every bite." We still need a paragraph 43? Wait we have 42. Good. Now we need to add the recipe card after method? The recipe card should appear after the method? The instructions say "include a recipe card at the end". So after the entire article. So after paragraph 42 we insert recipe card. Then hidden elements. Now we need to create the recipe card with correct ingredients list. We need to set data-base-qty for each ingredient. Let's list ingredients: - 1 lb ground beef (or turkey/chicken for a lighter option) => 1 lb. Data-base-qty="1". - 1 packet taco seasoning (or homemade mix) => 1. Data-base-qty="1". - 1 cup shredded cheddar cheese => 1 cup. Data-base-qty="1". - 1 cup shredded mozzarella cheese => 1 cup. Data-base-qty="1". - 1 can refrigerated pizza dough (or crescent roll dough) => 1 can. Data-base-qty="1". - 1 tbsp olive oil (for brushing) => 1 tbsp. Data-base-qty="1". - 1 tsp garlic powder => 1 tsp. Data-base-qty="1". - Salsa, guacamole, or sour cream (for dipping) => no quantity. Data-base-qty="0". We need to include these in the list. The template usesKitchen Hack: If you want a crisper crust, sprinkle a pinch of baking powder over the dough before adding the cheese. Baking powder reacts with the heat to create tiny bubbles, resulting in a lighter, airier texture. This trick is especially useful if your dough is a bit dense. Adjust the amount to your taste; a quarter teaspoon is enough for a single batch. It’s a quick way to boost the crunch factor without altering the flavor.