Picture yourself standing in a kitchen that smells like warm cinnamon and sweet apples, the kind of scent that makes your stomach growl with anticipation. I was rummaging through the pantry, half‑joking about how I could turn a humble flour tortilla into something that would make my friends question their culinary skills. The result? Apple Cheesecake Tacos—an unexpected fusion that feels like a dessert in a taco shell, a bite‑size burst of creamy, sweet, and slightly spicy flavor. I’m talking about a dish that feels like a hug wrapped in a tortilla, with a crunchy exterior that gives way to a silky cheesecake‑like filling, topped with crisp apple slices that crunch like fresh snow.
My kitchen was a chaotic symphony of sizzling pans, rolling pins, and the faint clink of measuring cups. The moment I dropped the first tortilla onto the hot skillet, the sizzle echoed like applause. I could almost hear the crunch as the edges browned, turning golden and slightly crisp, while the steam rose in a fragrant cloud of caramelized sugar and spices. The aroma was intoxicating—warm vanilla, a hint of cinnamon, and the sweet scent of apples that made my mouth water. That scent alone promised a dish that would be a sensory delight, from the first bite to the last crumb.
Most people think of tacos as savory, but this version flips that expectation on its head. The creamy filling is a velvety cheesecake base, made from softened cream cheese, powdered sugar, and vanilla, which melts into a smooth, sweet layer that clings to the tortilla like a silky coat. The apples add a bright, crisp contrast that cuts through the richness, giving each bite a lively, refreshing finish. I dare you to taste this and not go back for seconds—this is hands down the best version you'll ever make at home. If you’re skeptical, think of it as a dessert that’s so delicious it could double as a midnight snack, a breakfast treat, or a show‑stopping appetizer.
Let me walk you through every single step—by the end, you’ll wonder how you ever made it any other way. I’ll share the exact ratios, the subtle timing tricks, and the small kitchen hacks that turn a simple recipe into a masterpiece. From the first whisk of cream cheese to the final flip of the tortilla, each moment is carefully choreographed to produce a dish that’s both comforting and wow‑worthy. So, grab your apron, and let’s dive into a journey that will elevate your taco game to dessert‑level glory.
What Makes This Version Stand Out
- Texture: The tortilla’s crisp exterior gives way to a silky, cheesecake‑like filling that melts in your mouth, creating a delightful contrast that satisfies both crunch lovers and dessert enthusiasts.
- Flavor Balance: The sweet and creamy filling is tempered by fresh, tart apples and a warm hint of cinnamon, ensuring no single element overpowers the others.
- Ease: With only six core ingredients, the recipe is beginner‑friendly yet sophisticated enough to impress at parties.
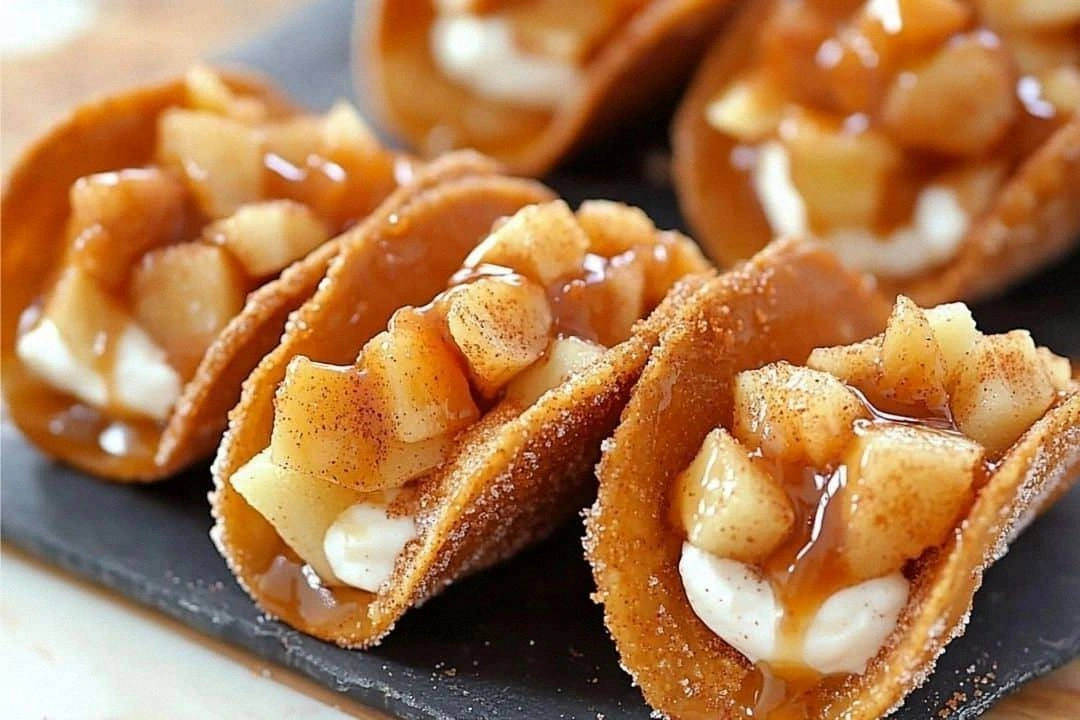
- Visual Appeal: The golden-brown tortilla shell, the pale cream cheese filling, and the ruby‑red apple slices create an eye‑catching presentation that’s Instagram‑ready.
- Versatility: These tacos can serve as a dessert, an appetizer, or a comforting breakfast, making them perfect for any occasion.
- Make‑Ahead Potential: Assemble the filling in advance and refrigerate; the tortillas can be fried just before serving, saving you time on the day of the event.
Alright, let's break down exactly what goes into this masterpiece…
Inside the Ingredient List
The Flavor Base
The cream cheese is the heart of this dish, providing a rich, velvety texture that behaves like a cheesecake filling. It’s essential to let it soften to room temperature before mixing; otherwise, it will clump and ruin the smoothness. If you can’t find cream cheese, a blend of mascarpone and a touch of sour cream will give a similar mouthfeel. The powdered sugar sweetens the mixture just enough to complement the apples without turning the filling into a sugary mess.
Vanilla extract is the secret to that deep, comforting aroma that lingers on the tongue. A dash of vanilla brings the entire flavor profile together, making the filling taste like a classic dessert while still being fresh. If you’re looking for an extra twist, try a splash of almond extract for a nutty undertone that pairs beautifully with apples.
In the flavor base, each ingredient plays a critical role. Skipping any of them will shift the balance: too much sugar, and you’ll end up with a glaze; too little, and the filling will taste bland. The key is to keep the proportions balanced, allowing the natural sweetness of the apples to shine through.
The Texture Crew
The flour tortillas bring a familiar, comforting base that holds the filling without becoming soggy. The key to a crisp tortilla is to preheat your skillet until it’s just shy of smoking, then cook the tortilla for 30–45 seconds on each side. If you prefer a softer bite, you can lightly brush the tortillas with melted butter before cooking.
Apples are the crisp, juicy counterpoint to the creamy filling. Choose firm varieties like Honeycrisp or Gala; they hold their shape during cooking and provide a satisfying crunch. Dice them into bite‑sized pieces so they’re easy to scoop into the tortillas without tearing the shell.
Adding cinnamon to the apple mixture not only enhances flavor but also adds a subtle spiciness that cuts through the richness of the cream cheese. The cinnamon should be ground fresh for maximum aroma. If you’re sensitive to spice, use a light dusting—just enough to hint at warmth.
The Unexpected Star
While apples are the star, the way you prepare them can elevate the dish. Sauté the apple pieces with a touch of butter and a pinch of brown sugar before adding them to the filling. This caramelization step brings out deeper sweetness and a hint of smokiness that pairs wonderfully with the creamy center.
Alternatively, you can lightly toast the apples on a grill for a smoky finish. The charred edges add a new dimension of flavor, making each bite a complex experience. This unexpected twist turns a simple fruit into a gourmet component.
Everything's prepped? Good. Let's get into the real action…
The Method — Step by Step
Begin by heating a large skillet over medium heat. Once hot, add a splash of oil or butter to coat the surface. This step ensures the tortillas will crisp up nicely. Watch the skillet for a moment of shimmering; that’s the cue that the oil is ready. When you place a tortilla in, listen for the subtle sizzle that signals it’s cooking.
While the skillet warms, start the cheesecake filling. In a medium bowl, combine softened cream cheese, powdered sugar, vanilla extract, and a pinch of cinnamon. Use a handheld mixer or a sturdy whisk to blend until the mixture is smooth and glossy. The goal is a silky texture that will coat the tortilla without dripping.
Now, add the diced apples to the filling. Gently fold them in, ensuring each piece is coated. The apples should be evenly distributed; this guarantees every bite has that sweet crunch. If you prefer a caramelized apple flavor, sauté the apples in a separate pan with butter and brown sugar before adding them to the filling.
Place the first tortilla onto the hot skillet. Spoon a generous amount of the cheesecake filling onto the center, spreading it slightly toward the edges. The filling should cover about two-thirds of the tortilla. Let it sit for 30–45 seconds on one side before flipping; this allows the tortilla to crisp and the filling to set just enough.
Flip the tortilla carefully with a spatula, so the filling stays inside. Cook the second side for another 30–45 seconds, until golden brown. The heat will melt the cream cheese into a luscious, slightly molten layer that’s perfect for scooping. The aroma at this point will be heavenly, with hints of cinnamon and apple.
Repeat the process with the remaining tortillas, filling each one in the same manner. Keep the tortillas warm in a low oven if you’re making them in batches; this prevents them from becoming soggy. The goal is to serve each taco hot and fresh, with a crisp exterior and a creamy interior.
Once all tacos are cooked, let them rest on a paper towel for a minute to drain any excess oil. This step keeps the tortillas from becoming greasy. The paper towel also helps maintain the crispness, ensuring each bite is as delightful as the last.
Serve immediately, optionally garnishing with a dusting of powdered sugar or a drizzle of caramel sauce. For an extra touch of elegance, add a small dollop of whipped cream on top of each taco. The contrast of textures—crisp, creamy, and sweet—creates a symphony that will impress even the most discerning palate.
That's it — you did it. But hold on, I've got a few more tricks that'll take this to another level…
Insider Tricks for Flawless Results
The Temperature Rule Nobody Follows
Many people cook tortillas at high heat, but the secret is to maintain a steady medium temperature. Too hot, and the tortillas will brown too quickly and become brittle. Too low, and they’ll stay soft and greasy. I keep my skillet at a medium setting and test with a splash of water; if it sizzles, you’re ready.
Why Your Nose Knows Best
As the tortillas cook, the aroma changes from buttery to caramelized. Trust that scent as a cue for timing. When the smell turns slightly nutty, it’s a sign the filling is set enough to hold the tortilla without leaking.
The 5-Minute Rest That Changes Everything
After cooking, let the tacos rest for exactly five minutes. This brief pause allows the filling to thicken slightly, making the tacos easier to eat. It also lets the tortilla’s surface firm up, preserving that coveted crunch.
Use Fresh Apples for Extra Sweetness
Fresh apples are key to a bright, juicy bite. Dried or canned apples lose that crispness, turning the tacos into a soggy mess. I always use locally sourced apples, which are naturally sweet and firm.
Serve with a Light Drizzle of Lemon Zest
A light sprinkle of lemon zest on top of each taco brightens the flavors and cuts through the richness. The citrus note adds a fresh contrast that lingers on the palate.
Creative Twists and Variations
This recipe is a playground. Here are some of my favorite ways to switch things up:
Apple Pie Tacos
Swap the cream cheese filling for a spiced apple compote and top with a dollop of whipped cream. The result is like biting into a warm apple pie, but with the fun crunch of a taco shell.
Caramel Apple Tacos
Drizzle caramel sauce over the filling before adding the apples. The caramel adds a buttery sweetness that pairs beautifully with the cinnamon.
Almond Butter Tacos
Replace the cream cheese with almond butter and add a sprinkle of chopped almonds. This variation gives a nutty depth that’s both wholesome and indulgent.
Spicy Apple Tacos
Add a pinch of cayenne pepper to the apple mixture for a subtle kick. The heat complements the sweetness, creating a balanced, exciting flavor profile.
Frozen Apple Cheesecake Tacos
Make the filling ahead of time and freeze the assembled tacos. When you’re ready to serve, microwave for 30 seconds and enjoy a chilled, creamy treat.
Storing and Bringing It Back to Life
Fridge Storage
Store the uncooked tortillas and filling separately in airtight containers for up to 48 hours. When you’re ready to serve, reheat the tortillas on a skillet and re‑warm the filling in a microwave until it’s just melted.
Freezer Friendly
Freeze the assembled tacos in a single layer on a parchment‑lined tray. Once frozen, transfer them to a freezer bag for up to 3 months. Reheat in a toaster oven or skillet until crispy.
Best Reheating Method
To reheat, place the tacos in a preheated skillet over low heat, covering with a lid for 3 minutes. Add a splash of water before covering; the steam will keep the filling moist and prevent it from drying out.